
Once before, iAccessibility was hosted on a WordPress site. We since made the switch to Squarespace due to limitations in configuration, but we have since determined that Squarespace does not meet our needs as far as Accessibility. Because of this, we have decided to move iaccessibility.net back to WordPress. We are still in the middle of moving all of our content to the new site, so please bear with us as we complete the transition.
Report
Is it an iPad Pro, or is it just a big iPad?
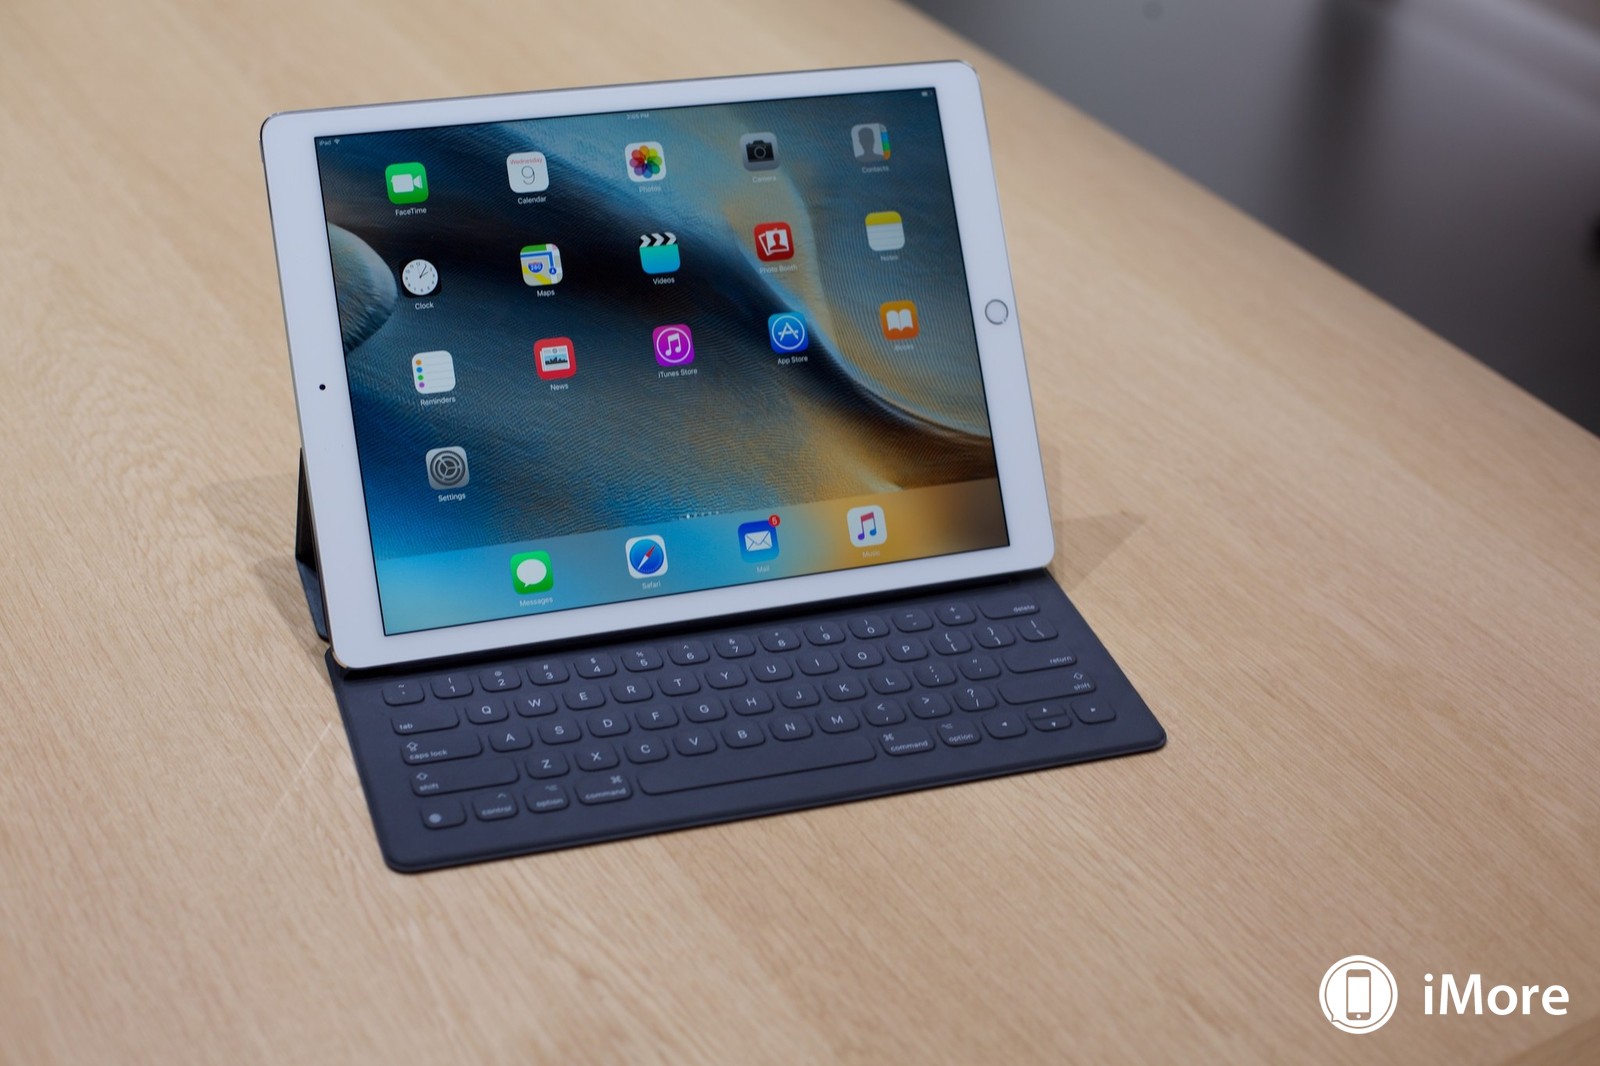
So recently, Apple released the iPad Pro, and promised that this device would be a computer alternative, so have decided to do as many have done and try to use the iPad as a main computer. In many wyas, the iPad Pro has things that are better than an iMac or Macbook, and in some ways the iPad Pro is not. In this article we will explore how it is better and how it is not.
Why the iPad is a computer Aleternative
The iPad Pro comes with a beautiful 12.9 inch Retina display that looks amazing for web design and other professional and creative ventures. The on screen keyboard is no longer the basic iOS keyboard we have come to know, but is now a full featured keyboard with a number row and the punctuation in the correct places. You can even press the shift key and find the question mark or number row characters as you would on the computer. The current version of iOS also contains more keyboard shortcuts like Command Tab to switch between apps.
Safari on the iPad Pro also behaves more like Safari on the computer. I am actually writing this article on my iPad Pro, and have full access to the Squarespace tools as if I was on my Macbook. The only thing I did not see is how to drag and drop items into the correct places.
The Sound quality on the new iPad Pro is amazing, in fact it really rivals the sound quality on many desktop computers.
The battery life on the iPad Pro is amazing as well. I unplugged the iPad around 8 this morning and have played games and surfed the web on it all day and the iPad is still at 82% battery life. This does outlast the Macbook or Macbook Pro’s battery life.
Photos look great on the iPad Pro. You can get a good look at your high resolution photos that you have taken on your iPhone 6s or 6s Plus and they will look amazing on the iPad Pro.
Another advantage of the iPad Pro is that it will eventually get USB 3.0 support. The iPad Pro does not currently have any usb 3 accessories but iFixit has determined that there is USB 3.0 support built into the iPad mainboard.
How the iPad Pro is not like a computer
While the iPad Pro has many features that make it comperable to a computer, it still has its limitations.
The iPad Pro does not have XCode or the professional Mac apps for creatives. While the iPad software can support it, Apple will not add these programs to their iOS devices at this point.
Podcasting is still difficult on the iPad Pro because of sound and audio input limitations. I do not know if you can hook up a USB Mic to it yet. That will be tried shortly. This is still where the MacBook has an advantage.
Many also do not like the fact that the iPad still does not have multi user support. I think this may be coming in iOS 10.
The last major issue with the iPad Pro is the lack of a filesystem browser. Apple has added iCloud Drive support, but I believe that you will always need Internet Access for this to work.
Conclusion
The iPad Pro is really Apple’s best creative device. If you need a device with a filesystem and full podcasting support, then use a Mac. If you do not need these features and want a touch centric device, then the iPad Pro is best for you. If you want a good device to watch movies and TV Shows then the iPad Pro is amazing. I even use it as my home speaker system if I just want to fill a room with audio. The iPad Pro’s 4 speakers really are amazing to hear, and no writing can express how well these things sound.
The big thing is that you will not be able to write code for apps or create the most professional movies with this device, but you can start a project on it and do the heavy lifting on a Mac.
Please let us know what you think about the iPad Pro and write how you use it or not use it as a computer.
Introducing MLWordTips by MaLynWorks
iAccessibility is proud to introduce our latest app MLWordTips. MLWordTips has been made by iAccessibility for MaLynWorks, and allows for the user to learn Microsoft Word keyboard shortcuts. These tips and shortcuts are not specifically for screen reader users, but are useful for blind and sighted users alike.
Home
Welcome
Welcome to iAccessibility! We have rearranged the top menu to bring back all of the articles from the original iAccessibility Report, and we will continue to offer articles in this format. We apologize for making it difficult to get to this content, but it has been fixed. We will also be providing new and more detailed content on Apple releases and iOS apps, along with information about other operating systems and their apps.
  <div class="collectionlink-thumbnail"><a class="content-fill" href="/report/"><img data-src="http://static1.squarespace.com/static/536e35fbe4b0312f0844c9b5/t/5546a1d1e4b01f3065ef56d0/1430692306376/IMG_0034.jpg" data-image="http://static1.squarespace.com/static/536e35fbe4b0312f0844c9b5/t/5546a1d1e4b01f3065ef56d0/1430692306376/IMG_0034.jpg" data-image-dimensions="600x345" data-image-focal-point="0.5,0.5" alt="IMG_0034.jpg"  /></a></div>

<div class="collectionlink-content collectionlink-content-below-thumbnail">
  <div class="collectionlink-title">
    <a href="/report/">The iAccessibility Report</a>
  </div>


      <div class="collectionlink-description">The iAccessibility Report looks at news that relates to mobile devices, and mobile device accessibility. Our authors will also review apps and determine if each app meets accessibility standards for blind users.</p><a href="/report/" class="collection-more-link"></a></div>


</div>


  <div class="collectionlink-thumbnail"><a class="content-fill" href="/events/"><img data-src="http://static1.squarespace.com/static/536e35fbe4b0312f0844c9b5/t/55517949e4b0bc20d1e61d69/1431402830627/IMG_0034.jpg" data-image="http://static1.squarespace.com/static/536e35fbe4b0312f0844c9b5/t/55517949e4b0bc20d1e61d69/1431402830627/IMG_0034.jpg" data-image-dimensions="600x345" data-image-focal-point="0.5,0.5" alt="IMG_0034.jpg"  /></a></div>

<div class="collectionlink-content collectionlink-content-below-thumbnail">
  <div class="collectionlink-title">
    <a href="/events/">Events</a>
  </div>


      <div class="collectionlink-description"><p>Learn about our upcoming events.</p><a href="/events/" class="collection-more-link"></a></div>


</div>
A Look at the new Magic Keyboard from Apple
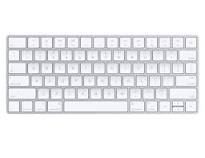
The new Magic keyboard is very similar to the keyboard on the new Macbook, and is thinner, lighter and smaller than the previous version. This keyboard, while new and different in size has a few definite perks over the previous keyboard. For one thing, the new keyboard can be charged quickly with a Lightning cable. 2 Minutes should charge the keyboard up to 9 hours of battery power. Plugging the keyboard into a device should automatically pair the keyboard to the new device as long as it supports a newish version of bluetooth. If your computer does not support bluetooth, you can use the keyboard as a wireless keyboard. One way this is nice is that you can use the keyboard with a PC, so you can throw your keyboard in a bag and use it on any computer you have or come into contact with. This allows for you to use the computer the same whether it is your computer, or someone else’s.
Introducing ACB Link

 ACB Link Logo
We are proud to announce the latest app developed by iAccessibility ACB Link. ACB Link is a combined effort between iAccessibility and the American Council of the Blind to bring ACB members the latest news, resources and audio content to iOS users. To learn more check out these resources.
ACB Link
ACB Link connects members and friends of the American Council of the Blind. With ACB Link, you can:
- Access valuable resources offered by the American Council of the Blind
- Get push notifications designed to keep you in the know about late-breaking news items of value to ACB members and friends
- Easily and conveniently connect to the state and special-interest affiliates of the American Council of the Blind via the app’s affiliate tab
- Be informed and entertained by the programming available from ACB Radio’s various channels via the radio tab
- Play ACB podcasts on demand so you never again have to miss information that enhances your life and increases your independence
- Gain valuable information that focuses on dealing with sight loss, whether you’re facing vision loss yourself or have an elderly parent or relative who is.
ACB Link is intuitive, easy to use, and fully accessible with VoiceOver, Apple’s screen reader built into iOS.
The American Council of the Blind (ACB) was founded in 1961 but many of its state affiliates and local chapters have a history that can be traced back to the 1880s. Since its inception, ACB and its affiliates have been at the forefront in advocating for programs and policies that have created the opportunities blind and visually impaired Americans now enjoy. The American Council of the Blind believes in the acceptance of all blind persons irrespective of where they are in their adjustment to blindness. We value every person for their individual strengths, abilities, and accomplishments, and we look forward to seeing ACB Link serve as a further vehicle of communication and interaction among all members of the ACB community and among those with questions and concerns about sight loss.
Start Speaking
Start Speaking is the first app that lets your iPhone speak selected text out loud. Start Speaking now supports the Apple Watch.
Multitasking with iPad VoiceOver and iOS 9
As advertised, The iPad will now support multitasking in iOS 9, and it is just as easy for VoiceOver users to take advantage of this feature. Here is how it works.
- While in an app, tap the status bar. You will notice there is a third option here instead of just notification enter and Control Center.
- flick left with three fingers to move in the apps list.
- Find an app on the right side of the screen and double tap it.
- Once both apps are open you will have your right most app on top of the left app. you will need to now take your finger and slowly move left on the screen. You will hear something that says side app decider. This lets you drag or manipulate the two apps you have on the screen. To make both apps visible, double tap on the side app decider.
- To pick another app, you will need to find the status bar in the right app and flick left with three fingers again. This will let you pick an app from the app list.
- If you have an app on both sides of the decider, you can double tap the side app decider again to unpin apps. This means that only the app on the right would be active,
- You will also be able to flick up or down on the side app decider for other options. You can dismiss the app on the right, maximize the app on the right, or use it to pin apps together by double tapping. Another option in the actions list is the app chooser for the right side.
- If you double tap and hold on the side app decider, you can drag the decider left or right to make each app bigger or smaller.
One thing to remember is that apps are not pinned side by side by default. You will have to pull in an app, and then use the side app decider to pin both apps on the screen.
I hope you have found this guide helpful. We will be doing a few more iOS 9 guides later today on new accessibility features, and we will also be making a few iA Cast episodes to go with this release.
Hey Siri, give us a hint!
Siri has a few snarky things to say about Apple’s new event on September 9th as suggested by their invitations. Below are two pictures with descriptions of some things that Siri said.
 “Give us a hint.”, Siri, “The only hint I can give you right now is a hint of lime. And that there’s a big announcement on September 9th.”
  “Give us a hint.” Siri, “You’ll have to wait until September 9th. I bet you one of those kids who snuck downstairs to open presents early, Weren’t you?”
Uisearching for Accessibility = nil
 As I am sure you can tell, This post in more about the accessibility of developing apps for iOS. While this post may be quite technical, I think that all users can learn from what is said here.
While building an app, I found out that some of the code I was using was what is called depreciated by Apple. This means that the code has been replaced with something newer and hopefully cooler, and this is the case with adding a search bar to an app. The trouble is, all of the tutorials I have found on how to do this are giving bad information, and the developers that use these tutorials are making apps with inaccessible search result tables. Read on if you are still interested in learning why this is, and how to fix it.
What is the problem?
When a developer makes a search results table from what is called a UISearchController they are given two options. To make the current table display search results, or have another table display the search results. Which one sounds the easiest.
If you said the first where the table that already presents data acts as the search results table view would be the easiest then you would be correct, but VoiceOver sees the search Bar as being in focus and ignores the table in the background, which does not allow for VoiceOver users to check view website and see search results. visual users not using VoiceOver have no issue here, but VoiceOver will not be able to give the user feedback or allow the person to select a result.
What is the solution?
The solution is option 2 for adding search. Simply add another table view controller that mirrors your table that is to be searched and tell the UISearchController that that table controller is the one responsible for displaying search results. You will have to add methods for handling row selection and displaying of data from the presenting table, but you are already doing this to display your current data.
Conclusion
While this may take a few extra steps of work while building your app it will be worth it to make sure your customers can search through your data as any other iOS user would. I would advise developers to use option 2.
Ipad pro, ipad, pro, ios, computer, Cast11
Michael Doise
Comment
Ipad pro, ipad, pro, ios, computer, Cast11
Michael Doise
Comment
Ipad pro, ipad, pro, ios, computer, Cast11
Michael Doise
Comment
Ipad pro, ipad, pro, ios, computer, Cast11
Michael Doise
Comment
Ipad pro, ipad, pro, ios, computer, Cast11
Michael Doise
Comment
Ipad pro, ipad, pro, ios, computer, Cast11
Michael Doise
Comment