Home / Blog / Report

#SafetyCast 1 – Introducing Us

Hands on Safety logo

Show Description


Leslie, George and Meaghan introduce themselves and the show. They also discuss statistics about crimes against people with disabilities, topics of future episodes, and white cane laws.


Providing Feedback


We want to hear from you, so please send an email to feedback@handsonsafety.net. You can follow us on Facebook and Twitter. . Soon, you will also be able to find us on the web, for resources and other safety related topics.

#iAUnboxCast 44 – Google Pixel 4

Pixel 4 front and back

Show Description

On this episode, Jason, Aleeha, and Michael unbox the Google Pixel 4

Providing Feedback

We love hearing from you, so feel free to send an email to feedback@iaccessibility.net. You can follow us on Facebook, and Twitter. You can also find us on Reddit, and all around the web. Also, don’t forget to check out our YouTube page, and for all things iACast, check out our iACast page. If you’d like to help support us, you can do so via our PayPal and Patreon pages. If you wish to interact with us during our podcasts live then please do join us on our Slack channel.

The iA Team’s Top Tech Picks of 2019

iAccessibility Logo with year 2019 instead of iA

It is now 2020, and that means it’s time for each member of the iA Team to pick their favorite device that they have used in the previous year. Here is everyone’s favorite device from 2019.

Jason – AirPods Pro

The AirPods Pro are arguably Apple’s most popular entry into the wireless earbud space. They feature a case that can be charged either wirelessly using a Qi-certified charger or with the Lightning connector. The AirPods Pro last up to 4.5 hours with ANC (active noise cancelation) or the Transparency mode active, and up to 5 hours with both modes turned off. Because they have silicone ear tips, they create a much better seal in your ear, giving you two benefits. The first being sound quality. They sound amazing, especially when compared to Apple’s EarPods and first and second generation AirPods. ANC works really well, as does the Transparency mode, and I seem to get battery life that exceeds Apple’s estimates. Add in there “Hey Siri” support, and you end up with a set of earbuds that wow me enough to make them my end of year tech pick for 2019.

Apple – AirPods Pro

Meaghan – Apple Watch Series 4

Disclaimer. I could go on forever about the following topic but have made it short and sweet.
My favourite tech purchase of 2019 has to be the Apple Watch Series 4, GPS only 40 millimetre gold aluminium case. I owned a series 3 before I made the spontaneous upgrade. I wasn’t going to do it, but I ended up in an Apple store in January and played with it and fell in love.
The thing I like right off the bat was the gold colour. It looks a bit better than space grey. One thing I noticed immediately was the increased navigational speed with voiceover. Not only is traveling with voiceover faster, but the watch also has a faster processor than the Series 3. Apple added better sensors for detecting your heart rate and the ability to take your own ECG just by holding your finger on the digital crown.
Another feature that the previous generation watches do not have that i enjoy is the capacity to have more than 6 complications on your watch face. The series 4 and up allow for a maximum of 8 complications.
Overall, the Series 4 is definitely an upgrade on the Series 3. I wish the battery life was better, especially for days that I do workouts, but I am in love with the apple watch. Don’t get me wrong, there are pros and cons to every device. however, i think it’s worth the purchase. i wear it everyday and it just doesn’t feel normal when I am not wearing it.
One thing you should note is as of fall of 2019, the Series 4 was replaced with the Series 5 which doesn’t have much of an improvement except for an always on retina display, international emergency calling, and a compass which doesn’t interest me very much. The Series 3 is still available to purchase for a bit cheaper and is still a very reliable device. I can’t wait to see what improvements Apple comes out with in the fall of 2020.

Leslie – Surface Book 2

In the midst of my reflections on 2019, I realized that it was a big year for me in the way of tech purchases, although it didn’t really seem that way at the time. And while I love all the devices I purchased this year, I finally decided to make the surface book 2 my pick of the year. For the past four years, I have been using a 2015 MacBook Pro with a BootCamp partition for Windows. This configuration has served me well enough, but I felt it was time to have a dedicated Windows machine in my life. After setting my budget and doing some research, I ended up buying a slightly used 13.5 inch Surface Book 2, with an Intel Core i7 CPU, 16GB RAM, and a 1TB SSD. This was much more computer than I needed, but I love it for the following reasons: First, the battery life on this machine is amazing! I can easily work 10 to 12 hours or more before needing to charge it. The keyboard feels great under my hands, although it has taken me some time to get used to the way the function key toggles on and off rather than only working when held down. At just over 3 pounds, it’s perfect for traveling. I haven’t really used it as a tablet, but I like the idea of having that as an option. And, Set-up with Microsoft.

Microsoft – Surface Book 2

Chelsea – IRIE BrailleTrac 120

The IRIE BrailleTrac 120 is hands down my favorite embosser and it contains the new “Power-Dot” Braille technology! The embosser that it is most similar to is the Juliet 120. The BrailleTrac 120 has very similar specifications as the Juliet does, but the BrailleTrac 120 is much quieter, cheaper, and much more reliable.  Each embosser also comes included with a copy of the TactileView Design software and the GoBraille Wireless Print Module. The GoBraille is a new piece of technology. The GoBraille allows the embosser to be recognized as an “AirPrint” printer, making setup and embossing much easier. It also has on-the-fly Braille translation software built into the GoBraille so you can just send standard print files to the GoBraille and it will convert the files to Braille as well as emboss them out automatically. I absolutely love this embosser because as a Teacher of Blind Students, singer, and one who is active in church as well as the National Federation of the Blind and iaccessibility, I am always looking for ways to promote Braille! Braille rocks and so does the BrailleTrac 120!

Links:

Irie BrailleTrac 120 Embosser

TactileView Design Software

GoBraille Wireless Print Module

Aleeha – PowerBeats Pro

This year, Apple teased better AirPods, with in-ear fitting and different colors. In May, however, a pair of earbuds were released which were, in my opinion, better than the second generation AirPods and a significant teaser for the AirPods Pro. These earbuds were the PowerBeats Pro wireless earbuds. Priced at $250, these headphones offer premium sound, a secure fit, water resistance, and many more features, including dedicated volume controls on each bud and Hey Siri support. We published an in-depth review of these earbuds, available in a past article on this blog. I believe I’ve found my favorite pair of wireless earbuds, despite my hatred for the in-ear design. The reason for this is that they offer amazing sound, audible even over a loud vehicle, they stay in my ears even when out walking, and I can control my music using the buttons on each bud, rather than needing to rely on my phone for audio control. With amazing battery life in each bud and in the case, these will be my companion for many years to come.

Apple – PowerBeats Pro

Michael – Beats Solo Pro Headset

This year, Apple released so many different kinds of headphones, and I have owned many of them. The second generation AirPods, the AirPods Pro, the PowerBeats Pro, and the Beats Solo Pros. While I love my AirPods Pro, the quality and comfort of the Beats Solo Pros is just the best. I am using them right now to listen to music and write this parapgraph. They come in several different colors, and cost $300. Like the Solo3 headset, the Beats Solo Pro headphones last for 40 hours if you are not using noise cancelation, and 22 hours with noise cancelation on. They are also nice because you can now use transparent hearing, which is like the mode on the AirPods Pro. I think the only thing I don’t like is the case. I wish it was more like the Studio3 case but it will do. I just bought the Apple Lightning to 3.5 adapter so that I can plug these right in to a regular headphone jack, which makes them amazing for use with my Switch or my Surface. I could just use Bluetooth, but it is easier to use that with iCloud devices.

I really think that the Beats Solo Pros are some of the best headphones in 2019, but they are not for everyone, so I suggest people try them out before buying.

Conclusion

The iA Team would like to wish you all a very happy new year, and we will be back next week with an all new iACast episode.

Accessory Review – AMBEO Smart Headset

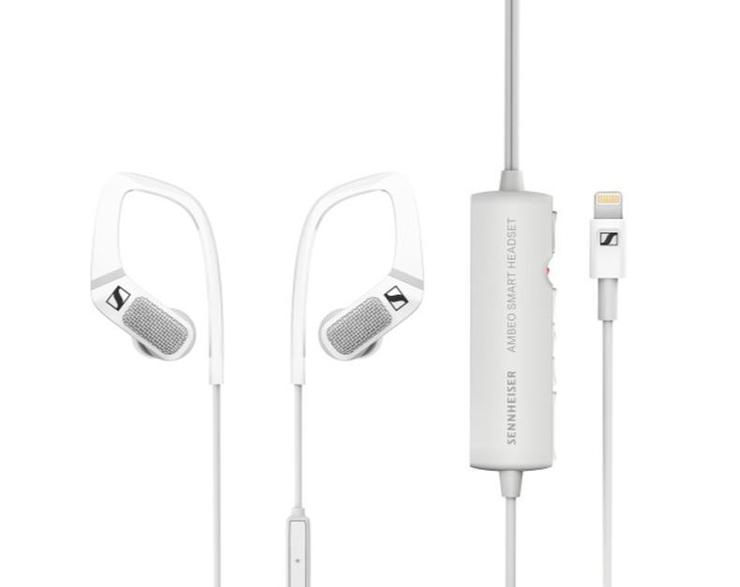
Ambeo smart headset

Background

The AMBEO Smart Headset has become, and will probably remain, one of my all-time favorite wired headsets. It has caused me to reconsider my feelings on the headphone jack. For a long time, I use to feel that the headphone jack was the single most useful audio feature a product could have, and now, I’m not so sure that’s true.

As everyone knows, Apple removed the headphone jack from the iPhone 7 and later, causing wide-spread controversy, both in and outside of the audio-file world. I even remember saying that if Apple ever removed the headphone jack from products like the iPad and Mac, it would be a sad day indeed; but I’m not ashamed to admit that I might be wrong. You can do things with Lightning and USB-C ports that would be impossible with the standard 3.5 MM headphone jack. Not only can you play high-resolution audio, there are also headsets that can provide you with noise cancellation, all without the need for extra batteries. You can purchase headsets that have an equalizer as well, allowing you to tailor the audio to your exact taste. Because the connection is digital, any changes you make to the audio will affect everything on your device, including any screen reader you might be using, such as VoiceOver for iOS. If that’s not enough, you can buy headsets that allow you to record in binaural (or 3D) audio.

What is binaural audio? Binaural (or 3D) audio is a method of recording that replicates how the human ears hear audio. The result is that when played back through stereo headphones, you almost feel as though you’re in the room, or crossing the street, depending on where the recording takes place. You can find lots of examples of binaural audio on YouTube, SoundCloud, and other similar places. iAccessibility even records it’s UnboxCasts in binaural audio. Mix together noise cancelation, a system-wide equalizer, the ability to play high-resolution audio, and you’ve got all the ingredients to make a headset I want to have in my life. You’ve got… the AMBEO Smart Headset.

Features

The AMBEO Smart Headset features Sennheiser’s signature sound, along with Apogee’s proprietary Soft Limit and mic pre-amp, making for an extremely natural and noise free recording. Not only does the headset feature the ability to cancel noise and record binaural audio, it also allows you to hear your environment using the same microphones used to make recordings. You can choose between three levels: reduced level, which brings in a little background, while still mostly hearing your music; natural level, which is meant to let you hear your surroundings without any amplification; and amplify level, which amplifies the volume of your surroundings, bringing them to the forefront of what you hear. You can customize all of this using the Smart Headset app, available for free in the App Store. The app is mostly accessible, with the only major issues being the “Getting started guide” and manually adjusting the EQ curve when using the Custom preset in the equalizer. The headset also features a microphone on the right cable, meant for talking to Siri and taking calls.

Layout and Controls

Exploring the headset from the top, one will first find the earbuds. These earbuds are an in-ear style. This means they require you to have a good seal to achieve the best sound quality. Attached to the earbuds, you will find a set of medium silicone ear tips. Other sizes are included in the packaging. You can buy tips from lots of companies, and in various styles, if the default ear tips cause you discomfort during use. For example, I ended up purchasing some memory foam ear tips, which not only improve sound isolation, but also made the earbuds stay in my ears better. The earbuds also feature both the binaural microphones and the ear hooks (They sit behind your ears) that  help with stabilization when the earbuds are in your ears, the microphone on the right cable, and nothing else until you reach the rectangular controller. The first thing you’ll find on the top left side of the controller if you are wearing the earbuds in your ears, is the Smart slider. By default, the slider changes the microphone level from Natural level to Reduce level. You can change the function of the slider in the app. You can choose to have it mute and unmute the telephone microphone, open Voice Memos, launch the Smart Headset app, open the camera, open an app called Meta Recorder, and open an app called FilmicPro. I haven’t used Meta recorder and FilmicPro, as the AMBEO Smart Headset will work with most any recording app. Finally, you can have the Smart Slider toggle a feature Sennheiser calls “Interact”. While I don’t use this feature on a regular basis, I definitely think it’s extremely useful. When you turn it on, the headset will lower the volume of any audio that’s playing, and pass your environment through using the binaural microphones via the Situational Awareness feature. The Smart Slider is textured so your finger doesn’t slip off during operation. This slider is a spring-loaded slider, meaning that when you slide it all the way up, it will slide back to its original position. Just below the Smart Slider, you’ll find a little LED light. It changes color depending on the status of the microphones, and it will also indicate if you’re recording is distorting. Below the LED is the volume up button, the multi-function button for manually bringing up Voice control, Siri, managing calls, and media playback. Below this you’ll find the volume down button, and the rocker switch. The rocker switch is used for controlling just how much of your surroundings you hear, and whether or not noise cancellation is enabled. Again, you can customize the levels that the switch cycles through in the app. When you adjust the switch, the headset speaks the setting you’ve landed on. The speech sounds like audio recordings, rather than text-to-speech. The voice Is easy to hear and understand. You can choose to disable voice prompts in the app. You may want to do this if you use the headset a lot. Below the control is the rest of the cable that terminates in a lightning connector.

Recording

Recording with the AMBEO Smart Headset is just as easy as you mmight expect. Open Voice Memos with the headset connected, and tap on the Record button. That’s it. You’re making your very own binaural recordings; straight on to your iPhone, iPod touch, or iPad.

Voice Calls

When making voice calls with the AMBEO Smart Headset, I have found that the microphone on the cable is really quiet. It also sounds like the headset is noise reducing some background hiss created by the microphone. The audio is downsampled to 16 kHz. As most HD voice calls don’t go beyond that sample rate, this is not usually an issue. Some apps however, will allow you to transmit in binaural, using the microphones on the earbuds, rather than the microphone on the cable. TeamTalk is such an app. Other apps such as WhatsApp, use the binaural microphones when recording voice messages, but they aren’t recorded in binaural. That, I assume, is dependent on the codec and sample rate used by the app.

Situational Awareness

One of my favorite non recording features of the AMBEO Smart Headset is the Situational Awareness feature. As mentioned above, the headset uses the binaural microphones to allow you to hear your surroundings. Latency doesn’t exist when using this feature. That means that what you hear sounds very natural. Other than some microphone hiss, I can’t tell a difference between how my surroundings sound through the headset, and how my surroundings sound without the headset in my ears.

Noise Cancelation

The Noise Cancelation feature on the AMBEO Smart Headset is pretty good, but I wouldn’t say that it’s the best noise canceling headset out there. It does a good job at canceling noises like the rumble of a car ride, airplanes flying over, etc. I can still hear some conversation, though I do hear a difference when noise cancellation is disabled. I’m not sure if this is because the noise cancelation uses the binaural microphones, rather than microphones on the inside of the earbuds, but I don’t notice much of a suction feeling in my ears when using the feature. Using different styles of ear tips can improve sound isolation, which can assist the noise cancellation feature in blocking out external noise.

Sound

One thing you’ll want in a set of earbuds is great sound, and the AMBEO Smart Headset doesn’t disappoint. The sound is Rich and detailed, and nothing sounds over emphasized to my ears. I haven’t yet found a genre of music that doesn’t sound amazing over the AMBEO Smart Headset. When you play back binaural audio on the earbuds, it’s almost as though your ears have been transported to wherever the recording has taken place. Remember that sound is subjective, so you may experience the sound of the earbuds differently. As mentioned earlier, with the equalizer found in the Smart Headset app, you can Taylor the sound to fit your taste.

Conclusion

With the features the AMBEO Smart Headset offer, the quality of the recordings, and the sound, I would call the Smart Headset my, almost perfect, do everything wired headset. The only weakness they have in my opinion, would be voice quality for tasks such as phone calls and FaceTime. If you are searching for a great sounding pair of earbuds that are lightweight, comfortable, sound great, and can Make high-quality binaural audio recordings, give these a look. You can pick them up for $199.95 US at Amazon and other dealers.

Accessibly Streaming a Live Event to YouTube

Youtube Logo

It’s something that has not been commonly thought of as an accessible option for blind people but, believe it or not, a blind person can successfully stream a live event to a YouTube channel using a myriad of tools. This can be accomplished using either a Windows or Mac computer. However, for the sake of this article, I’ll be sticking to the Mac, since that’s what I used.

Background

A friend was looking for a way to broadcast her wedding live on YouTube without breaking the bank. Being the enterprising tech person that I am, I offered to give it a shot; because I would be there already and always love a good problem to solve. Then, I had some second thoughts. What if the angle was wrong? What if the audio didn’t work? I would be coming in to the hotel that day, with no idea of the ports on the sound board, and no clue whether the cables I had were the ones I would need. Nevertheless, I persevered.

The Set-up

I first began looking for an accessible streaming software for my Mac. As the most powerful laptop at my disposal, I needed to take full advantage of what it could offer. After doing a little digging, I stumbled across Open Broadcaster Studio (OBS). OBS, a free piece of software, offers the user the ability to turn their computer into a streamer for both audio and video. Many different inputs can be mixed together into a single feed that goes out to either a local recording or an online stream. The app isn’t amazingly accessible, but is useable with VoiceOver if you sit down and work with it. In many ways, it behaves similarly to the TeamTalk 5 client for the Mac. Sometimes, you must route the mouse to the buttons and then click it with the VoiceOver modifier, plus Shift and space.

For my input, I used a portable Behringer USB mixer, connected to my computer and to the venue’s sound board. I was lucky that the board had an RCA output, which was hooked up to my mixer through an adaptor and a 3.5 mm male to male cable into the mono input jack of my mixer.

Getting the video feed together was more of a challenge. Somehow, I needed to bring the feed from the camera of my iPhone 11 Pro into my computer and mix it with that fabulous audio coming from the mixer. This requires some work. There are, as those of us who have upgraded to Catalina will know, some permissions problems with the new OS that make some apps difficult, if not impossible to run. When using OBS’s built-in Window capture feature with QuickTime to try to capture the video, no video came across from the iPhone. So, back to the drawing board I went. I found a plug-in for OBS, accompanied by a $15.99 iOS app, which claimed to do what I needed. The app itself is mostly accessible, with some interesting button labels and focus problems, but it’s functional. The real issue became getting the plug-in to recognize that an iPhone was connected to the Mac. After closing and reopening the app on the iPhone, it finally recognized the device and I had a very nice looking video feed on my computer screen. This, combined with the audio I collected from earlier, the video went out to YouTube from OBS and created a seamless streaming experience. I would strongly recommend this setup for anyone looking for an inexpensive way to stream an event.

Book Recommendation: Take Control of Shortcuts by Rosemary Orchard

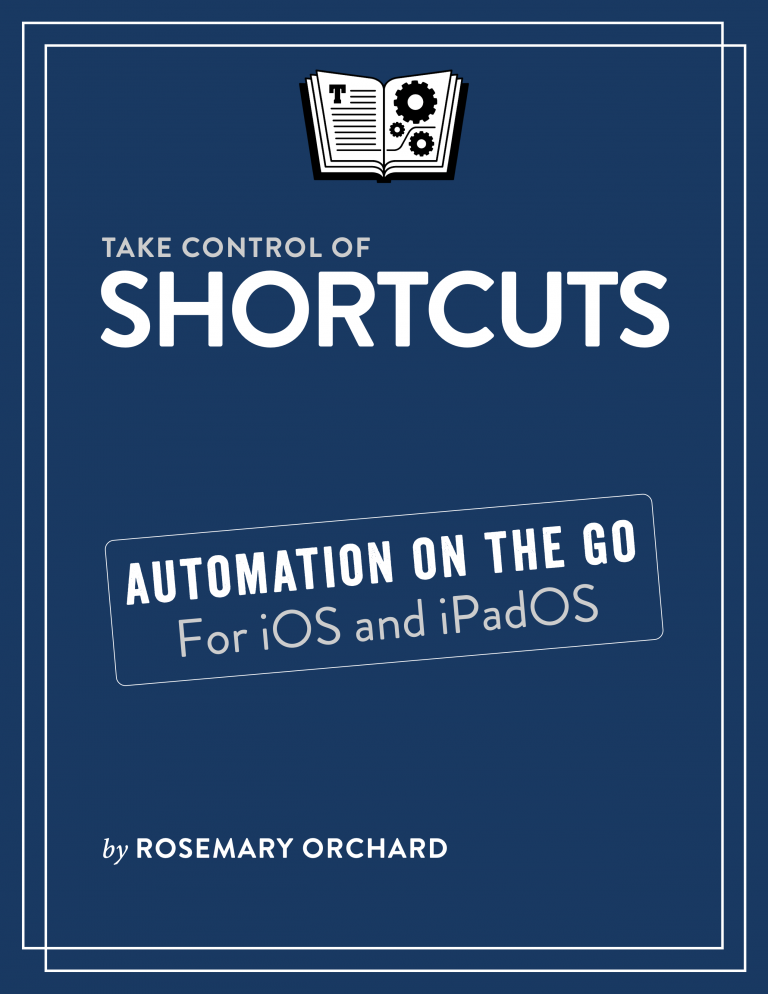
Take Control of Shortcuts book cover.

Android users have always bragged that their phones could allow for a higher level of customization than iOS. In ways this is still the case, but Apple’s introduction of Shortcuts has brought both operating systems closer together in how customizable the experience can be.

Unfortunately, many users do not know that this feature exists, or how to use it, so I am very excited to recommend this book by Rosemary Orchard called Take Control of Shortcuts.

I personally have learned a lot from this book, and I have been writing shortcuts since they were called Workflows in the Workflow app. I love that I can change the brightness when I open a game, or set do not disturb when I am reading a book. I could go on but I think you will find your own favorites by reaing the book.

Even if creating shortcuts just isn’t for you, you can learn how to find shortcuts that apps make for you by reading this book, so I urge all users of iOS 13 to check this book out, and also to listen to the Automators podcast to keep learning how to automate your life.

Take Control of Shortcuts – Take Control Books
RosemaryOrchard.com 
The Automators

Progressive Web Apps vs Native Apps: A Comparison

iAccessibility Logo

Software applications have typically been written to work in our operating systems like Windows and macOS, but with the improvements made to the Internet, it is now possible to make web pages that act like software applications. A few examples of this would be Gmail, Google Docs, or Microsoft Word online. These web based applications are commonly called Progressive Web Apps or PWAs because they are applications that can use your device’s hardware similarly to an application built for that device. This is why applications like Microsoft Word and others are referred to as native apps Lets compare the two types of applications, and then we can determine if one approach is better than the other.

Native Applications

Native applications are applications or programs built on a particular platform in the native SDKs of that platform. This would be similar to a developer building an iOS app in Swift or an Android app in Java or Koklin. Native applications compile to machine code, and are loaded on a person’s device through an installer, or an app store.

Benefits

Native apps are built using Software Developer Kits herein called SDKs and Application Programming Interfaces which will herein be called APIs. these SDKs and APIs let developers write code specifically for a certain set of devices. This allows the applications to run faster with low latency. This means that your games will not lag, and your GPS will update quickly.

An applications look and feel mean a lot to a user, and an app that is built natively will more than likely look like it was built specifically for a certain device. There are several methods for building cross platform apps, but using a platform’s built in and familiar user interface controls will always make users happy.

Even desktop users are concerned these days about how many resources an app uses, and this is why native apps can shine. Native apps do not run in conjunction with a web browser or other platform, so resources can be used the least to get the same job done.

Drawbacks

Native applications are amazing but they have a few limitations. The first of these is that they have to be updated. A Progressive Web App can be updated on the fly, but an app that is installed on a device needs to be updated on each device for the user to get the benefits of the software change.

User Interface design takes a lot of time, and developing a good interface for multiple devices takes time and effort. The User Interface used on iOS should not be the exact same for Android and so on. WhatsApp for iOS does not look anything like WhatsApp for Android, and neither does Facebook. This means that a user interface must be created for each platform for a native app, which can take more time and money than a company is willing to invest.

Progressive Web Apps

Progressive Web apps are applications built on the web. They still use the standard HTML pages we have come to rely on when we go to a website, but they then use JavaScript and other languages to refresh the page content without refreshing the entire page. Again, examples of this would be Gmail, Google Docs, and Microsoft Word Online.

Benefits

Progressive Web Apps allow developers and designers the ability to develop and deploy without having to send out a massive update to users. A developer can commit changes to the application and the user will see those changes the next time they login to the web app. This makes Progressive Web Apps very scalable, and free from review periods which Apple and others require on native applications.

While having a native interface is good for built in applications, Progressive Web Apps can deliver the same user interface across platforms. This means that the user will see the same interface on a Chromebook as they would see in Microsoft Edge in Windows or Safari for macOS.

Drawbacks

Progressive Web Apps do have their drawbacks. The most notable one is that they do not always provide an easy way to be used offline. Many of these do, but there are many that do not work while offline.

As said earlier, computer resources are essential, and multiple browser tabs with web applications can take up your computer’s resources. This is why Chromebooks also allow for Native Android apps along with Chrome web apps so that the user can use both on a chrome based machine.

Accessibility practices are key for blind and low vision users to have equal access to online applications. Native apps are no where near perfect in this space either, but they do have an edge as many PWA frameworks do not allow for accessibility out of the box. This is why many online apps have accessibility barriers where as many native apps that fulfill the same use case work well with screen readers.

Conclusion

Both Native Apps and Progressive Web Apps have their place in the modern Internet and both solutions have their strengths and weaknesses. The important thing is for developers to know when to use the right solution, and for users to know what works best for them. For example, I find that Microsoft Word online is a bit cumbersome, so I prefer to use Word for Windows or Mac. The same goes for mail. Gmail has a nice online UI, but I find that a native mail client works best for me. The nice thing though is that I have the option to use Gmail online if I am not at my own computer, and the interface works well not matter where I go.

The reason we felt that this article needed to be written was so that users could learn the difference between these kinds of applications and so that people could be aware that there is usually more than one option available, and to use what works best instead of what others want you to use.

We also advise that you reach out to both native app developers and web app developers alike and leave feedback on how each experience can be made better.

Kindle Paperwhite vs Kindle Oasis: Accessibility showdown

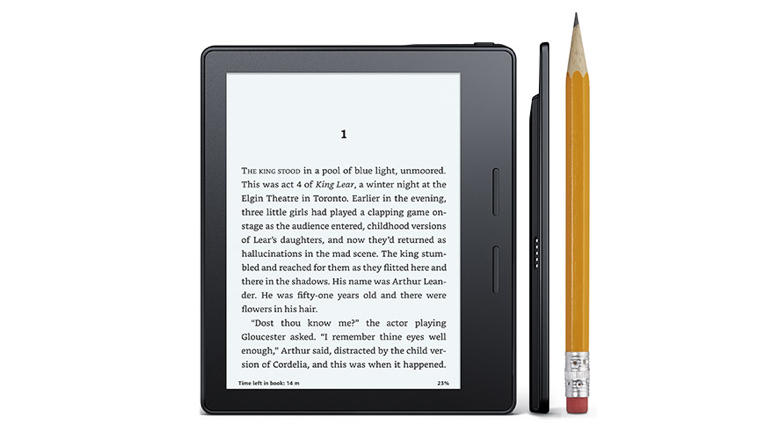
Front of Kindle Oasis with side shots of different colored sides.

There has been a lot of controversy over the years as to what eReader is the most accessible and usable. Amazon, Apple and others have developed devices for reading books with large print and with speech, but lets just look at eReaders for the time being. Amazon has two devices that are commonly used in schools among other places. Lets take a look at both the Kindle Paperwhite and the Kindle Oasis.

Kindle Paperwhite

The Kindle Paperwhite is an inexpensive 6 inch device stat starts around $120 with promotional ads. It is a basic eReader with eInk support that also has a backlight for easy reading. The Paperwhite is built with WI-FI, and does not have built in accessibility support, but does support a dongle that can be purchased seperately, or with the device to add VoiceView support and a headphone jack.

I have used a Kindle Paperwhite for several years, and I have not tried the accessibility module to add speech to my Kindle. I can say that the print does get fairly big, but the backlight can cause eye strain, and you can actually see where the bulbs emit light on each side of the device, which is distracting when you are reading a book.

While the Paperwhite is a cheap solution, it doesn’t have the best accessibility features due to lack of built in VoiceView, and Bluetooth, and it also does not support Audible, or user interface zooming.

Kindle Paperwhite

Kindle Oasis

The Kindle Oasis is Amazon’s premier eReader starting at $250. This eReader is thin, light and powerful. It has 25 LED lights for the best reading performance, up to 32 GB of storage, WI-FI, Bluetooth, and built in accessibility features like VoiceView. Like the Kindle Paperwhite, the Oasis uses eInk to display pages but with a higher refresh rate, and with the ability to zoom user interface elements.

I picked up the Kindle Oasis last month and again, have not tried VoiceView on the device, but I can say that it is easy to get the thing up and running and the large print is beautiful. You can also adjust the warmth of the LEDS to be white or yellow, which can remove blue light from your device. Doing this will allow your eyes to read more without getting tired quickly. If this is not your thing, then no worries, the Oasis also comes with High contrast, so you can have your white on black text.

I purchased the Kindle Oasis with 32 GB of SSD with the free cellular connection, and I think that this has to be the best eReader I have ever used. I have read books on the iPad, iPhone, and the Kindle Paperwhite, and I have not been able to read books in print as fast as I can on this device.

Kindle Oasis

Conclusion

I still do think it is a shame that there is no great eReader in this category that works well out of the box for totally blind users. I think the Fire Tablets or iPads are a better choice due to the fact that VoiceOver and VoiceView can be enabled out of the box, but the Kindle Oasis really is the best in class eReader if you are a low vision user wanting to just read a book in print, or large print.

Accessory Review: Powerbeats Pro

Jason Earls with PowerBeats Pro pointed at camera

Introduction

When Apple announced the Powerbeats Pro in April, I was excited. I had had my AirPods for around two years, and was noticing that my use time between charges was getting shorter and shorter. Also, they didn’t stay in my ears as securely as I would like, causing a reduction of sound quality as they moved around. I had purchased covers that would go over them to help with the fit and sound, but I couldn’t simply drop them in the case for charging, or put them in my ears when I needed them because the covers did not fit in the case. That ease of use, of course, is one of the selling points of the AirPods. I have dropped covers more than once, but somehow managed to not lose them for extended periods of time. Talk time, that is, the amount of time the battery lasts while you are using the AirPods in a call, wasn’t quite long enough for me either. Yes, I could use one AirPod at a time, switching them out as needed, but being used to earbuds and headphones with a wire connecting them, it was always easier to just have both buds in my ears, and I’ve gotten use to that. This led me to use my AirPods in the same way, putting both of them in my ears, even if I was just using them for a call. Then, something happened. I started coming across articles in my newsfeed speculating about new AirPods with a longer talk time, and grips to help them stay in your ears. Hey Siri support, and lower Bluetooth latency were also discussed as possible features. Could these new AirPods be what I was looking for? I wasn’t quite sure, but I was going to keep them on my radar.

The AirPods were finally announced and as we all know, they don’t have any grips, but they do have the lower latency, longer talk time, and Hey Siri support. They also have wireless charging, but that isn’t something I am all that fussed about. I seriously considered buying them anyway, even though I would still have problems with them staying in my ears. Before I had decided what I was going to do, Apple announced the Powerbeats Pro in April. They had everything I wanted in wireless earbuds. Ear hooks to help them stay in my ears, silicone tips to help with sound isolation, sensors to detect when you insert them in your ears so they can play and pause music, Hey Siri support via the H1 chip, and physical buttons to manage audio playback and answer/end phone calls. If that wasn’t enough, they have a rated play time of 9 hours, and talk time of 6 hours. Naturally, all of these features come at a price. In this case, it’s $249.00 in the US. Some might say that $249 is a lot to spend on wireless earbuds, especially considering that noise canceling is something the Powerbeats Pro does not do, but I didn’t care. I bought them. I’ve had them for a few days now, and I thought I’d post my initial impressions.

Packaging

The box features an outer sleeve that, when removed, reveals the box with the charging case resting in an indention on top, with the earbuds inside. This acts as a sort of removable lid. Under this, you’ll find printed instructions, the lightning charging cable witch I believe to be black rather than white, and a circular plastic container containing multiple sizes of replaceable tips.

The Case

Several reviews talk about the size of the charging case for the Powerbeats Pro, and I see why. It’s not exactly small when compared to the case of the AirPods, and it is a bit baulky, but it’s not really been an issue for me so far. The case is a clamshell style, with magnets to help keep it closed. There is a tactile Beats logo on the top of the case, and a rounded flat section on the bottom. Opening the case will reveal the earbuds. The “system button”, for pairing to non Apple devices, is located inside the case, on the bottom edge if it is facing you.

Connection and setup

The setup process matches that of the AirPods. For more information on setting up the Powerbeats Pro and AirPods, you can visit the Beats website, and for the AirPods, check out this Apple article. When switching devices, the Powerbeats Pro play a slightly different sound than the AirPods, but everything else is the same as you would expect. Interestingly, VoiceOver describes the Powerbeats Pro as AirPods when checking the battery status with the battery widget in iOS. This, however, is likely a bug which will be fixed in a future iteration of the operating system. 

The Earbuds

One of the first things you’ll notice about the earbuds when removing them from the case are the ear hooks on each one. These hooks are flexible, so you can adjust them to best fit your ears after you’ve inserted the earbud. The buds are made from a smooth feeling plastic, and are really light when placed in the hand. They feature two physical buttons. The volume button is on the top of the bud, and there is a Beats logo button on the side for managing audio playback and calls. You can also use the Beats logo button to bring up Siri, or another virtual assistant on non Apple devices. Because each bud features the same controls, you can use them independently of each other, or together, depending on your preference.

For charging, there are magnets that help guide the buds in place inside the case, making it really easy to remove them from your ears and drop them in the case to charge.

The earbud is mounted at a bit of an angle to assist with insertion and help with comfort, but it makes it a little more complicated for me to pull them from the case and put them in my ears. This may become easier as I use them more.

Removing and attaching the ear tips can be a bit of a challenge as well, as they will bend if you apply too much force when putting them on the earbuds. It helps to turn the tips inside out, grab the stem, and push it on the bud. Fold the tips back down, and you should be good to go. The Powerbeats Pro come with 4 different sizes of ear tips. The largest tips seem to work the best for me.

Sound

Before I describe the sound, let me start off by saying that sound is very subjective, and what I like or dislike about the sound of the Powerbeats Pro may differ from what you experience.

I’ve read some reviews that talk about how the Powerbeats Pro have a treble push, and that is definitely the case. It took me a while to get used to it when I first started listening to them. Beats is known for it’s bass, and you do get a great deal of it with the Powerbeats Pro, but it’s nice and controlled. The sound isn’t as thin as the Beats Solo 3 which are on ear headphones, and I found that to be a pleasant surprise. It does sound like there is a bit of a dip in the lower mid range, but all in all, these are great sounding wireless earbuds, and I really enjoy listening to them. I’ve listened to several different musical genres on them, and haven’t yet found any that sound bad on the Powerbeats Pro. I also didn’t experience any noticeable distortion when I set the volume to max.

Call quality is also pretty good. They sound very similar to the second generation AirPods. They support Wideband audio for calls, which is a must for me in Bluetooth headphones or earbuds.

If there was one thing for me to complain about regarding the sound, it would be that the Powerbeats Pro sound best with the Beats ear tips. I tried the tips from my AMBEO smart headset (the factory ones and the memory foam tips I bought to replace the factory tips,) but I was unable to get the same level of sound isolation that I do with the Beats tips.

Speaking of sound isolation, while they won’t block out all sound, they do block out enough for me to clearly hear what I’m playing, at least in a somewhat loud environment. That’s exactly what I want.

Battery Life

While the earbuds are rated for 9 hours per bud for audio playback, and 6 hours per bud for calls, I feel as though I get slightly longer than that, though I haven’t actually tested this. What I can say for sure, is they do last a lot longer than my AirPods ever did.

Conclusion

While the earbuds aren’t the easiest to pull from the case and insert into my ears, they take everything I loved about my AirPods to the next level. If you are looking for an amazing pair of wireless earbuds, and especially if you have Apple devices, I highly recommend the Powerbeats Pro if you routinely listen to music, podcasts, etc.

They are available in Black, Ivory, Moss, and Navy.

Product Review: Anker USB-C to Lightning Audio Adapter

There are very few adapters that can get the iAccessibility podcast team excited. An adapter is an adapter, but many of us have wanted an adapter to allow Senheiser’s Ambeo smart headset to work with any USB-C device, so we were surprised when Anker created the USB-C to lightning audio adapter.

About the device.

The Anker USB-C to lightning audio cable allows the user to plug a lightning audio device like Apple’s EarPods to a USB-C device like the iPad Pro, or the MacBook Pro. This also works with other headphones like the Ambeo headphones to work with the Mac or even Windows computers.

Does it Work?

In our tests, we’ve found that he Anker USB-C to lightning audio adapter works extremely well with connecting the Ambeo headset to an iPad, Mac, or Windows computer. This device has allowed the iAccessibility staff to use the Ambeo headset with any USB-C device for listening and recording purposes, which is exactly what we have been looking for.

Drawbacks

We have only found one issue with this device, and it is the price of the adapter. The Anker USB-C to Lightning audio adapter costs $30, which is a bit steep for an adapter especially since it is small and can easily be lost.

Conclusion

I personally really like this device as I can use Apple headphones among others with my Mac. I do not really like the price of this adapter, but I think it is a good trade off for being able to use a wide variety of headsets with non-lightning devices.

Anker USB-C to Lightning Audio Adapter at Amazon

Quick Tip: Enable widgets on your iPadOS Home Screen

iOS 13 logo

Android users have had the ability to use widgets on the home screen since there has been Android phones, but iOS users have had to go to a separate place to use the same functionality. In iOS or as its now called, iPadOS 13, widgets can coexist with your home screen. Here’s how to turn it on.

  1. While on your home screen turn your iPad to landscape view.
  2. Flick right with one finger or with three fingers if you are using VoiceOver.
  3. Once your Today view appears, find the first widget in the list. You will find that it is a prompt to add today view to your home screen.
  4. Tap the Add to home screen button

Please note that this will only add widgets to your first home screen page, and only while you are in landscape mode. You will be able to move in your widgets over your home screen in portrait, but they will only sit on your first home screen in landscape.

While this isn’t exactly what users would want in having widgets on each home screen, this is a start, and it can only get better in future iPadOS versions. What widgets do you use on your iPad? Let us know in the comments, or on twitter by tweeting @iaccessibility1 or by emailing feedback@iaccessibility.net.

Quick Tip: Updating Apps in iOS/iPadOS 13

iOS 13 logo

In the past, updating apps was simple because you only had to open the App Store app, and go to the Updates tab. Now, Apple has decided to make updates less prominent by moving the updates area to a new section on each tab of the App Store. Here’s how to find your updates now.

  1. Open the App Store
  2. In the top right, find the My Account button and activate it.
  3. Find the section heading that says upcoming automatic updates.
  4. You will then find the familiar options from the updates tab like update all, and the ability to update individual apps.

Apple has deemphasized the updates tab as updates should be a quiet aspect that just happens, but it is important to know where your updates happen in case you need to avoid the update of a certain app.

It is also important to remember that you can disable automatic updates in the settings app under App Store.

Back to Top