Home / Blog / Report

Quick Tip: Updating Apps in iOS/iPadOS 13

iOS 13 logo

In the past, updating apps was simple because you only had to open the App Store app, and go to the Updates tab. Now, Apple has decided to make updates less prominent by moving the updates area to a new section on each tab of the App Store. Here’s how to find your updates now.

  1. Open the App Store
  2. In the top right, find the My Account button and activate it.
  3. Find the section heading that says upcoming automatic updates.
  4. You will then find the familiar options from the updates tab like update all, and the ability to update individual apps.

Apple has deemphasized the updates tab as updates should be a quiet aspect that just happens, but it is important to know where your updates happen in case you need to avoid the update of a certain app.

It is also important to remember that you can disable automatic updates in the settings app under App Store.

Quick Tip: Enable Dark Mode in iOS 13

Quick Tip: Enable Dark Mode in iOS 13

Users have wanted the ability to select a dark theme for their operating systems as long as there have been operating systems, and Smart invert has helped make that dream a reality. Smart invert changes the solid background colors of each screen to be reverse of what would normally be shown. This usually gets the job done, but it doesn’t always work correctly. I use WhatsApp, and my background color is blue. Smart invert makes this an orange color, which is not what I would like to see. Dark Mode also changes the color to be dark, but it allows for a developer to customize the experience so that the app looks great no matter which mode is active.

iOS 13 has this new dark mode feature, and here’s how to turn it on.

  1. Open the settings app
  2. Tap Display and Brightness
  3. Here you will find the two options to pick Light and Dark. This will even change your wallpaper to look lighter or darker.

Note: You can use the Automatic toggle switch to keep your device light during the day and dark at night.

Conclusion

Dark Mode is an amazing new feature added in iOS 13. I have been using it on my phone, and some on my iPad, so it will be a great new feature when it comes out. The only downside to dark mode is that an app bust be designed to utilize the feature. I urge all users to reach out to your favorite app’s developer and ask them to enable dark mode in their next update so you can experience this in all your apps.


Quick Tip: How to Share Shortcuts in #iOS13

Shortcuts app icon

We are still in the beta season for iOS and iPadOS, but anyone can try the new features offered by Apple by signing up for the public betas. One of the many changes that Apple has made is that Shortcuts are now built in to the OS. This allows deeper integration with features, but it also means that Apple has made changes to allow Shortcuts to be more secure. You might notice that the share button is disabled and that is because Apple does not allow the sharing or opening of untrusted shortcuts by default. Fortunately, you can still turn this feature back on. Here is how this is done.

Enabling Untrusted Shortcuts

  1. Open the Settings app and tap on Shortcuts
  2. Turn on, “Use Untrusted Shortcuts”
  3. Return to the Shortcuts app
  4. find a shortcut and go to more details.
  5. Find the share button at the bottom of the screen next to the run shortcut button

That’s it! you can now share and open shortcuts. that you make, or that you get from online sources. Turning this on will also allow you to install shortcuts that can compromise the security of your device, so it is important to know what shortcuts you are installing, and check the actions that are in the shortcut so that you do not open your phone up to malware or unauthorized access.

#iACast- 121 Apple Productivity Progress

Neon green apple logo cut out on dark background.

Show description

On this episode of the iACast, Aleeha, Jason and Michael discuss more about WWDC and how Apple compares with its competitors in the market place.  They also consider what may need to be improved in the future.  Additionally, they debate the comparability of Mac Os and I-pad OS.  

Picks

Jason Alt Frequencies

Aleeha: HomePod

Michael: Avengers: Endgame

Differences between iOS and Android App Development

Picture of Xcode app icon and the app icon for Android Studio

Becoming a developer for any platform requires a lot of time, dedication, and will, but sometimes it helps to have resources out there to just read and learn from. iOS and Android are two platforms that dominate the industry, so lets take a look at these platforms, and what it takes to develop for them.

iOS Development

To develop for iOS, you MUST have a Mac. Once you have one, you will need to download Xcode, Apple’s development platform. This application lets you develop applications for both iOS and macOS. You will then need to learn a coding language supported by these operating systems. The most popular of these is Swift, but developers can still use Objective-C if that is what they are more interested in. Here are some great resources to get you started with these languages.

  1. The Swift Programming Guide for Swift 5 on Apple Books
  2. The Objective-C Programming Language – Apple Developer

iOS development is based on writing code around the user interface and user events. To help with this, Apple has created what are called Storyboards, where you can create each screen of your app graphically. If graphical design isn’t your thing, then you can create all of your app’s user interface objects through code. Each method has its strengths and weaknesses.

Once your app has been written, your assets are ready, and you are ready to test,  you should sign up for an Apple Developer account. This account will use your Apple ID, and it will cost you $100 in the US each year.

Once this is done, login to App Store Connect, and set up TestFlight testing which supports public testing now.

If your app is how you like it,  send it up to Apple for review. This can take up to 24 to 48 hours. Once this is done,  your app will be live in the App Store for anyone to download.

Android App Development

Android app development is very similar to iOS development in some ways but drastically different in others. Here is the process for building an app for Android.

To develop apps on Android, you will first need a program called Android Studio. Android Studio is an Integrated Developer environment similar to Apple’s Xcode. It allows you to build Android apps on multiple platforms. This means that you can build the same app on a Windows computer or on a Mac.

To start developing for Android, you first need to learn an Android supported programming language. There are ways you can build Android apps in Python and or with other programming languages, but Java and Kotlin is the preferred way to go, and is the supported language by Google and Android Studio at this time. Here are some resources to get you started.

  1. Documentation for Android Developers

With Android Studio, an app is built by programming around user interface elements and events, which is similar to iOS, but Android does not have anything like Storyboards. Instead, you will have to design each screen separately. These screens are called Activities, and the best way to think of this is that each activity is a separate app from other activities in your containing app. You basically just connect each activity together and send data back and forth.

Android Activities are basically a few files. The code files which are written in Java or Kotlin, and the layout files which are written in XML. You can write the layout files by hand, or you can use Android Studio’s visual designer. You will definitely find though that the Android studio visual designer will only get you so far in the process, and some hand writing of the user interface layout files will be needed. You can also opt out of layout files, and just write all of your user interfaces out of Java or Kotlin, but this will take longer unlike iOS development.

Once you write your app its time to test and begin the publication process. You will need to register as an Android developer at developer.android.com which has an initial cost of $20. Once you pay this then you are forever an Android Developer!

Publishing your app is very similar to the App Store Connect portal for iOS. This time, you will use the Google Play Developer console. You will have to have screenshots of your app and a description, and you will need to upload your app with Android Studio.

What Are The Differences?

iOS development and Android development have several things that are similar, but they have some very major differences. Many of these were outlined above, but lets look at everything now.

  • iOS development requires you to pay $100 a year to keep your apps in the App Store, whereas Google requires you to pay $20 up front to become an Android Developer for life.
  • Apple uses Xcode to build apps, whereas Android uses Android Studio to build apps and services.
  • Apple keeps their apps as a walled garden, meaning their access to other apps is limited,  where as Android lets your app talk to and see other apps on a device.
  • iOS developers use Swift or Objective-C to build apps, whereas Android developers use Java or Kotlin.
  • iOS app simulators are bare-bones versions of iOS that run effectively on macOS, where Android simulators are full versions of Android that may tax your machine a bit while debugging apps. This allows you to run Talkback while testing your apps, however. The iOS simulator is unable to run VoiceOver.
  • iOS apps may run in the background for certain reasons for a certain amount of time, but Android apps can install services to run indefinitely or until the app is closed.
  • iOS apps use storyboards or NIB files to build user interfaces, where Android apps use layout files which are written in pure XML. Android files are easier to edit by hand.

There are still many more differences between these two platforms that we have not had the chance to cover, but this should help any new developer know what they are getting into if they want to transition between either of these platforms.

Reach out to us on our Slack community if you would like to learn more, or email us at feedback@iaccessibility.net if you have any developer questions.

Seeing On Your Own Schedule – My Experiences as an Aira Back to School Recipient

Michael Doise wearing Horizon Glasses From Aira

When Aira originally gained popularity among the blind community, I glossed over the posts in my Facebook news feed and emails concerning the product.  I had been living on my own for a while, I was cooking my own meals and I had good travel skills.  If I needed to read the instructions for a box of food, or adjust my thermostat, I could just call Bee My Eyes, a free service that connects blind people in need of visual information to a wide network of volunteers twenty-four hours a day.  It was free and it worked.  I did not start to pay attention to Aira until a close friend of mine got the Back To School scholarship.  She is a competent and very independent blind person.  When she thought she could benefit from it, I wondered how it would benefit me.

Fast forward a few months to the 2018 convention of the National Federation of the Blind, a site access location for Aira.  During the convention, I could take Aira for a test drive at no cost to me.  I fondly remember arriving to my hotel room, and noticing that it was much too hot for my liking, I decided to give Aira the old college try.  After setting up a free account, I called an agent for the first time.  After answering a few questions about myself, and listening to the disclaimer that Aira sessions would be terminated if I was not using my mobility tool outside my living arrangement and that agents could not tell me if a situation was safe, I completed my first task.  The agent helped me set my thermostat.  That first call got me hooked.  The agent I interacted with was focussed on me.  She was happy and energetic.  At that point in time, she was focussed on me and only me.  She knew how to help me orient my phone so she could see the thermostat clearly, and best of all, in a matter of seconds, my room began to cool off and I was comfortable.  Although the volunteers at Bee My Eyes want to help, they lack the professional training that Aira provides to their staff, and since the volunteers are not being paid, they are not on call like Aira staff.  They may be in the middle of something when they pick up your call.

In August of 2018, I applied and was accepted to the Back To School program, where I received 200 Aira minutes a month; as well as a pair of Horizon glasses.  Although I did not think the glasses looked good, I put them on anyway, and discovered a whole new world.

Aira could do so much more than Be My Eyes.  Agents engaged in several TeamViewer sessions, which enabled me to ensure that assignments with formatting requirements were presentable and enabled me to access inaccessible assignments and websites on my own terms.  I no longer had to schedule readers and have a rigid agenda for completing assignments.  My school life was on my own terms.

My use of Aira was not limited to academics.  One of the most thrilling experiences with Aira was having an agent describe Disney’s fireworks display from the fourteenth floor observation deck of Disney’s Contemporary Resort.  I can see fireworks, but they only look like colorful lights to me, and it has to be dark for me to see them.  I have discovered that I can see the fireworks from that location; however, Aira’s description proved to me that I was missing a lot.  I had no idea that Disney made all kinds of designs with their fireworks, and how vivid the colors were.  The agent who described the fireworks was amazing!  She was energetic throughout the show, and she maintained my attention the whole time.  I knew what colors the fireworks were, that they were making stars and other designs in the sky, and that Cinderella’s castle was the focal point of the display.  I practically had tears in my eyes throughout her description.  Family and friends are always willing to describe things for me, but they want to enjoy the display and take pictures too.  Aira’s descriptions are top-of-the-line.

I would encourage anyone to give Aira a try.  Locations such as many major airports, Walgreens, and the Massachusetts Bay Transit Authority (MBTA) are only a few site access locations where anyone can try Aira for free.  In addition, both the American Counsel of the Blind and National Federation of the Blind state and national conventions are site access locations, and Aira representatives are available so customers can ask questions, test drive the glasses, and sign up if they want to.


Pricing

For many people Aira’s plans may be too costly, and I am happy to say that there are a lot of options to get Aira funded.  Aira has a $29-per-month plan which offers 30 minutes per month.  In addition, Aira is a registered vender for Vocational Rehab services in many states.  A veteran can get Aira through their Veteran’s Affairs counselor. Employers can purchase blocks of minutes for employees, and more colleges and universities are becoming site access locations.  The Back To School Program is also another option for students.  Enrollment begins in mid to late August, and the application process is quite simple.

Conclusion

An important thing to remember about Aira is that it does not substitute solid travel, technology, and daily living skills.  The product is simply available to provide visual information, but in all situations, the explorer drives the session.  An agent will not tell you when it is safe to cross the street, nor will they complete your homework for you.  They will help you navigate to a destination and tell you when the light is in your favor if they can see it, and they are happy to help you format a document, but you have to be the one to tell them what to click on, and where you want things to be positioned in a document.  With Aira in your toolbox, you will no longer have to wait on someone to help you with the visual aspects of life, you can get assistance at the touch of a button.

New Features in macOS 10.14 Mojave

macOS Mojave night background

MacOS 10.14 Mojave has been in the wild for quite some time, but we felt that it still bears discussion, as it comes with a few changes that will change how we view the Mac ecosystem.

Features

There are several features in macOS Mojave; however, only a few of these will be discussed. In this article, we will focus on the significant features that will keep changing in the future.

Dark Mode

MacOS 10.14 brings dark mode to the Mac, which allows applications to show content with a dark theme. This is different from smart invert for iOS as it only changes the interface and text colors. The one drawback to this is that developers must enable dark mode in their applications and it does not work out of the box.

Dynamic Desktops

One feature worth mentioning is Dynamic Desktops. Dynamic Desktops are modified desktops that can change based on certain conditions. Right now, this means that the desktop can change based on the time of day, so you can have a lighter background and skin while it is bright outside, or you may have a darker background with dark mode enabled at night. This is really useful if you would like to adjust your working environment based on the time of day.

Desktop Stacks

So, wouldn’t it be amazing if you could make a stack of items on your desktop instead of just in the Dock? Well, you can now! Mojave supports the ability to make stacks on your desktop.

Continuity Camera

macOS Mojave allows you to take pictures with your iPhone or iPad and have that picture go directly to your Mac. One issue that users have found is that the phone can not have personal hotspot enabled when this is used.

Mac App Store

The Mac App store received a full redesign this year, with an all new interface.

iOS Apps On The Mac

An ongoing project was started in 2018 to allow iOS apps work on the Mac. This is a huge change for the Mac, as it allows iOS developers to run their apps on the Mac. Unfortunately, this feature is only enabled in certain apps from Apple like Home, News, Stocks, and Voice Memos. Apple has stated that they would be bringing more support to iOS apps on the Mac in 2019.

Accessibility Improvements

VoiceOver and Zoom did not receive much of a noticeable update this year, but there have been obvious under the hood changes to VoiceOver to support the new iOS apps that have been added to the Mac. We noticed these changes throughout the Mojave beta process.

Conclusion

While Mojave has not seen the most accessibility updates, it surely has several updates to pay attention to, and lets be honest, Dark Mode is a great feature for low vision users if the brightness of the screen is too much or if the added contrast helps you read the interface easier.

MacOS Mojave has set the stage for future versions of macOS, but we will definately see even more changes to the OS later this year when we receive macOS 10.15.


Let us know what your thoughts are about macOS by emailing us at feedback@iaccessibility.net

Book Recommendation: iOS Access For All by Shelly Brisbin

iOS Access For All By Shelly Brisbin Book Cover

Apple’s iOS 12 is the latest operating system to developed for iPhone and iPad devices which was released in September of 2018. Since there are some changes to how iOS works, we need a new guide to know how to use these great features with accessibility solutions like VoiceOver and Zoom.

Shelly Brisbin releases a book every year called iOS Access For All, which provides a great guide for accessibility users to learn what is new and how to use all of the features in the current year’s version of iOS. Shelly has finished her book for this year’s version of iOS, and we now have the iOS 12 edition of iOS Access For all. The link to her website where you can learn more is below.

iOS Access For All Website

Useful Cables and Dongles for The 2018 iPad Pro

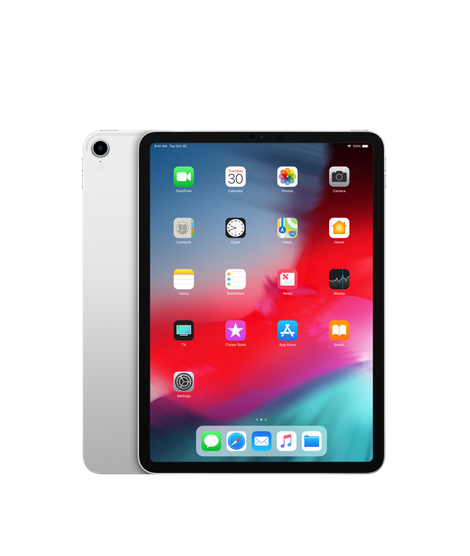
iPad Pro 11 inch WI-FI front and back

The 2018 iPad Pros are a step above everything else Apple has released in the iOS lineup for several reasons. The speakers are amazing, the display is the clearest and brightest yet, and the USB-C Port allows the use of some amazing external devices. The drawback is that you will no longer have a lightning port, so your old cables will not work. While this is an issue, it is worth noting that the new iPads allow the user to utilize any USB device through the USB-C Port. This article will hopefully give you some ideas on how to get the most out of your new iPad’s USB-C port by listing a few accessories and how they improve the device beyond the capabilities of older iPads, and even current iPhones.

Apple USB-C to USB-A Dongle

USB-C to USB-A cable from Apple

The USB-C to USB-A dongle from Apple is the best accessory for the iPad. It gives you a full USB-A port on your iPad Pro. With this little accessory, you can hook up microphones, hard drives, printers and much more to your iPad. You will need to make sure the device is working when you connect it, and some devices like hard drives may need another app installed so that you can see all of your files.

Cable Price: $19.00

Apple USB-C to Lightning Cable

USB-C to Lightning Cable From Apple

This cable allows you to charge lightning powered devices with your iPad Pro. This includes AirPods, and even the iPhone. I have tested this with the AirPods, and it will charge the headset without any problems.

Cable Price: $25.00

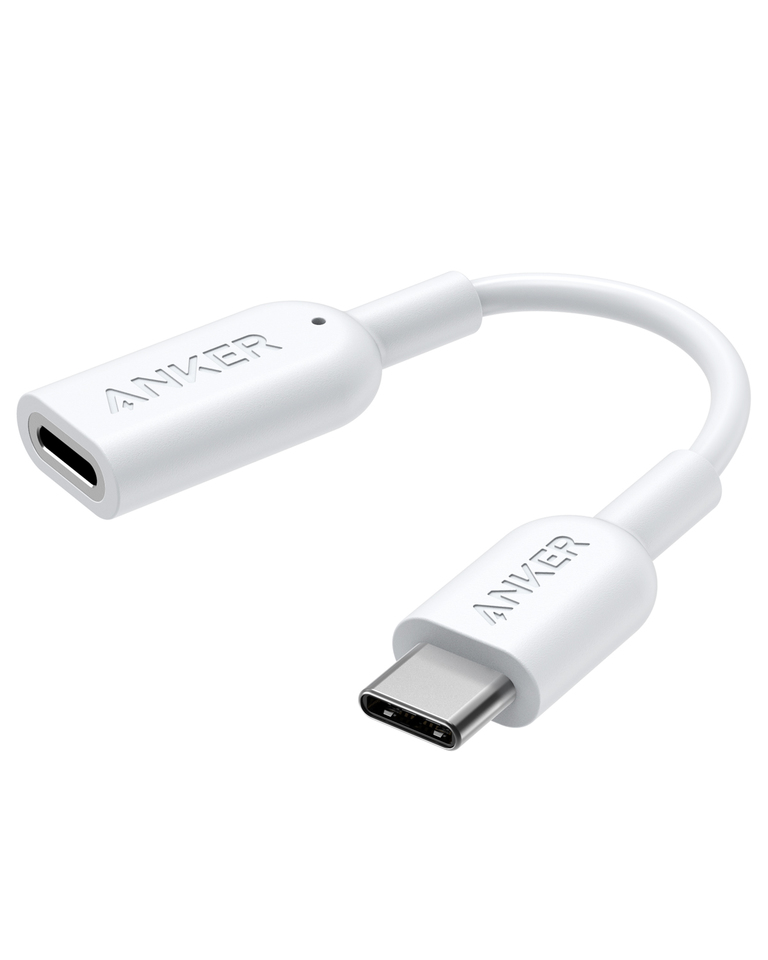
USB-C to 3.5mm Audio Dongle

USB-C to Headphone Adapter from Apple

The iPad Pro does not have a headphone jack, so you will need to purchase a dongle if you would like to use regular headphones on your iPad Pro

Cable Price: $9.00

Conclusion

The iPad Pros from 2018 are amazing devices that let their users add all kinds of new functionality. There are a few drawbacks which include the lack of a headphone jack and the loss of the lightning port, but the use of USB-C allows some amazing devices to now work with the iPad Pro.

2018 iA Team Devices

iA Logo for 2018

2018 Team Picks

It is that time again, the time when the iA Team gets together to tell you about our favorite devices we have bought this year. Each team member will post their favorite and tell you why it is their choice. It’s time to sit back, relax, and take a look at the best devices 2018 had to offer, at least in our opinion. Let us know your thoughts in the comments.

Michael: HomePod

This year, my favorite device has to be the HomePod. It is by far the best sounding smart speaker out there, and, while Siri isn’t very smart, the speaker is able to produce the best sound around. The thing that has made the HomePod even better is the addition of Shortcuts. It is nice to be able to check on our server statistics by just saying Server Statistics to Siri. The disadvantages are that the device is expensive at $350, and that Siri is not the smartest of assistants.

Jason: Sennheiser Ambeo Smart Headset

This headset, designed in partnership with Apogee, will take your recording game to the next level. With its ability to capture binaural or 3D audio, coupled with its ease of use, I would be hard pressed to find a better pick for 2018, and that’s not even everything it can do.

If you listen to music or other audio, you can enable active noise cancelation. The headset uses the microphones on each earpiece to perform the cancelation. Plus, you can use them to hear your environment in realtime. The headset sounds great for pretty much everything you can throw at it, and if you play back binaural recordings with it, you might feel as though you’ve been transported to the location where the recording took place.

The Ambeo is meant to be used with iOS devices, and the cable terminates with a lightning connecter. This makes it possible for the headset to perform all of these functions without the use of batteries. There is a microphone on the right cable for taking calls and talking to Siri, but I find it’s better to use another headset for calls because everyone tells me I’m hard to hear when I use it. You can set the volume level of your environment using a rocker at the bottom of the controller. You can play/pause and perform call functions by using the volume and multi-function buttons above the rocker. The top of the controller has a slider switch that can be set up to perform a wide array of functions if you install the Smart Headset app. You can also choose different EQ presets and update the headset’s firmware, and that’s just a couple of things the app lets you adjust.

You can purchase the Ambeo Smart Headset for around $300.00 US from retailers such as Amazon and the Apple store.

A USB C version of the Ambeo has been announced, but is not yet available at the time of this writing.

I’ve been enjoying mine sense the day I got it, and encourage anyone who owns an iOS device and wants a great sounding headset that can make 3D audio recordings to give the Ambeos a look.

Matt: Amazon Echo Dot 3rd Generation

Late this year, Amazon released another echo dot, which is a bit bigger, not only in size, but in sound as well. The new generation echo dot has fabric around the edges, instead of plastic like the previous generation.
It also has a 75% increase in volume and very decent sound for under $50.
The 3rd generation echo dot is $49.99 in the U.S. and $79 in Canada.
About a year or so ago I bought (and then sold) the second generation echo dot, but its sound quality was definitely not as good as this particular speaker. At volume 5, the second generation dot was very quiet, and at volume 10 it was maybe the level of volume 5 or so of the new dot. When I had the second generation dot, I constantly had it connected to a bluetooth speaker, because it didn’t have a good sound. I have not connected this new Echo to my Bose SoundLink Mini II. The audio isn’t as good as, say, the Sonos1 or Homepod, but it gets the job done.
This is my favorite echo device that I’ve owned. It’s small, compact, has great sound, and Alexa works incredibly well and seems to understand me about 50% more so than she did before. For the price, you can’t go wrong!

Scott: Widex Evoke Hearing Aids

My pick for 2018 is the Widex Evoke hearing aids. The latest technology from Widex features MFI connectivity allowing users to connect iDevices via Bluetooth. The advanced chips in these aids allow them to learn from the environment the user is listening to and adapt on the fly. The Evoke app for iPhone allows for even finer adjustments and is usable for the most part with voiceover, and the company seems to be responsive to user feedback and feature suggestions.

While the company does have a device to stream TV audio to these hearing aids, I wish they had the ability to connect to other Bluetooth devices as well. I also wish they came with rechargeable batteries like other hearing aid manufacturers have. For the money, roughly $8,800.00 for a pair, it’s still a good investment in some of the latest hearing aid technology on the market today, and it’s a big step of from previous hearing aids I’ve had from Widex. I would recommend people check them out as a viable option in hearing care.

Meaghan: iPhone XS

My pick for 2018 is Apple’s iPhone XS that was released in October. It is the same size as the older plus phones and it works very well. I can get about 14 to 17 hours of use before needing to charge up the battery. I like it for its speed and ability to keep up with what I am doing on a day to day basis, tasks my 7 was a bit slower with.

I also like face ID and the edge to edge display. Not that the display matters to me being totally blind, but you really don’t realize how much more text can fit on a page until you use one. The speakers are also a lot better than the 7. It kind of sounds like my 6th generation iPad.

It is one of the most superior phones out there and if you can afford it, I suggest getting it.

Jeff: Freestyle Libre Continuous Glucose Monitoring System

One of the most difficult issues for managing diabetes as a blind person is testing glucose levels and testing accurately. Many blind individuals such as myself find testing using finger sticks to be very problematic. Many times blood may smear or not make its way into the strip for an accurate test. This is why this year is truly an amazing year for those who are diabetic and who are blind. We finally have a way of testing that no longer requires finger sticks and is fully accessible! The Freestyle Libre monitoring system along with its accompanying Libre Link iOS app will provide a painless and delightful experience for managing diabetes. The Freestyle Libre system consists of a sensor that is injected into the back of the upper arm. This process is accessible and easy to accomplish with the provided applicator device. Sensors come in two types, a 10-day sensor and a 14-day sensor. I would encourage you to obtain the 14-day sensors as they last longer and setup time is one hour versus 12 hours for the 10-day sensors. The Libre Link app is accessible and will guide you through the process of activating the sensor. Once activated you can test as often as you would like. I feel strongly that this is one of the greatest inventions in the health industry for the blind and is truly life changing. Yes, we can do more for accessible meters and we shouldn’t stop advocating for this but this new combination for testing is something that will truly impact individuals lives in managing their diabetes.

Chelsea: AirPods

Until I discovered AirPods, I thought that all headphones/earbuds had to have a chord to be of any auditory value. This is why, before AirPods, I had not really taken the plunge and purchased any other Bluetooth headsets. On a spring day in April, I did just that.

The airPods connect to the iPhone via Bluetooth and are truly a game changer. While they are not the highest quality, they work for recording podcast and performing other tasks. I especially think they are a great fit for a Voiceover user because they can be used individually which maximizes battery life and minimizes the need to charge them constantly. As a teacher of blind students, I am always on the go and am in need of my phone. With AirPods, I can use my phone with audio and be discrete while doing so. The high value device is only $160.00 and has been well worth every penny.

Lauren: Disney’s Handheld Device

One of the most impactful pieces of technology that I have interacted with is Disney’s Handheld Device, which provides closed captioning, enhanced audio, or audio description.  Depending on the user’s need, guest services cast members can configure the device to best meet the needs of the user in question.  Upon acquiring the device, the user must put down a $25 deposit, which is fully refundable, provided that you return the equipment at the end of the day.

As a blind User, I relied on the audio description features.  I used this device in EPCOT.  It vibrated each time I went into a different country in the World Showcase and as I traveled through the various sections of Future World. On entering each area, I could use the device to learn what restaurants, rides, shopping, and entertainment opportunities were available to me.  The device also described the location of restrooms.  Probably one of the most fascinating features of the device is the audio description.  The device provided a description of each area of EPCOT, and I was truly amazed to know how much effort was put forth to replicate the hallmarks of different countries, and features specific to EPCOT itself.  The device also provided descriptions of the cue lines for the attractions with audio description, great entertainment for those long lines.

While the device made my experience that much more memorable, I do feel that there should be audio descriptions for more attractions, and that the descriptions should be more detailed.  I felt like I was still missing out on some of the visuals accompanying the rides.  For example, the device does not tell the listener that the characters are animatronic and almost human.  I think it is important for blind guests to know this information because anamitronics are staples in Disney’s parks and movies.

Aleeha – Apple Watch Series 4

Apple released the latest iteration of its smart watch, the Apple Watch series 4, in the last part of 2018. This watch brought many new features and better functionality to the device, including enhanced sensors for detecting heart abnormalities, drastically faster performance, and a slightly bigger display (40 and 44 MM models.) I upgraded from the Series 2 and immediately noticed a drastic performance boost. VoiceOver runs so smoothly on the watch that it’s almost like using it on the phone. The new haptic feedback of the Digital Crown allows a more tactile experience, even while using VoiceOver. I am very happy with this purchase, and think this is a template for even better watches to come.

Back to Top