Best Device of 2016 – Michael Doise

Apple AirPods in charging case

The year of 2016 has given us several new and exciting devices, and our authors here at iAccessibility will be writing about what they feel is their favorites, but I will start everything off with my favorite, which is…

The Apple AirPods!!!

When Apple released their new phone in September, they promised the release in October for their wireless earbuds, but they had to delay the launch due to issues with the device. In December, Apple released the AirPods, and they did not disappoint in what they promised.

I managed to pick up the AirPods from Best Buy while they were available online, and they were delivered two days later. Until this point, I have typically used EarPods and other bluetooth headphones like the Aftershokz Trekz and for a short time, the Beats PowerBeats3, but I have since retired and returned each of these as the AirPods have changed the way I listen to audio on a daily basis. I even use the AirPods on the Mac to record podcasts. I use the AirPods for output and my regular mic for audio input

Conclusion

While the AirPods may not be perfect and for everyone, they are my favorite device for 2016, and I recommend them to all that want a wireless audio solution that is clear and that allows for listening to audio while traveling in a noisy city where you have to know where you are going.

Is the BrailleNote Touch the Notetaker of the Future?

BrailleNote Touch with Google on the screen.

The English Braille code allows for people to read and communicate at the same speed as someone who reads and writes in print. Braille Notetakers allow Braille literate users to complete tasks with speech and Braille. Humanware, a company that makes a few of these Braille notetakers has released a new product called the BrailleNote Touch, which is the latest model of notetaker in their line. I have had the chance to work with one of these notetakers, and here is what I have found. By the end of this review, you can decide if this device is right for your situation, or if you should look elsewhere for Braille support with technology.

What is the BrailleNote Touch

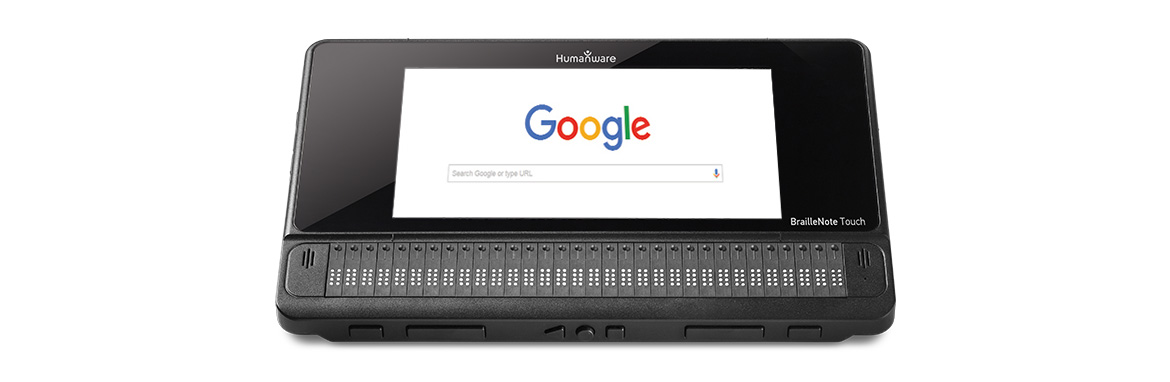
The BrailleNote Touch is a Braille notetaker made by Humanware. It allows the user to write documents, store contacts, read emails and much more.

Device Details

Software

Unlike the previous versions of the Notetaker, the BrailleNote Touch runs Android version 4.4 Kitkat, with the full suite of Google apps to allow for Google Play support. This allows for the use of the Google Play store to install apps third party Android apps. Humanware built their suite of apps known as KeySoft on top of the Android operating system to allow for the use of their proprietary apps like KeyWord, KeyMail, and KeyList. KeySoft also offers a new input method called TouchBraille that allows for users to touch the screen with their fingers to type in text fields and other areas. These finger combinations are in the format of Braille characters, and the user can quickly enter text with this method.

Hardware

The BrailleNote Touch appears to look like other Braille Notetakers, but it has several differences. The BrailleNote Touch has three new physical buttons on the front to make the device comply with Google Android Standards. These buttons are Back, Home, and Recent Apps. While these buttons are different, you will also find familiar buttons, like the previous and next thumb buttons, and the buttons used to scroll the Braille display to the right and to the left. On the left side, you will find the Lock button and the volume up and down buttons. There is also a Micro USB charge port on that side as well. On the right, you will find the headphone jack to plug in headphones or speakers. If you are new to the BrailleNote Touch, you will notice that the device has a lip on the left side that is part of the Braille keyboard. If you lift this you will find a touch screen, where you can use TouchBraille to enter text. This screen belongs to the same technologies that Android manufacturers use to make tablets. This is because the BrailleNote Touch is essentially a tablet with a Braille display attached. You can remove the actual BrailleNote Touch from its case by holding both switches at the bottom of the device and by lifting the device out of the case. This process can also be done on the device to remove the battery.

Using the BrailleNote Touch

As mentioned earlier, the BrailleNote Touch uses Humanware’s proprietary software Keysoft which is built on top of Android 4.4. When you boot the BrailleNote Touch for the first time, you will see setup/tutorial. You will be asked to set items like the time and date, the WI-FI, Braille translation tables and much more. Simply use the previous and next thumb buttons to move between items, and you can select by using dot 8 (Enter), or a cursor routing key.

Once you get to the Main Menu, you can navigate with first letter navigation, or by using the previous and next buttons. Once you find the option you would like you can press a cursor routing button, or use the enter key. If the app you are looking for is not listed then you will need to find the all applications option and select it. All previously mentioned navigation commands work in this menu as well. I have found that you can quickly move through KeySoft Menus, but you can quickly get ahead of the speech if you are a fast user, so it may be a good idea to speed up the speech on the BrailleNote Touch as it requires the current item that is being read to finish before it can move on to the next.

A common task that someone might do with this device is word processing with KeyWord. You can find this in the main menu of KeySoft. In KeyWord, you will find commands like Create and Open. One difference in this device is that you save your documents before you give them a name, so once you create your document, you will need to type out what you would like and then save the document. I personally think that each task in creating opening and saving documents has a lot of steps but they do seem to be very similar to these programs in previous versions of the notetaker.

Using Email with KeyMail

Email is a huge part of a person’s daily life, and the BrailleNote Touch allows for several different account types for email, and you are even able to set up multiple email accounts on the same device. Once you have your email set up, you can find options for new message, read messages and more in the KeyMail menu. You will also see an option for Change Account here if you have multiple email accounts. It is very important that you know which email account you are set to so you don’t send email from another user’s account. While the setup process for email is easy, there can be other problems that can arise. While I was using the device, I attempted to set up two email accounts using Exchange. I determined that I needed to update the security on the device, but the machine would crash KeyMail when I would try to change between accounts. Once I had the machine encrypted, which took two attempts and a system wipe, I was able to change between email addresses seamlessly.

Changing settings on the BrailleNote Touch is just as easy as changing settings on an Android device. This is because the settings for the BrailleNote are basically the Android Settings app. If you need assistance making changes to your settings that you do not understand, you can turn accessibility off by pressing the Home button three times and that will exit KeySoft. At this point, you can lift the keyboard cover, and the other person with you can use the device as if it was any Android Tablet. Once they are done, you can simply press the Home button 3 times, and it will activate KeySoft again. I personally found that this makes changing settings easy as they are all in a central place on the device.

TouchBraille

TouchBraille is a new and revolutionary Braille typing feature that comes on the BrailleNote Touch. While in a document or text field, you can type Braille as if you were using a Braille keyboard. To calibrate TouchBraille, place all 10 fingers on the screen at the same time. It helps if you put them in the pattern of entering Braille. A good guide to use is to line your fingers up with the Braille Keyboard that is included, and then just move your hands to the screen. If done correctly, the BrailleNote Touch will make a quick vibration to let you know it is calibrated. If the process did not work, then it will make a longer vibration. Once calibrated, you can quickly type on the screen using your fingers. I have found that TouchBraille is very fast and allows for quick input if and only if you are good at using your fingers with a touch screen. This ode requires that you be able to press Braille symbols with both hands, which means some fingers will be up and some will be down on the screen, so good finger dexterity is required.

KeySOft Version 2

KeySoft, the main software system for the BrailleNote Touch has just been updated to version 2.0 with all new features. You can now use KNFB Reader to read printed documents and these documents can also be saved as plain text for editing at a later time. You will also see a new option for Braille Terminal, which lets you use your BrailleNote Touch as a Braille display for a Mac, PC or SmartPhone.

Conclusion

While the BrailleNote Touch does add many new features to the successful line of BrailleNote devices from Humanware, it does have its own limitations. There is a noticeable speed problem when entering edit fields and when navigating menus. This mainly effects fast users, but beginners will not notice this issue for the most part. The BrailleNote Touch is really a good device for those who are in school, or for those who are used to using Braille as their primary method for taking notes and for communication. If you are familiar with a PC or if you use a smartphone effectively, then this item will only slow you down as completing simple tasks do take longer with more prompts that must be read before you can move on to the next item if you are using speech. Braille does appear to work a bit faster, but you will still notice speed issues with this version of the BrailleNote Touch. Another item to consider when deciding to get a new device is the price. The cheapest BrailleNote Touch starts at $3,995 for the 18 cell display model, and $5,495 for the 32 cell, so purchasing one of these devices is quite an investment.

Quick Tip: Enable Bash Shell in Windows 10

A picture of the Windows Logo

Windows has made huge advancements in innovation since the release of Windows 10, and this continues with the Anniversary update. A great feature that was added with this update was the ability to install the Bash Shell to use with Windows instead of the standard Windows command prompt.

The Bash Shell is a common command line interface for users to complete tasks on Linux. It is completely text based, and it offers color coding of folders and files. Tasks are completed by typing in commands instead of using the mouse to find and activate items.

Setting up Bash on Windows 10

  1. Open the Settings app
  2. Find Updates and Security
  3. Find the option that says, “For Developers.”
  4. Enable Developer Mode
  5. You can now close settings
  6. Open Control Panel
  7. Navigate to programs
  8. Activate Turn Windows Features On or Off
  9. Find the check box that says, “Enable Windows Subsystem for Linux.”
  10. Activate OK
  11. When prompted, restart your PC
  12. Once your computer has restarted, Open the command line from the Start Menu, or by typing cmd in the search and press enter.
  13. Once the command line is open, type the word bash and press enter.
  14. Windows will ask you if you would like to install Bash and all you need to do is press y and enter.

The final process will take some time to complete, but will have bash ready to go on your PC once it does.

Dictation Commands for macOS and iOS

Apple Dictation Logo
Dictation for the Mac and for iOS has changed the way we input text on our machines and phones. Because of this, we need to have commands to add punctuation and capital letters. We have searched the web and have compiled a list of these commands here and they work for both macOS and iOS. These will also work in VoiceMail Transcription and apps like Just Press Record

Dictation Commands

  • All Caps – Completely capitalizes the next word.
  • Caps – Capitalize the beginning of the next word.
  • Upper Case [Letter] – make the next letter upper case.
  • Caps On – This turns on Caps Lock.
  • Caps Off – Turn Caps Lock off.
  • No Caps – No capital letters in the current word
  • Numeral [Number] – This types a number instead of the word for that number.
  • New Paragraph – Create a new paragraph.
  • New Line – Create a new line at the current insertion point.
  • No Space – Force dictation to not put a space between the next word.
  • No Space On – Force dictation to not put spaces after words.
  • No Space Off – Start putting spaces after words.

Punctuation and Special Character Commands for macOS and iOS dictation

  • Period
  • Comma
  • Question mark
  • Reverse question mark
  • Hyphen
  • Dash
  • Em Dash
  • Exclamation Point
  • Underscore
  • Open Parenthesis
  • Close Parenthesis
  • Open Square Bracket
  • Close Square Bracket
  • Open Brace
  • Close Brace
  • Colon
  • Semi Colon
  • Ellipsis
  • Quote
  • End Quote
  • Back Quote
  • Single Quote
  • End Single Quote
  • Double-Quote
  • Apostrophe
  • Slash
  • Back Slash
  • Tilde
  • Ampersand
  • Percent Sign
  • Copyright Sign
  • Registered Sign
  • Section Sign
  • Dollar Sign
  • Cent Sign
  • Degree Sign
  • Caret
  • At Sign
  • Pound Starting Sign
  • Yen Sign
  • Euro Sign
  • Pound Sign
  • Smily Face or Smiley
  • Frowny Face, Frown or Sad Face
  • Winky face or winky

Have we missed any commands or other things to say? Please leave us a comment if you know of commands that are not listed here.

Joining the Windows 10 Insider Preview

A picture of the Windows Logo

Like macOS X, Microsoft offers a Windows beta test program called the Insider Preview program. In a previous episode of the iA Cast we promised a post on how to join this program and here it is.

An important thing to note is that Windows Insider builds are beta versions, and may contain bugs and problems. These builds may even cause your computer to not work properly and I even had to reinstall my graphics card drivers in the latest build to make Magnifier and games work correctly, so installing the Insider Preview will be something you do at your own risk, but they do offer slower upgrade rings so that you get more stable builds which should not have as many problems. For extra stability, a good idea is to set up a restore point on your machine before starting this process

Installing Insider Preview in Windows 10

  1. Join the insider program at the Microsoft’s Windows Insider website
  2. Read the agreement and join the program on the website.
  3. You will need to use your Microsoft account here to join the program.
  4. Back up all important files.
  5. In Windows 10, Open Settings app.
  6. Click updates and Security.
  7. Select Windows Update
  8. Select Advanced Options.
  9. Find the section for Get Insider Builds and select Get Started
  10. Read the disclaimer and go through the prompts.
  11. Restart your computer.
  12. Once your computer restarts, you should go back to the screen for the Insider Preview Builds and select your ring. The ring is for how often you will get Insider builds. the longer the amount of time between builds will allow for the builds to be more stable.

The Insider Preview are as follows;

  • Release Preview – Insider builds for the most stable versions of software and drivers.
  • Slow – Builds that contain minimal risk to applications and services on devices.
  • Fast – Builds that are for those who enjoy being the first to test new software features. These builds can contain bugs and other issues that may effect your system.

By default, all users are signed up for the Release Preview ring but this can be changed at any time. Once you sign up for the Insider program it will take some time for Windows Update to download the Insider build.

Returning to Stable Windows

It is simple to return back to the stable version of Windows 10 if you decide to opt-out of the Insider Preview program

  1. Return to Settings then Updates and Security.
  2. Find Windows Update and select Advanced Options.
  3. There should be an option here that says, “Stop Insider Builds.”
  4. A popup window will appear to turn off insider builds for a certain amount of time.
  5. There will also be an option to stop receiving Insider builds to just stay on the stable version of Windows 10.

If for some reason this process does not work then this would be the time to use the restore point that you created before starting the Insider Preview program.

Conclusion

Microsoft’s Windows Insider Preview program lets users see and test the new features that are coming in future versions of Windows. With the future release of the Windows Creators update, Microsoft has provided testers with an opportunity to shape the future of Windows and improve each update to make the OS more stable and enjoyable.

Guide: Pairing with W1 Enabled Headphones

Side of the PowerBeats 3 with W1 Chip

Apple this year removed the headphone Jack from the iPhone 7 which demanded a change in wireless technologies for bluetooth users. To help in this, Apple created the W1 Chip which currently is on the Beats headphones and will soon be on the Apple AirPods. One advantage is that W1 enabled headphones will pair with all of your Apple devices using iCloud. In this Guide we will look at the ways you can quickly pair these headphones with all of your devices.

Initial Pairing

To pair your W1 enabled device with an iPhone for first time use is simple. Just have the devices on and near your each other. The iPhone will prompt you to unlock the device with touch ID and then tap a button on the screen to pair it with the headphones. I did this process on my iPhone 7 Plus but it will work the same on any other iPhone or iPad.

Connecting to W1 device with iOS

If you have connected to your device from your watch, Mac, or with any other iOS device then you will need to tell your current device to reconnect to the bluetooth device with the W1 chip. Here is how this works.

  1. From your home screen open Settings.
  2. Find Bluetooth on the main settings screen.
  3. Tap on your headset and it should connect.

Connecting with Apple Watch

As we discussed previously, the W1 enabled devices will pair to all of your Apple devices, and this includes the Apple Watch. This is an easy way to connect an audio device that lets an Apple Watch user privately use VoiceOver. Here is how to connect your headset to Apple Watch.

  1. Slide up from the bottom of the screen with one finger, or swipe up with two fingers if you are running VoiceOver. You will need to be at your watch face to do this. If done correctly, you will have brought up Control Center.
  2. Find the AirPlay icon and tap or double tap on it.
  3. When asked, tap or double tap on the name of your headset. This will connect your headset to your watch and all sound from your watch will go through the headset.

Connecting with the Mac

Connecting to a W1 headset on the Mac allows you to use the headset on your Mac for all sound output. Here is how you connect the two.

  1. Find your Menu extras in the top right of the screen or by using VO+M+M
  2. Find the option for Bluetooth and expand the menu.
  3. Find your headset and bring up the sub-menu
  4. Select Connect to connect your headset to your computer.

Conclusion

Apple has really improved the use of Bluetooth technologies with this new W1 chip, which they plan to use in their upcoming AirPods. The addition of the W1 chip allows for users to easily pair and connect to all of their devices without a long process of pairing and impairing devices.

Accessible Gaming: Mac Vs Windows

Apple Zoom Logo

Gaming has been a huge portion of technology since the 1980s, and there has really not been a focus on if low vision gamers could play video games or read text. Now, with built in magnification between operating systems low vision users can finally customize their systems so that text can be read and games can be played, but what OS provides the best experience for gamers who use magnification.

Windows Magnification

Windows Magnifier has greatly improved over the last few versions of Windows and keeps getting better in Windows 10. You can now magnify in full screen on the Windows Desktop, and in some graphical applications. This will also work while in games, but it will not work in many games that run in full screen. If Magnifier is open and zoomed in while games are open then many games will not function properly.

MacOS Magnification

Zoom on the Mac has been on the Mac for around 10 years and has not had the need to change in that time. Zoom has been the first Desktop magnification solution to allow for full screen and lens style magnification, and it works well in desktop applications and in graphical apps. The really impressive feature of Zoom is that it will work within games that run on the same resolution as the Mac with very minimal effects to performance.

Conclusion

While I prefer the gaming experience that is provided on the Mac, there are still more games available on Windows than there are on the Mac, so the choice of which OS to use as a primary gaming platform will still have to be Windows for the choice of games. The good aspect that Steam provides is that you can buy games from Steam and get the game for both Windows and MacOS.

Sling’s Accessibility should be in a Sling.

The Sling icon

Sling TV is an online cable service that brings cable TV channels to your smartphone, tablet, and computer. While Sling TV brings much to the table like affordable plans and a 7 day free trial, their accessibility and app features have much to be improved upon. Lets take a look at both of these things.

Sling Accessibility

Sling TV allows for users to sign up and sign in to the app, but the accessibility stops there for the most part. While users can find the menu and guide, a user can not browse the channel listings that are in the app. Visually, the channel listings are in a scrollable control that slides left and right and once an option appears in the middle of the screen then that channel’s listings appear. This functionality does not work with VoiceOver, and the schedules will also only tell the times that something is to be shown. The show title only appears as an image with no alt text included.

Sling TV App Features

While iOS has moved on the Sling TV app has not. While using the Sling app on iPad I noticed that they do not support Picture in Picture support at this time, and the interface is still that of an iOS 7 app that does not scale with size classes as most modern apps do.

Conclusion

While Sling TV provides a great online based cable TV experience, it still lacks features that other services provide, and VoiceOver users will find that the app lacks the accessibility required for everyday use. As a low vision user I plan to continue my subscription after my trial, but milage will vary when this app is concerned. Hopefully support for accessibility and feature sets will improve when single sign on and the TV app are released to the public because they both support Sling TV.

VO Starter 3.0 Public Beta

VO Starter App Icon

iAccessibility is proud to announce that VO Starter 3.0 is now in the Beta phase of development. As such, we are offering the opportunity for a public beta test through TestFlight. If you are interested, please fill out the form below and you will receive a TestFlight invite in your email. We will remove the form if or when we run out of testing slots. We hope you enjoy the app.

First Look: 13 Inch 2016 MacBook Pro without Touch Bar

image of MacBook Pro 2016 from iMore.com

Last week I had the chance to check out the 2016 MacBook Pro that is 13 inch without the new Touch Bar, and my thoughts on this machine are mixed. Here is what I observed.

Chasis

The 2016 MacBook Pros come in what feels like a new type of anodized aluminum unibody case. This case does feel stronger and more smooth than other models, and the Space Gray does look nice for a MacBook Pro.

Display

The new display on the MacBook Pro  is noticeably brighter, and thinner. It is so think that they removed the backlit Apple Logo to make the display thinner, which is not my favorite decision as the light up Apple logo is iconic to Apple’s product line.

Trackpad

The new trackpad on the 2016 MacBook Pro is considerably bigger than previous models. This allows for the user to have more working area to use for the ouse. One thing I noticed is that this makes there be less of a hand rest for proper typing, so one could not easily rest their hands on the MacBook without accidentally moving the mouse if a finger or palm hit the trackpad.

Keyboard

Apple has changed their laptop lines to use a new keyboard that uses better key design and prevents typical keys from breaking. These keys are flatter, and do not have as much key travel as previous keyboards. If you are familiar with the 12 inch MacBook then you will be familiar with this keyboard. I personally do not like the amount of travel the keys have, so I find it difficult to type on this keyboard. The keys do have slightly more travel then the MacBook, but they still do not have the amount of travel that comes on the 2015 MacBook Pro, which can be an issue for some. Many are able to adapt to these keys but many including myself prefer the previous keyboard style.

Ports

The 13 inch MacBook Pro without the Touch Bar comes with 2 USB-C/Thunderbolt 3 ports on the left side, and a headphone jack on the right. These ports are incredibly fast and powerful, but they are actually difficult to feel on the side of the machine to line up the device you are plugging in. This allows the machine to be thinner, but this may be an issue for users with low feeling in the fingers. With this model of the Pro, we also see the removal of the MagSafe charging port. On this model of the computer, one charges the machine by plugging the charger into any of the new USB-C ports. This now adds the risk of tripping over cables and pulling your computer off of whatever surface it is resting on.

Conclusion

The 2016 MacBook Pro strives to take us into the future with new display, keyboard, and connectivity technologies, but to do so, Apple has had to make sacrifices that remove features that users are used to having like standard USB ports, and a keyboard with more travel. In a few years we will not notice these changes and we will just accept them as standards, but until then it will be a rocky transition with a lot of cables hanging off of our MacBooks.

VoiceOver at the Bar

image of MacBook Pro 2016 from iMore.com

This week Apple introduced all new MacBook Pro laptops with an AMOLED Touch Bar, which replaces the function keys. Although this changes how users work with the Mac, the Touch Bar allows quick access to tools and controls that may be difficult to find. Not only does the Touch Bar do all of this while keeping standard functionality, but it is completely accessible for all users! Here is how it works with VoiceOver.

How does the Touch Bar work?

The Touch Bar stretches across the top of your keyboard, where the function row would have been located. Items appear based on which app is open. At the right side of the Touch Bar, you will find an all new Touch ID sensor that doubles as a power button for the computer.

Enable and Disable VoiceOver

Without function keys to rely on, Apple had to change some VoiceOver commands. For example, to enable and disable VoiceOver on the new MacBooks, hold the command key and tap the Touch ID sensor three times. This may seem familiar, because it’s similar to how iOS users toggle accessibility features.

Using the Touch Bar with VoiceOver

If you’ve ever used VoiceOver on an iPhone, iPad, or Apple Watch, you will feel right at home using the Touch Bar on the new MacBooks. VoiceOver will read out any item under your finger, or you can flick left or right to move through elements. Then, simply double tap to activate an option.

Using Traditional VoiceOver Function Key Commands

If you miss your traditional function keys, do not worry. You can still get to them. When the function key is held down, the Touch Bar reverts to a row of function keys for you to select. However, VoiceOver commands that rely on function keys are easily performed by holding down the function key with the keystroke you usually use. The only difference is you will use the number row as function keys. For example, VO+F2 would be Function+Control+Option+2.

Slider Controls

At this point, you may wonder how you’ll adjust controls, such as brightness or volume. Never fear, Apple has you covered once again. To use a slider control, setVoiceOver focus to the slider, and double tap and hold until you hear three rising tones. At this point, you can move your finger left or right to adjust the value. Once you are done, simply remove your finger to set the value. Alternatively, VoiceOver users can adjust system volume using the keyboard. Press Control+Option+- to lower system volume, or Control+Option+= to raise it.

The VoiceOver Cursor

VoiceOver provides a visual cursor to show what is selected. When working on a Mac that has the new Touch Bar, you will have two VoiceOver cursors. One is located on the Touch Bar, while the other is on screen. This means when you switch from using the keyboard to using the Touch Bar, you will not lose your place.

Conclusion

Yes, Apple’s new Touch Bar allows for quick access to controls and other items, but it is not just for sighted users. Apple’s commitment to accessibility has been clearly demonstrated in the usability of the Touch Bar for everyone, including those who rely on VoiceOver. So, if you were concerned about the usefulness of the Touch Bar, we hope this information puts you at ease!

Quick Tip: How To Enable VoiceOver Using The Touch Bar

image of MacBook Pro 2016 from iMore.com

The MacBook Pro’s new Touch Bar has changed the way users interact with their Macs. The Touch bar removes the traditional row of function keys for a customizable touch bar that can have different options based on which app is active. While this changes the way we use the Mac it still allows for VoiceOver users to still be productive users of the MacBook Pro. While the function keys are changed on this machine, you can still enable VoiceOver with a similar method to the iPhone. Here is how it works.

Enable/Disable VoiceOver with Touch ID

  1. Hold the Command Key
  2. While holding Command, tap the Touch ID sensor or the Power button three times

This method is a very simple way to enable and disable VoiceOver on the Mac which closely resembles how iPhone and iPad users enable and disable accessibility features.

Back to Top