iAccessibility’s top devices of 2016

iAccessibility Logo

Many of our staff members wrote articles about their favorite device of 2016. In this post we are going to give you a link to each of them.

  • Michael Doise’s post about AirPods.
    The first post was from Michael Doise. He talked about Apples brand new
    AirPods.
  • My Favorite Device Of 2016 Bose QC35’s
    Rich posted the next post, talking about some cool new headphones from Bose.
  • My Pick For Best Tech of 2016? Beats Solo 3
    Next up, Jason wrote a post about the Beats Solo 3 headphones. The first thing Jason focuses on right off the bat is the battery life of the Beats Solo 3’s. Check out the article for more information.
  • Jessica’s Favorite Device of 2016!
    Jessica wrote this really interesting post about the Ring Video Doorbell Pro If you’re looking for a security camera for your home or apartment, you might be interested in this post.
  • Ashley’s fav device of 2016
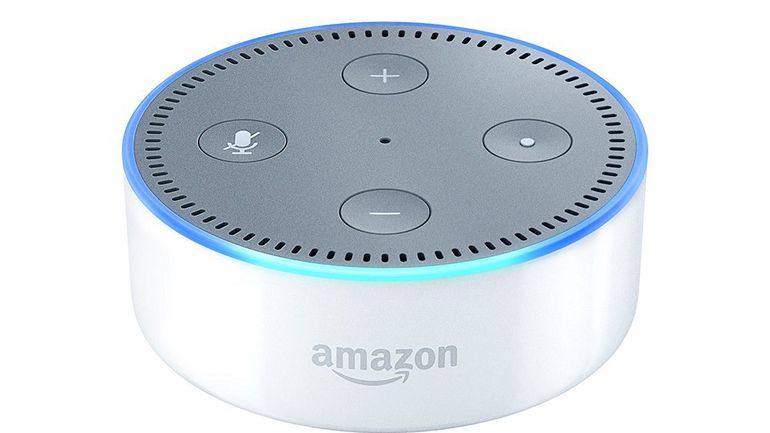
    I, Ashley, wrote about the Amazon Echo Dot. I received my Dot at the end of 2016 so I had a short time to explore the Dots capabilities before I published my post. I suggested some great Alexa skills in my post.
  • Carlos’s Favorite Device of 2016
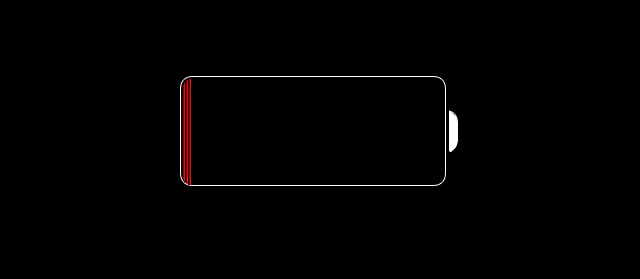
    Carlos wrote about the Smart Battery Case from Apple that originally came out for the iPhone 6s in 2015, but was then updated in 2016 to work with the iPhone 7
  • Matt’s favorite Device of 2016 iPhone SE
    Matt decided that the iPhone SE was his favorite device for 2016. Read his article to find out more and why he picked this phone as his favorite.

Witch of these devices is your top pick? Let us know in the comments.

Ashley’s fav device of 2016

Echo Dot Second Generation White

2016 was a great year for technology. One of the things I am excited about is the Amazon Echo Dot. I received the Dot at the end of the year and have come to love the Dot as soon as I started explore some of its capabilities.

Design

The Amazon Echo Dot is a smaller version of the Amazon Echo. The Dot is its own speaker. It can hear you from a good distance away with the seven microphones places in the Dot. You can use the Dot as a Bluetooth speaker for your phone or tablet. You can also connect powerful speakers to the Dot via Bluetooth or the 3.5 MM jack.

Skills

With the Dot, you have access to many skills. To find skills that you are interested in, check out the skills section of the Alexa app.

Some of my favorite skills in no particular order are:

  • Ocean Sounds: This skill will play ocean sounds for a limited period of time. There are two similar skills that are a big favorite, thunder sounds and rain sounds.
  • Bed Time Story: Ask Alexa to open Bed Time story and tell her your name and be put to sleep, or not!
  • Dominos: Yes, go ahead and order up some pizza. Dominos has a skill for Alexa.

I hope with this short post you have learned a little about the Amazon Echo Dot . The Dot is a great buy if you want a portable device that is able to control devices in your home; for example, lights, switches and more.

Is AirPlay from Windows Really Possible?

AirPlay icon consists of a rectangle like a screen with a triangle at the bottom pointing up.

I have had many opportunities to AirPlay things from my phone or my iPad to one of my friends Apple TV’s. I think it is a great experience to use other speakers to play a song you like or use a bigger screen to play a video on.

I know that many Mac users can AirPlay from their computer, but I never thought it was possible to AirPlay from Windows; however, recently I was visiting with some friends and I was looking through iTunes for a song and decided to listen to some music. I wanted to find out who the artist was and tripped over a button that said, “AirPlay,” and honestly, I wasn’t expecting to find the AirPlay button in iTunes for Windows.

I decided to see what options I would get if I clicked on the AirPlay button and, you have it. My screen reader showed me a list of Apple TV’s I could stream to. Being the person I am, I doubted that it would actually stream to one of the TV’s, and if it did it would still my speech as well, but I was really surprised by what I heard. Yes, the music did play. Yes, it sounded really good coming from the Apple TV, and no, it didn’t steal my speech.

Are you wondering how to AirPlay from your iTunes on Windows? Follow these quick steps, and you’ll be jamming out in no time.

  1. Make sure that the computer and the device you want to use is connected to the same Wi-Fi network.
  2. Open iTunes on your computer and start playing music.
  3. When you tab through the iTunes window, you should see the volume, and the next button to the right is the AirPlay button.
  4. Activate the AirPlay button. You will now see a list of available devices. Keep in mind that your computer will be the first option in the list.
  5. Put your cursor on the device of your choice and press enter. It will take a few seconds for the audio to switch but once it does you will be able to adjust the music from your computer.
  6. To return your music back to your computer, repeat steps 3 4 and 5.

I hope everyone checks out the AirPlay options available to you. I will warn you that if you don’t have any available airplay devices, you may not see the AirPlay button on your screen.

Unlock Your Computer With Windows Hello

Windows Hello Logo with text of Windows Hello and Windows 10 logo

These days, we’re always trying to find the most convenient ways to get access to our technology. Some computers come with finger print readers, and most have built in cameras. Microsoft takes full advantage of this with Windows Hello!

With Windows Hello, you can use your face, iris, or fingerprint to access your information on your device. As long as your device has a fingerprint reader or camera that Windows Hello supports. You can also sign in to your computer with Windows Hello companion devices. Some of these devices are specific and can include Microsoft Band and Windows phones.

How to enable Windows Hello

  1. Go to start and select settings.
  2. Go to accounts and then sign in options.
  3. Select Windows Hello.
  4. Select whether you want to add your face, iris o fingerprint. We are going to use fingerprint in this example, but the steps are the same.
  5. Select add another.
  6. Follow the prompts to touch your finger to the print reader. If you are using a screen reader, you may need to use Narrator to hear those prompts.
  7. Once your first print is in the computer, you will be asked to enter a pen. This is another way of verifying yourself if you are not able to use the print you have entered.

Why use Windows Hello?

I have read many articles that say that with the invention of Windows Hello, passwords will become a thing of the past. Windows Hello will also tie in with Windows Passport, making it possible for one person to sign in to their computer without inputting a password or pin number.

I think Windows Hello is a step in the right direction for Microsoft. I hope that more devices will become compatible with this feature.

Quick Tip: Share Apps From the Home Screen

Image showing VO Change app icon with Share 3D Touch Item.

Have you ever wished there was a faster and easier way to share apps with your friends without going to the app store and searching for it? iOS 10 brings you the ability of sharing apps with your friends directly from the home screen.

Here is how it’s done.

  1. Find the app you want to share and 3D touch on it.
  2. Tap the share app button at the end of the list.
  3. The share sheet will appear and you will be able to choose the option you want.

This is a much faster way to share apps. You wont have to spend time looking around in the app store looking for an app you want to share. For people that have phones without 3D touch, or have 3D touch turned off, you will have to go to the app store to share apps.

This feature is only available to devices that support 3D Touch, so you will only have access to this on newer iPhones running iOS 10.

Low Power Mode Explained

Image of black screen with battery icon which is a battery with small glowing red area showing the amount of battery left to represent a time when low power ode is needed.

Have you ever wanted or needed to squeeze more power out of your phone’s battery? Low Power Mode might be the setting you are looking for. Low power mode reduces the amount of power your phone is using until it has at least 80% battery. When low power mode is enabled, it may take some time for some features to work while others will not work at all.

Low Power Mode affects:

  • Hey Siri
  • Email fetch
  • Automatic downloads
  • Some visual effects
  • Background App Refresh
  • location services in apps

How to enable low power mode:

  1. Open settings
  2. Tap battery
  3. Toggle the switch next to Low Power Mode to On

Note: When Low Power Mode is on, the battery percentage icon on your status bar will be yellow.

What I Like About VarioUltra

Image of Vario Ultra 20 cell Braille display on white background.

Are you looking for a Braille display that is lightweight, portable and easy to use? The VarioUltra from BAUM might be what you are looking for. When I think of great Braille displays this one has to be on the top my list. It has many great features, including its own suite of productivity apps.

The display itself:

The VarioUltra is a vary lightweight display. The VarioUltra 20 weighs half a pound and the VarioUltra 40 weighs 1 pound. The keys are shaped in an ergonomic 8-dot keyboard. The keys are curve in such a way so that you can type for hours with no problems. You don’t have to worry about aggravating anyone with the keys because they are very quiet and easy to press.

Let’s talk about the Braille:

The Braille is some of the best I’ve seen. It reminds me of something that has been recently Brailed. I use my VarioUltra on a daily basis and love the way the Braille feels.

Multiple connections:

The VarioUltra was the first Braille display that allows you the connect to five devices at once. You can connect the display to one USB device and four Bluetooth devices at once. What makes it even better is the fact that you can switch between all of your devices with a simple command.

Features:

Here is a brief list of the VarioUltra features:
• Suite of productivity apps, from word processor to PDF reader and more.
• high quality, brushed aluminum construction that looks and feels amazing.
• Crisp refreshable Braille cells that make reading Braille a breeze.

More info:

The VarioUltra 40, with 40 cells costs $3,995.00. While the VarioUltra 20 costs $2,395.00. If you would like to find out more about the VarioUltra, Website.

In closing:

I hope you now understand why I believe the VarioUltra is one of the best displays available. It has many great features including the ability to connect to five different devices, an impressive set of productivity apps, ergonomic keys and much more. I hope you will give the VarioUltra a chance to become your favorite display.

Why Does Bedtime Help with Sleep Schedules?

Image showing the clock icon for iOS. icon is a picture of a clock on back background. Minute Hand is at 2 and hour hand is at 10.

Are you having trouble getting up in the morning? Apple’s new Bedtime feature helps you make sure you go to bed at a time that best suits you. Bedtime lets you set what time you want to go to bed and wake up and the app notifies you when you should go to bed, and the Bedtime specific alerts are a great way to wake up in the morning.

How it works:

The Bedtime feature lets you choose what time you want to get up in the morning and calculates a time that you should go to bed based on information you’ve given it. You can adjust your sleep schedule on a daily basis, or set up a scheduled Bedtime; for example, if you have to wake up at a certain time on week days, you can set it up so that you don’t have to change it unless your schedule changes.

How do I activate Bedtime?

  1. Open the clock app.
  2. Tap on the Bedtime tab in the bottom center of your screen.
  3. Tap on Get Started.
  4. Choose your wake up time and press next.
  5. On the next screen, choose what days of the week you want your alarm to go off, and press next.
  6. Now choose how long you want to sleep and press next.
  7. On this screen, choose when you want to be reminded to go to bed and press next.
  8. Here is where you choose what you want your phone to play to wake you up. Note that these are not your normal alarm sounds.
  9. When you have everything set how you want it, just press save.
  10. You can change your Bedtime and Wake time from the Bedtime tab.
  11. If you need to change your Bedtime settings at any time, press the options button in the top left of your screen.

If you’re looking for something to help you stay on a sleep schedule; the Bedtime feature is for you. Bedtime is an easy to use view website feature that allows you to tell it what time you want to wake up, and it will tell you what time it thinks you should go to bed. Bedtime also sends its data to the Health app so if you want to monitor your sleep pattern, check it out.
If you have questions or experiences with Bedtime that you would like to share, contact us on Twitter @iAccessibility1

These Mail Changes in iOS 10 will Make You Happy

Image showing iOS Mail app icon Mail icon is a white envelope with a blue background.

If, like me, you receive a good deal of email on a daily basis, you may have noticed that there are a few new changes to how you can interact with your messages.

Let’s talk about threads

When I noticed the changes to threading in Mail, I thought I would not like it;. however, now that I’ve adjusted, it makes my life easier. My hope is that this post will give you a better understanding of Mail in iOS 10, and help ease the transition process.


Managing threads in iOS 10 is much easier for VoiceOver users, thanks to the new Custom Rotor Actions feature. There are two ways of handling threads. The first is to tap on the thread to open it. Turn your rotor to messages and start swiping up and down through your thread. You will see the person’s mane and their message. You can interact with that message or the thread with the buttons on the bottom of the screen.
If you prefer the way Mail was handled in iOS 9, find a thread in your inbox, turn your rotor to actions and swipe up to expand thread and once you press that, the thread will expand so that you see each message in a list and you can read them by opening each message individually.

What are filters anyway?

There were times when I’ve wanted to look for a specific message and not known what the subject was, but I knew that it had an attachment that I needed for some reason or another, so I’ve had to go through every one of my emails to find the one I want. I don’t have to do that anymore thanks to filters.

If you want to look for a specific type of email in your inbox, you can use filters. If you choose a filter, your mail app will show you every think that falls in the filter you chose. The filters are, unread, flagged, emails to you, emails that CC’d me, only emails with attachments and mail only from VIP’s.

If you want to filter out mail, open a mailbox, and look in the bottom left corner of your screen. There is a button that says, “filter messages”. When you tap on this button, to the right a button will appear that shows you what filters are automatically applied. Once you tap on this button, all of the filters you can choose from are on the screen. Once you choose the one you want, tap the done button in the top right of your screen.

Once you are done with that filter, look in the bottom left for the filter button and tap it. Once you do that, you will go back to your original mailbox.

Conclusion:

I hope you all take advantage of all the great new features in mail and iOS 10 and don’t forget the ones that were there before. Be sure to check out our other articles related to iOS 10 at at iAccessibility.

Back to Top