Review: Google Allo Accessibility

Image showing the Google Allo icon

Clearly in competition with Apple’s iMessage, and other messaging services, Google recently released Allo – a messaging app for Android and iOS. Most of its features are very similar to iMessage, with a few exceptions.

First of all, as stated above, unlike iMessage, Allo is cross-platform. That means, regardless of whether you’re rocking an iPhone 7 or a samsung Galaxy S7, you will be able to use this app.

Additionally, Google’s assistant is baked right into the app. You can chat with it, play games with it, and more.

Lastly, Google will read messages sent with the service, unlike Apple’s iMessage. Note: There is a way around this, but it involves giving up most of the app’s unique features. Is that a deal-breaker? Well, that would depend on who you ask.

We have already talked about iMessage on iAccessibility, so we know it is accessible. So, how does Google Allo stack up? Is it worth using to communicate with friends? Let’s see.

The setup process is fairly straight forward. Like WhatsApp, Google Allo uses your phone number to create an account. This means you will have difficulty if you wish to message using tablets or other phones. After verifying your phone number, you are prompted to give the app access to your contacts and to send you notifications. Then you take a selfie, and add your name. And that’s it! You are all set up!

Once you’ve completed the setup process, you’ll notice there’s already a thread with Google Assistant. In this thread, there are unread messages. This is where I first began to encounter accessibility concerns on iOS, but not on Android.

The first thing Google assistant wants you to do is allow access to your location. This makes sense given the fact that the assistant can help plan a night out, among other things.

The reading of messages in this thread by VoiceOver is quite erratic. Some messages are read at least twice and out of order. I quickly learned that it is better to flick rather than to explore the screen by touch.

The smart replies are completely accessible, and I had no problems with those.

However, in some replies from the assistant, VoiceOver will get stuck in a continuous loop. For example, when asking what can you do.

Talkback, on the other hand, has none of these issues as far as I could tell. I was even able to successfully play Tic-Tac-Toe with Talkback running on Android. That was a lot of fun, and it was accessible, too!

I did appreciate the attempt by Google to make the conversation with Google Assistant more like chatting with a friend, but it was a little creepy at times. For example, it wants to know where you are and more about you. For me, it felt a little like talking to a stalker.

So how about chatting with a friend?

Well I tried that too. The same messaging issues that plague the Google Assistant message thread also affect any other threads you have. The most annoying thing for me is constantly hearing VoiceOver say, “double tap and hold to open message edit menu.” I do not know what that means. With all the double tapping and holding I did, I could not make any “message edit menu” appear.

One neat thing that Google Allo has over iMessage for me is that the quality of audio messages is so much better! I get why Apple uses low-quality recording, but it is such a disappointment. similar to Apple’s iMessage, you double tap and hold on the “record an audio message” button and swipe up to send or left to cancel.

If text effects are your thing, you can easily do this with VoiceOver running. Simply enter text, and then double tap and hold on the send button. Without releasing the button, swipe up to make text larger and swipe down to make text smaller. Note: there is no feedback to inform you of just how large or small your text is, regardless of whether you’re sending or receiving.

You can also send your location, stickers, take a photo or video (and draw on it), or attach a photo or video from your camera roll. I was extremely disappointed to discover that taking a photo or video in the app, and sending stickers are both completely inaccessible on iOS. VoiceOver sees no elements on the screen. Android, once again, has no such issues.

There are also a few inconsistencies as far as the interface is concerned. One example is to delete a conversation on iOS, you need to double tap on the menu at the top right of the screen while you’re in the conversation. On Android, on the other hand, you long press on the conversation thread and then double tap delete.

Another inconsistency is that Android users can access quick replies in notifications, whereas that does not appear to be an option on iOS. Neither version of the app allows you to quickly write out your own response, which is disappointing.

I also tried out encrypted one-on-one chats with myself, and that worked just like any other chats. The interface is dark instead of light, which I honestly preferred, and messages can be set to expire. Also, notifications are very vague, only telling you that you have a message.

Overall, I like the app. I think it’s great if you can convince enough people to download it. You can send text messages with it, but you can’t use any of the app’s main features unless the recipient of your messages is also using Google Allo. Also, there are legitimate privacy concerns. If you’re OK with Google reading every single message you send, unless you remember to start an incognito chat, then go for it! Lastly, accessibility has room to improve, especially on iOS, but it is a very new app.

What do you think of Google Allo? Have you tried it yet? Do you plan to download it? Why or why not? Let us know!

Why Does Bedtime Help with Sleep Schedules?

Image showing the clock icon for iOS. icon is a picture of a clock on back background. Minute Hand is at 2 and hour hand is at 10.

Are you having trouble getting up in the morning? Apple’s new Bedtime feature helps you make sure you go to bed at a time that best suits you. Bedtime lets you set what time you want to go to bed and wake up and the app notifies you when you should go to bed, and the Bedtime specific alerts are a great way to wake up in the morning.

How it works:

The Bedtime feature lets you choose what time you want to get up in the morning and calculates a time that you should go to bed based on information you’ve given it. You can adjust your sleep schedule on a daily basis, or set up a scheduled Bedtime; for example, if you have to wake up at a certain time on week days, you can set it up so that you don’t have to change it unless your schedule changes.

How do I activate Bedtime?

  1. Open the clock app.
  2. Tap on the Bedtime tab in the bottom center of your screen.
  3. Tap on Get Started.
  4. Choose your wake up time and press next.
  5. On the next screen, choose what days of the week you want your alarm to go off, and press next.
  6. Now choose how long you want to sleep and press next.
  7. On this screen, choose when you want to be reminded to go to bed and press next.
  8. Here is where you choose what you want your phone to play to wake you up. Note that these are not your normal alarm sounds.
  9. When you have everything set how you want it, just press save.
  10. You can change your Bedtime and Wake time from the Bedtime tab.
  11. If you need to change your Bedtime settings at any time, press the options button in the top left of your screen.

If you’re looking for something to help you stay on a sleep schedule; the Bedtime feature is for you. Bedtime is an easy to use view website feature that allows you to tell it what time you want to wake up, and it will tell you what time it thinks you should go to bed. Bedtime also sends its data to the Health app so if you want to monitor your sleep pattern, check it out.
If you have questions or experiences with Bedtime that you would like to share, contact us on Twitter @iAccessibility1

iOS Bug Tracker

picture of Apple feedback assistant icon.

This post will be updated often with new bugs found by iAccessibility authors and by our readers, so please check back often. We will also mark a bug fixed when has been fixed or resolved by Apple.

Zoom Scrolling issue

This bug occurs in iOS 10 for iPhone and iPad when Zoom is enabled. It doesn’t matter if you are zoomed in or not, but when scrolling on the home screen or in scroll views, the system will think you are trying to touch an item and will not scroll. You must stop interacting with the device and try again several times to get the desired result. This has persisted in all betas of iOS 10.

Quick Tip: Bypass iOS Wi-Fi requirement

Personal Hotspot icon

There are some occasions where you might want to download something on your iOS device but you are told that you must have a Wi-Fi connection. Here is how you can get around this obstacle. Just remember though that this will take up your data plan but if you are wanting to try this then you probably realize this. Here is what you will need to do this.

Requirements

  1. You need an iPhone that has the personal Hotspot feature enabled
  2. A Mac running a newer version of OS X or Mac OS.
  3. A Lightning Cable

Instructions

To use your iPhone to download items that require Wi-Fi, do the following.

  1. make sure Bluetooth and Wi-Fi are turned off.
  2. Connect your Phone to your Mac using a lightning cable.
  3. Turn Personal Hotspot on and select USB Only
  4. In yourMac’s menu bar, turn Wi-Fi off.
  5. You may need to go to Network settings under System Preferences and enable iPhone USB.
  6. Go to System Preferences and then to Sharing.
  7. Select the iPhone USB in Source, and Wi-Fi under, “to computers with.”
  8. Find the checkbook under the sharing table and check share Internet connection to start the connection.
  9. You can now connect to your Mac with your iPhone over Wi-Fi and it will think it is getting Internet from your Mac.

This is a great process for using your phone with your Mac to download any content that would require a Wi-Fi connection. You can also do this with a Windows PC if you create an Ad Hoc connection as well.

Get Me some Accessibility

Image of Get Me icon

With everything that has happened in Austin and with other cities with ridesharing, we find ourselves without the services we come to rely on and must attempt to use similar services to fill the void. Get Me, a service supported by the City of Austin, is one such service, but is Get Me’s app accessible?

Accessibility of Get Me

If you have read the title of this article then you already know the answer to the above question. Get Me for iOS has absolutely lousy accessibility, and that is not a subjective opinion. Lets start at the signup process.

While I am a low vision user that uses magnification, I attempted to sign up with Get Me with VoiceOver. I filled out much of the information until I reached the portion where they ask for your card method. This does not include Apple Pay or anything like that, but only a card. There is only one text box, which changes when you enter certain information in there. Once you enter your debit card number, they want the expiration date which is 4 numbers. they then want your CVV and then your zip code but this information is not spoken to the user as you enter it. I have heard that there is a way to take a picture of the card, which may be easier for some than entering the numbers without knowing what to enter when.

Once I signed up (using vision) I was presented with two buttons that are badly labeled. They are Home Delivery 2 and Home Ride 2. These are the buttons where you pick if you want something delivered to you, or if you want to get a ride. Obviously, these buttons are badly labeled, and should be changed.

Requesting a ride is impossible with VoiceOver The only things VoiceOver can find on the request a ride screen are the cancel button, and the title of the screen. VO does not see any buttons on the screen, such as where to enter the pickup or destination address, where to pick the type of ride, or even the request button. These all appear to be standard iOS controls, but Get Me does not seem to be using a standard method for creating their app for iOS, which will require them to invest a LOT of time in making their app accessible.

Conclusion

While the City of Austin might find the Get Me service to be an alternative to Lyft and Uber, it is not an accessible alternative to blind and low vision users. When using VoiceOver, a person needing a ride would need to have sighted assistance in requesting a ride, which is not an alternative by any means.

Get Me [Something or Somewhere]

#iACast 14: Wi-Pi

Raspberry Pi Logo

Episode notes

ON this episode of iA Cast we discuss the latest Apple news, and we talk about the new version of the Raspberry Pi, a $35 computer that can fit in your pocket We discuss that Sony is bringing their streaming PlayStation game playing service to the Mac, and the latest in gaming news.

We hope you enjoy iA Cast. Please use our social links to leave us feedback about the podcast, and please rate us in the iTunes Store, or wherever you listen to our podcast.

#iACast 12 – Digital Accessible Art!

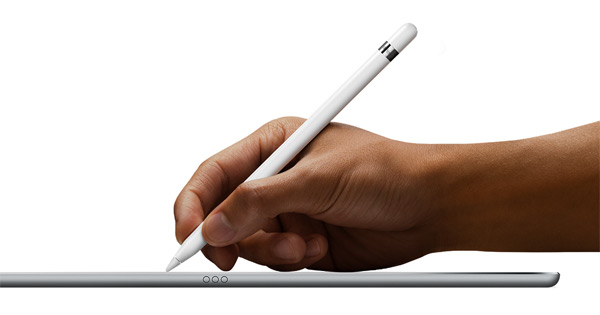
Image of Apple Pencil being used with iPad Pro on flat surface

Episode Notes

It has been since December since we recorded a new podcast, so here is what we have covered this week.

  • We discussed the updates that have been made here at iAccessibility concerning the podcast and our website.
  • Review of the new iPhone 6s battery case
  • Discuss the pros and cons of removing the iPhone headphone jack in the iPhone 7
  • Discuss error 53 and what it means. We also touch on the new iOS date bug.
  • We discuss the latest news about iOS 9.3 which will come out to everyone in March
  • Apple is rumored to release the iPhone 5se next month, and we talk about what features it should have and if people want a 4 inch iPhone
  • We discuss the New Apple TV and if people still use it
  • Facebook is a modern name in browsing the web, but do we really need the app on our devices to use their services?
  • We discuss the latest in entertainment news, which include movies, gaming and books
  • The Apple Pencil is a new way to draw on a tablet screen, and you can learn how to pair it and draw with it by listening to this episode

We will continue this podcast each week now and all episodes have been migrated over to this site. If you do not see episodes 11 and 12 in your podcast app of choice then please unsubscribe and re-subscribe to our podcast and you should see the new episodes there.

iAccessibility is on slack at iaccessibildtyslack.slack.com We encourage everyone who wants to communicate on what we discuss to contact us and we can add you to the accessibility Slack community.

Slack is accessible and it will work with all modern screen readers on any platform.

Please email Michael Doise if you have any questions or suggestions for this podcast. You may also find us online at the social links below these show notes.

We hope you have enjoyed this podcast and will listen next week.

Speculation: Penciling in OS X?

Image of Apple Pencil being used with iPad Pro on flat surface

Many writers at iMore have stated that Mac OS X is not designed to be a touch based operating system. This is because the programs are not built to work with a touch interface, but what if a team were to build apps for iOS that did the same as Mac OS X but for iOS? If these apps were built for the iPad, then the user could use the pencil for an easier touch experience in selecting files rather than using their finger. The Apple Pencil offers a very precise tool for manipulating objects on the iPad Pro, and it would be logical to speculate that it would be an essential tool for bringing full Mac OS support to an iPad or iPad Pro near you.

Pairing Apple Pencil with iPad Pro

Image of Apple Pencil being used with iPad Pro on flat surface

This weekend I received my Apple Pencil, and the first thing I did was get my iPad Pro and pair it with the Apple Pencil. The process is very simple and will take less than a minute. Here is how you pair the two devices.

Pairing the Apple Pencil

The Apple Pencil has a magnetic cap on the end opposite the nib. You will feel a metal ring, and the cap will be above that ring. Simply pull the cap off the back of the pencil and you will see a Lightning connector. You can pair your Pencil by either plugging that lightning connector into the iPad Pro and have it stick out the bottom of your iPad, or by using the adapter that comes with the pencil. This will allow you to plug a lightning cable into the pencil, and then into the iPad. This will make sure you don’t hit the pencil breaking the lightning connector on it. This would be the best for charging, but to pair it is just simple to plug the pencil right into the iPad for a few seconds.

Once you plug the Pencil into the iPad Pro, you just have to wait until a pairing dialog appears. Once it does, double tap on the pair button to pair your Apple Pencil, and you will be ready to write in the Notes app or other apps that work with the device. When the battery gets low on the pencil, the iPad will tell you to charge the pencil by using a method mentioned above.

We will soon have an article here on iAccessibility’s website discussing how to do more with the Apple Pencil with VoiceOver, so keep checking back to learn more about this amazing device. We will discuss how to use it with drawing apps, and how to navigate the iPad Pro with the Apple Pencil.

Is the new Smart Battery Case worth a hump?

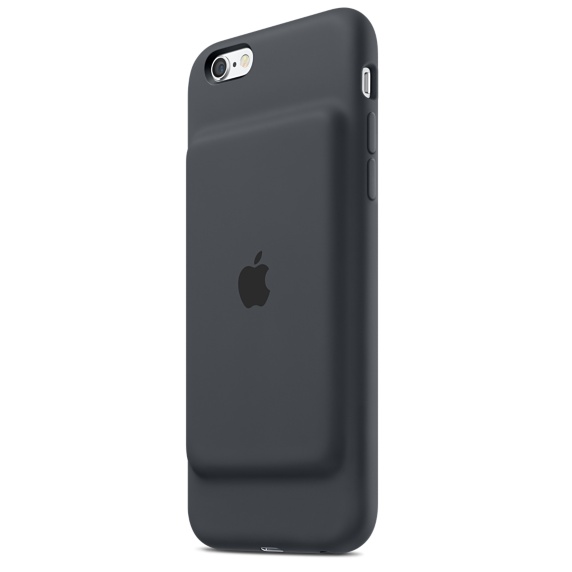
Apple Smart Battery Case for iPhone

Late last year, Apple released the new Smart Battery Case for the iPhone 6s. This battery was created for the iPhone 6s only as the 6s Plus contains 1/3 more battery power than the smaller phone. So is this case worth spending $100 for better battery life, and is it worth the hump on its back?

Smart Battery Case Dimensions and Characteristics

The iPhone 6s Smart Battery Case comes in at a size similar with the 6s, but adds a small amount of space at the bottom that contains its own lightning port, and puts the speaker on the front along with the microphone. The headphone jack is still on the bottom as well.

The case also contains a hump on the back that contains the battery pack. This is a change compared to the Mophi cases as the Mophi cases make the back of the phone the same thickness throughout the design where there is no hump on the phone or case.  The hump really doesn’t add much of a difference how you hold the phone, in fact, the hump on the back adds extra grip for the iPhone which can help some hold their phones better.

The color of the Smart Battery Case comes in either charcoal or White, which limits you to how your phone would look, so if you have the space grey phone then I would go with the charcoal, but it is up to you to customize your phone as you like it.

Performance

The Smart Battery Case promises 18 hours of web browsing and 20 hours of video watching, which is nearly doubled the amount that is offered on the built in battery on the 6s. The way this case works is that you use the battery on the case first and then your phone will then use its battery. You can even see your case’s battery in Notification Center under the batteries notification widget. When you plug your phone in to charge your phone will charge first, and then the case will finish charging.

Conclusion

While the iPhone 6s Plus has more battery built in, it is still a big phone, and not everyone needs a big phone. If a smaller phone is for you then this case adds a new way to keep your phone charged and is officially from Apple. If you do have the 6s then I highly recommend this case if you don’t already have a way to keep your phone charged as the 6s does burn through battery life fairly quickly.

Apple Smart Battery Case for iPhone 6s from Apple.com

Back to Top