Quick Tip: Enable Bash Shell in Windows 10

A picture of the Windows Logo

Windows has made huge advancements in innovation since the release of Windows 10, and this continues with the Anniversary update. A great feature that was added with this update was the ability to install the Bash Shell to use with Windows instead of the standard Windows command prompt.

The Bash Shell is a common command line interface for users to complete tasks on Linux. It is completely text based, and it offers color coding of folders and files. Tasks are completed by typing in commands instead of using the mouse to find and activate items.

Setting up Bash on Windows 10

  1. Open the Settings app
  2. Find Updates and Security
  3. Find the option that says, “For Developers.”
  4. Enable Developer Mode
  5. You can now close settings
  6. Open Control Panel
  7. Navigate to programs
  8. Activate Turn Windows Features On or Off
  9. Find the check box that says, “Enable Windows Subsystem for Linux.”
  10. Activate OK
  11. When prompted, restart your PC
  12. Once your computer has restarted, Open the command line from the Start Menu, or by typing cmd in the search and press enter.
  13. Once the command line is open, type the word bash and press enter.
  14. Windows will ask you if you would like to install Bash and all you need to do is press y and enter.

The final process will take some time to complete, but will have bash ready to go on your PC once it does.

Dictation Commands for macOS and iOS

Apple Dictation Logo
Dictation for the Mac and for iOS has changed the way we input text on our machines and phones. Because of this, we need to have commands to add punctuation and capital letters. We have searched the web and have compiled a list of these commands here and they work for both macOS and iOS. These will also work in VoiceMail Transcription and apps like Just Press Record

Dictation Commands

  • All Caps – Completely capitalizes the next word.
  • Caps – Capitalize the beginning of the next word.
  • Upper Case [Letter] – make the next letter upper case.
  • Caps On – This turns on Caps Lock.
  • Caps Off – Turn Caps Lock off.
  • No Caps – No capital letters in the current word
  • Numeral [Number] – This types a number instead of the word for that number.
  • New Paragraph – Create a new paragraph.
  • New Line – Create a new line at the current insertion point.
  • No Space – Force dictation to not put a space between the next word.
  • No Space On – Force dictation to not put spaces after words.
  • No Space Off – Start putting spaces after words.

Punctuation and Special Character Commands for macOS and iOS dictation

  • Period
  • Comma
  • Question mark
  • Reverse question mark
  • Hyphen
  • Dash
  • Em Dash
  • Exclamation Point
  • Underscore
  • Open Parenthesis
  • Close Parenthesis
  • Open Square Bracket
  • Close Square Bracket
  • Open Brace
  • Close Brace
  • Colon
  • Semi Colon
  • Ellipsis
  • Quote
  • End Quote
  • Back Quote
  • Single Quote
  • End Single Quote
  • Double-Quote
  • Apostrophe
  • Slash
  • Back Slash
  • Tilde
  • Ampersand
  • Percent Sign
  • Copyright Sign
  • Registered Sign
  • Section Sign
  • Dollar Sign
  • Cent Sign
  • Degree Sign
  • Caret
  • At Sign
  • Pound Starting Sign
  • Yen Sign
  • Euro Sign
  • Pound Sign
  • Smily Face or Smiley
  • Frowny Face, Frown or Sad Face
  • Winky face or winky

Have we missed any commands or other things to say? Please leave us a comment if you know of commands that are not listed here.

#iACast 27 – Backdoor

iAccessibility Logo

Hello, and welcome to another delayed edition of our podcast! We are hopeful that our schedule will be a little more regular soon, so we hope you all are sticking with us. In this episode, which was recorded on November 16, 2016, we cover the following topics:

  • A Backdoor to ChinaHow would you feel if you found out that your text messages, location data, and private information were being sent to China for analysis? Unfortunately, if you own a cheaper android phone, or if you are an international customer, this could be a reality for you. The worst part is you may never know if your phone is affected, and the software that does this was put there on purpose by the manufacturer. Whoa!Your User Data is Secretly Sent to China Through a Backdoor on Some US Android Phones
  • Microsoft Joins Linux FoundationThis surprised a few members of our team. Apparently, Microsoft is reversing course on its opinion of Linux. This is especially interesting, because some of Microsoft’s choices still contradict the choice to join the Linux Foundation. We think it will be interesting to see what the future holds in this regard.Microsoft – Yes, Microsoft – Joins the Linux Foundation
  • Visual Studio Invades the MacNow developers can develop cross-platform applications using Visual Studio on macOS. Although our group finds Xcode to be the best IDE for developing Mac and iOS apps, we believe choice is always good. Hopefully this will allow more developers more flexibility in how and which operating system they use while developing apps.Announcing the new Visual Studio for Mac
  • MacBook Pro with Touch Bar ReviewsIt’s all pretty mixed! Some think the Touch Bar is useful, while others think a touch screen would make more sense. We believe the usefulness of the Touch Bar depends on how you use your computer, and which apps support it. We think it will become more useful over time as mor uses are found for it, and the price will decrease as well. You should definitely feel free to check out reviews online, and if you have a store nearby, check out these new machines in an Apple Store.The Reviews are in — Here’s What People are Saying About Apple’s Latest Laptop
  • First Impressions of Apple’s AirPodsWhat will it be like to use the long-awaited Airpods? What is latency like? Will they work well with VoiceOver? Well, most of us have yet to find out any of this first-hand, since the AirPods have not been released! However, lucky members of the media have been testing AirPods, and we have read a little information from one of our favorite websites, iMore. Here’s the link!AirPods First Impressions
  • We’re All About the TV AppListen to us discuss what it’s like to use theupcoming TV app on the iPhone, iPad, and Apple TV. We think this is a great addition to our TV-watching experience. We find it frustrating that some services, like Netflix, refuse to participate. However, it’s a great start, and we can’t wait to see how it improves in the near future.3 Ways Apple’s New TV App Will Change the Viewing Experience on Apple TV
  • Prevention is Always Better Than Reaction: Twitter is Finally Getting the PictureFinally, Twitter is introducing new features to help users prevent abuse. Muting keywords, usernames, and conversations is now a little easier. We think this is a good step in the right direction, but that Twitter should be doing more to help users have a more positive experience on the social network.Twitter is Adding New Filtering Tools in an Effort to Curb Abuse
  • Is the Google Home worth Ditching the Echo?On our website, you will find Rich’s impressions of the new Google Home smart speaker. He immediately returned his. Would you have done the same? Do you think it replaces the Amazon Echo? Overall, we think it sounds neat, but it is very much a first-generation product. We think it could still be an option for users who are in the Google ecosystem, but if the Echo meets your needs, we recommend sticking with Alexa.Google Home First impressions
  • VO Starter – Public Beta!We welcome anyone who wants to join us in testing version 3.0 of the VO Starter application for iOS. It is a great resource for blind an low vision users who are new to iOS, and you could help us help them learn to use VoiceOver.VO Starter 3.0 Public Beta

Thank you all for checking out our podcast! Please share it with others, and tweet using the hashtag #IACast. Please visit us online at iaccessibility.net, and check out all we have to offer!

The Future in Microsoft Accessibility

A picture of the Windows Logo

A day ahead of the International Day of Persons with Disabilities, Microsoft highlights improvements planned for it’s products and services for 2017, and the changes seem really exciting.

Windows 10 and Narrator

The Windows 10 Creators Update will include improvements to Narrator. Some of these new changes are already available on Insider builds. Other changes will be available in early 2017. They include:

  • Braille: Microsoft says that the Creators Update will include beta support for braille input and output. There will be support for braille displays from more than 35 manufacturers, and support for over 40 languages. Narrator will support multiple braille variants, including grade 2 contracted braille.
  • Unassisted installation: You will be able to install the Windows 10 Creators Update with Narrator, regardless of weather you are setting up a full installation of Windows, or a portable one.
  • New launching method for Narrator: Microsoft has changed the quick keys used to launch Narrator. Due to feedback from users, you will now launch Narrator by pressing CTRL + Windows + Enter. Narrator can still be launched from Cortana or the Settings Window.
  • New Voices and capabilities: Narrator will gain 10 new voices, and multilingual reading, allowing for seamless switching of languages, as long as you have the corresponding voices installed.
  • Improved audio experiences: Microsoft has implemented something they call “Dynamic ducking,” meaning that Narrator will only reduce the volume of other applications when it is speaking. Microsoft has improved handshaking between Narrator and Cortana. Now, Cortana won’t transcribe what Narrator (or other screen readers) are reading.
  • More general reliability and usability improvements: Microsoft added what it says are “features to make it easier to understand the context of a control with which you are interacting and to make it possible to discover information about objects like the background color of a table cell.” Narrator will maintain your navigation mode across applications. Microsoft has also made some cursor positioning improvements to Narrator. They include “stopping and starting where you expect when reading in scan mode and when reading by line, paragraph and in continuous reading.”
  • Easier web browsing with Edge: The responsiveness of Narrator has been improved. Microsoft has added several new features, including the ability to navigate by forms such as check boxes, text fields or buttons. Heading level navigation is also possible.
  • Improvements across devices: It will be possible to use a controller to “drive Narrator interactions on Xbox.” You will be able to adjust the pitch and speed of the Narrator voice on The Xbox.

Support For Third-party Assistive Technology

Microsoft has said that they are “working closely with partners to ensure that they have what they need to deliver great user experiences with Edge, Office and other Windows apps. And, we continue to offer the Window Eyes screen reader free of charge for customers using Office 365.”

And There’s More

For more information on Microsoft’s other exciting accessibility efforts, check out the Microsoft Accessibility blog at  Making Microsoft Products More Accessible, What to expect in 2017 I might be a Mac guy, but I think what Microsoft is doing with accessibility is amazing, and I’d love to play with it. Maybe one day I might be saying Windows Hello to a Surface. While I can’t see that happening right now, who knows what the future will bring, aside from Narrator? Follow us around the web and let us know what you think. Will you upgrade if you already use Windows? Do Microsoft’s accessibility improvements excite you enough to switch from macOS?

Joining the Windows 10 Insider Preview

A picture of the Windows Logo

Like macOS X, Microsoft offers a Windows beta test program called the Insider Preview program. In a previous episode of the iA Cast we promised a post on how to join this program and here it is.

An important thing to note is that Windows Insider builds are beta versions, and may contain bugs and problems. These builds may even cause your computer to not work properly and I even had to reinstall my graphics card drivers in the latest build to make Magnifier and games work correctly, so installing the Insider Preview will be something you do at your own risk, but they do offer slower upgrade rings so that you get more stable builds which should not have as many problems. For extra stability, a good idea is to set up a restore point on your machine before starting this process

Installing Insider Preview in Windows 10

  1. Join the insider program at the Microsoft’s Windows Insider website
  2. Read the agreement and join the program on the website.
  3. You will need to use your Microsoft account here to join the program.
  4. Back up all important files.
  5. In Windows 10, Open Settings app.
  6. Click updates and Security.
  7. Select Windows Update
  8. Select Advanced Options.
  9. Find the section for Get Insider Builds and select Get Started
  10. Read the disclaimer and go through the prompts.
  11. Restart your computer.
  12. Once your computer restarts, you should go back to the screen for the Insider Preview Builds and select your ring. The ring is for how often you will get Insider builds. the longer the amount of time between builds will allow for the builds to be more stable.

The Insider Preview are as follows;

  • Release Preview – Insider builds for the most stable versions of software and drivers.
  • Slow – Builds that contain minimal risk to applications and services on devices.
  • Fast – Builds that are for those who enjoy being the first to test new software features. These builds can contain bugs and other issues that may effect your system.

By default, all users are signed up for the Release Preview ring but this can be changed at any time. Once you sign up for the Insider program it will take some time for Windows Update to download the Insider build.

Returning to Stable Windows

It is simple to return back to the stable version of Windows 10 if you decide to opt-out of the Insider Preview program

  1. Return to Settings then Updates and Security.
  2. Find Windows Update and select Advanced Options.
  3. There should be an option here that says, “Stop Insider Builds.”
  4. A popup window will appear to turn off insider builds for a certain amount of time.
  5. There will also be an option to stop receiving Insider builds to just stay on the stable version of Windows 10.

If for some reason this process does not work then this would be the time to use the restore point that you created before starting the Insider Preview program.

Conclusion

Microsoft’s Windows Insider Preview program lets users see and test the new features that are coming in future versions of Windows. With the future release of the Windows Creators update, Microsoft has provided testers with an opportunity to shape the future of Windows and improve each update to make the OS more stable and enjoyable.

Guide: Pairing with W1 Enabled Headphones

Side of the PowerBeats 3 with W1 Chip

Apple this year removed the headphone Jack from the iPhone 7 which demanded a change in wireless technologies for bluetooth users. To help in this, Apple created the W1 Chip which currently is on the Beats headphones and will soon be on the Apple AirPods. One advantage is that W1 enabled headphones will pair with all of your Apple devices using iCloud. In this Guide we will look at the ways you can quickly pair these headphones with all of your devices.

Initial Pairing

To pair your W1 enabled device with an iPhone for first time use is simple. Just have the devices on and near your each other. The iPhone will prompt you to unlock the device with touch ID and then tap a button on the screen to pair it with the headphones. I did this process on my iPhone 7 Plus but it will work the same on any other iPhone or iPad.

Connecting to W1 device with iOS

If you have connected to your device from your watch, Mac, or with any other iOS device then you will need to tell your current device to reconnect to the bluetooth device with the W1 chip. Here is how this works.

  1. From your home screen open Settings.
  2. Find Bluetooth on the main settings screen.
  3. Tap on your headset and it should connect.

Connecting with Apple Watch

As we discussed previously, the W1 enabled devices will pair to all of your Apple devices, and this includes the Apple Watch. This is an easy way to connect an audio device that lets an Apple Watch user privately use VoiceOver. Here is how to connect your headset to Apple Watch.

  1. Slide up from the bottom of the screen with one finger, or swipe up with two fingers if you are running VoiceOver. You will need to be at your watch face to do this. If done correctly, you will have brought up Control Center.
  2. Find the AirPlay icon and tap or double tap on it.
  3. When asked, tap or double tap on the name of your headset. This will connect your headset to your watch and all sound from your watch will go through the headset.

Connecting with the Mac

Connecting to a W1 headset on the Mac allows you to use the headset on your Mac for all sound output. Here is how you connect the two.

  1. Find your Menu extras in the top right of the screen or by using VO+M+M
  2. Find the option for Bluetooth and expand the menu.
  3. Find your headset and bring up the sub-menu
  4. Select Connect to connect your headset to your computer.

Conclusion

Apple has really improved the use of Bluetooth technologies with this new W1 chip, which they plan to use in their upcoming AirPods. The addition of the W1 chip allows for users to easily pair and connect to all of their devices without a long process of pairing and impairing devices.

Accessible Gaming: Mac Vs Windows

Apple Zoom Logo

Gaming has been a huge portion of technology since the 1980s, and there has really not been a focus on if low vision gamers could play video games or read text. Now, with built in magnification between operating systems low vision users can finally customize their systems so that text can be read and games can be played, but what OS provides the best experience for gamers who use magnification.

Windows Magnification

Windows Magnifier has greatly improved over the last few versions of Windows and keeps getting better in Windows 10. You can now magnify in full screen on the Windows Desktop, and in some graphical applications. This will also work while in games, but it will not work in many games that run in full screen. If Magnifier is open and zoomed in while games are open then many games will not function properly.

MacOS Magnification

Zoom on the Mac has been on the Mac for around 10 years and has not had the need to change in that time. Zoom has been the first Desktop magnification solution to allow for full screen and lens style magnification, and it works well in desktop applications and in graphical apps. The really impressive feature of Zoom is that it will work within games that run on the same resolution as the Mac with very minimal effects to performance.

Conclusion

While I prefer the gaming experience that is provided on the Mac, there are still more games available on Windows than there are on the Mac, so the choice of which OS to use as a primary gaming platform will still have to be Windows for the choice of games. The good aspect that Steam provides is that you can buy games from Steam and get the game for both Windows and MacOS.

Unlock Your Computer With Windows Hello

Windows Hello Logo with text of Windows Hello and Windows 10 logo

These days, we’re always trying to find the most convenient ways to get access to our technology. Some computers come with finger print readers, and most have built in cameras. Microsoft takes full advantage of this with Windows Hello!

With Windows Hello, you can use your face, iris, or fingerprint to access your information on your device. As long as your device has a fingerprint reader or camera that Windows Hello supports. You can also sign in to your computer with Windows Hello companion devices. Some of these devices are specific and can include Microsoft Band and Windows phones.

How to enable Windows Hello

  1. Go to start and select settings.
  2. Go to accounts and then sign in options.
  3. Select Windows Hello.
  4. Select whether you want to add your face, iris o fingerprint. We are going to use fingerprint in this example, but the steps are the same.
  5. Select add another.
  6. Follow the prompts to touch your finger to the print reader. If you are using a screen reader, you may need to use Narrator to hear those prompts.
  7. Once your first print is in the computer, you will be asked to enter a pen. This is another way of verifying yourself if you are not able to use the print you have entered.

Why use Windows Hello?

I have read many articles that say that with the invention of Windows Hello, passwords will become a thing of the past. Windows Hello will also tie in with Windows Passport, making it possible for one person to sign in to their computer without inputting a password or pin number.

I think Windows Hello is a step in the right direction for Microsoft. I hope that more devices will become compatible with this feature.

Quick Tip: Initiate Speakerphone Calls Using Siri

icon showing iOS 10 and macOS icon for Siri

It is now possible to tell Siri to have your calls placed through speakerphone. Just ask Siri. You can ask something like “Hey Siri. Call Mom on speakerphone.” That’s it. Your call should now come through the speaker instead of your iPhone earpiece. It’s great if you need to make a call hands-free and you don’t have a Bluetooth or wired headset handy. Try it out, and let us know what you think. Do you find this feature useful?

Sling’s Accessibility should be in a Sling.

The Sling icon

Sling TV is an online cable service that brings cable TV channels to your smartphone, tablet, and computer. While Sling TV brings much to the table like affordable plans and a 7 day free trial, their accessibility and app features have much to be improved upon. Lets take a look at both of these things.

Sling Accessibility

Sling TV allows for users to sign up and sign in to the app, but the accessibility stops there for the most part. While users can find the menu and guide, a user can not browse the channel listings that are in the app. Visually, the channel listings are in a scrollable control that slides left and right and once an option appears in the middle of the screen then that channel’s listings appear. This functionality does not work with VoiceOver, and the schedules will also only tell the times that something is to be shown. The show title only appears as an image with no alt text included.

Sling TV App Features

While iOS has moved on the Sling TV app has not. While using the Sling app on iPad I noticed that they do not support Picture in Picture support at this time, and the interface is still that of an iOS 7 app that does not scale with size classes as most modern apps do.

Conclusion

While Sling TV provides a great online based cable TV experience, it still lacks features that other services provide, and VoiceOver users will find that the app lacks the accessibility required for everyday use. As a low vision user I plan to continue my subscription after my trial, but milage will vary when this app is concerned. Hopefully support for accessibility and feature sets will improve when single sign on and the TV app are released to the public because they both support Sling TV.

VO Starter 3.0 Public Beta

VO Starter App Icon

iAccessibility is proud to announce that VO Starter 3.0 is now in the Beta phase of development. As such, we are offering the opportunity for a public beta test through TestFlight. If you are interested, please fill out the form below and you will receive a TestFlight invite in your email. We will remove the form if or when we run out of testing slots. We hope you enjoy the app.

Google Home First impressions

Image of a Google Home

We are entering a market where the internet connected products that is controlled via voice is starting to get competitive. Up until now Amazon’s Echo has been the well-known product on the block. Now, in November 2016, Google Home is released. In this review, I hope to talk about how Google Home stacks up against Amazon Echo.

Unboxing and Setup

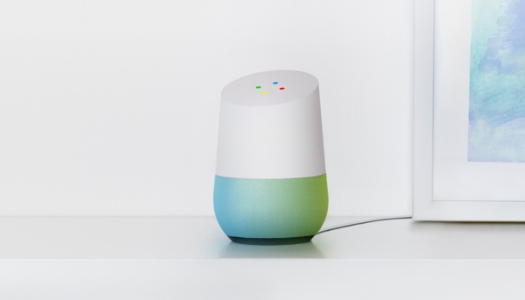
Unboxing the device, you find the unit, the power cable and some printed cards telling you about the Google Home app which you can download for iOS and Android. Physically, the device looks like an enlarged air freshener. You have one button on the back which controls if the microphones are on and off. You also plug in the AC cord on the back of the device. The base of the device is removable should you want to purchase additional bases. The base attaches magnetically and it covers the area where the speakers are located. On the top, you have a touch panel that you can use to adjust volume by moving your finger in a clockwise or counter clockwise direction, also you can start and stop media via this touch panel by tapping the touch panel with one Finger.

Setup

Once I plugged in the Google Home, I got the Google Home app on my iPhone 7 Plus. Setup was simple, I signed into my google account and connected the home to wifi. I was also able to link my Google Home with Spotify for music playback.

What Can you Do with Google Home?

You can do a lot of the same things you can do with Amazon Echo including ask for the time, the weather, tell me a joke, set alarms etc. You can play music and podcasts as well. You use “OK Google” as the phrase to wake it up.

Some things that are different include playing games like a trivia game show, it can walk you through the completion of madlibs and you can ask the crystal ball what your future holds. I found those quite fun I must say. The Home is also very conversational. For example when I asked it Who Is Donald Trump”?   I then asked, “When was he born?” The Home knew I was talking about Donald Trup from my last question. That is something that currently, Amazon Echo does not do at the time of this writing.

Things I Did Not Like

I did not like the speaker. It was mono which to be fair, so is the large Echo. However, I found it muffled and just not suitable for my ears for any music playback. You do get some bass and some highs, but overall, I just did not like the sound of the speaker. I hope in future we see a new home with much better sounding audio or the ability to use your own audio like you can with the $50 Echo Dot.

I also think the platform needs to mature, which to be fair, the Echo had to as well. The Echo has a wealth of skills and other things you can do at this point. I hope we see developers embracing the home platform going forward. I found at this point in 2016, everything I tested on the Home feature wise, my current Echo and Echo dot can do. I will be watching this platform as time goes on.

Pricing

The Google Home is $130 US. Below, find the link if you wish to purchase a different base.

https://store.google.com/product/google_home_base

Back to Top