Jessica’s Favorite Device of 2016!

Ring Video Doorbell Pro

So many great products were released in 2016 – it’s hard to pick just one favorite! I love my iPhone 7 Plus, Apple Watch (Series 2), Amazon Echo Dot, and Apple AirPods. However, given my love of home automation and security, there is one clear winner!

If you’ve followed me on social media for at least a year, you will know that in December, 2015, I received a gift of a Ring Video Doorbell. I gushed about this product, and honestly, I still recommend that model for anyone interested in an easy, wire-free setup, that will prevent most home invasions and thefts.

This post is not about the Ring Video Doorbell, as that product was not released in 2016. Instead, I am writing about its successor, the Ring Pro. I will continue to reference both models, as I feel you cannot go wrong with either device, if you are in the market for a video doorbell.

The Ring Pro was released in April, 2016, and I upgraded to it from my original Ring Video Doorbell in August, 2016. These two products are very similar in functionality, with some key differences.

  • Both products are Video Doorbells. They can both integrate with existing doorbells, but the Ring Pro must be hardwired, whereas the Ring video Doorbell can be used with an existing doorbell, or on its own. They also have different power requirements, so if you are purchasing a Ring Pro, make sure your current setup can support it.
  • Both record video, have 2-way audio, and have night vision. The difference is in video quality. The Ring Video Doorbell records 720p video, whereas the Ring Pro records and streams in 1080p! Note: Because the Ring Video Doorbell does not require external power, you can use it on its own, and if you do so, Live View will not be available. This means you will need a Ring or Motion alert to start streaming video.
  • The Ring Video Doorbell comes in different finishes based on your decor, whereas the Ring Pro comes packaged with different colored faceplates. This means, it will fit in, even if you move or sell the device, whereas you may wish to purchase an entirely new Ring Video Doorbell if you move. Added Bonus: The Ring Pro is smaller, so it will replace old doorbell buttons much more nicely.
  • They both work with additional services, but because the Ring Pro is hardwired, it will support Apple HomeKit, eventually. Note: This extra power requirement means that there is some additional setup for the Ring Pro. I had quite a bit more trouble getting started with the Ring Pro, but it works great now that setup is complete.
  • They both receive Ring and Motion alerts. However, the motion alerts for Ring Pro are much more customizable. This is great for eliminating unnecessary alerts, but it is not great for users, like myself, who are visually impaired. Setting up motion alerts is much easier with the original Ring Video Doorbell. In fact, you can complete the entire setup process with VoiceOver, the screenreader on the iPhone.

As a legally blind woman, who was living alone at the time, I was originally interested in the Ring Video Doorbell after some unusual activity occurred at my home. After using both versions of this device for a year, I can say that I was right for choosing Ring. I have felt much more secure, and anytime I receive strange motion alerts, it is very easy to share the video with someone who has better vision than I do. I also am more likely to answer the door, which results in missing fewer important messages, such as when a neighbor returned my dog to me after he escaped from the backyard. In everyday usage, once the device is setup, there is no difference in using the Ring Video Doorbell and the Ring Pro – my sole reason for upgrading was HomeKit support, which has been delayed. I can’t wait for it to be released, because it will make quickly accessing a live feed after receiving an alert much easier. It will also enable me to setup triggers to turn on my Hue lights, without using IFTTT.

Do I think you should get a Ring Video Doorbell or a Ring Pro? Many of my family members now have Ring doorbells, thanks to me, so yes, I believe this is a great device for all users, including visually impaired and blind people. As long as you subscribe to the Cloud Video Recording plan, you’ll have access to all videos for 6 months! This is definitely worth $30.00 a year for the peace of mind it affords. The Ring Video Doorbell is $200 and the Ring Pro is $250, so neither option is cheap. However, they are much cheaper than traditional alarm systems, which only alert you after the invasion occurs – Ring is much more proactive. They also have a stand-alone outdoor camera, and a Floodlight Cam. So, there should be an option, or combination of products that works for you and your home’s setup!

Check out Ring’s complete product lineup, including the Ring Video Doorbell and Ring Pro, at ring.com!

What was your favorite device of 2016? Let us know – we love hearing from you!

Product Review: Apple AirPods

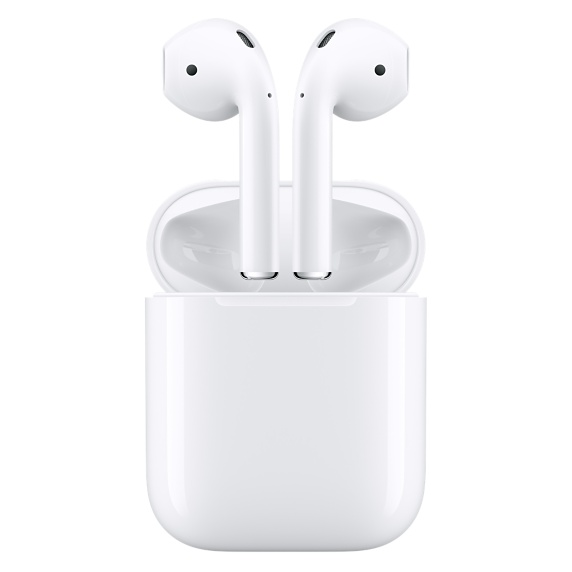
Apple AirPods in charging case

When preorders went live for Apple’s iPhone 7 and 7 Plus, I acted fast! I knew I wouldn’t miss the headphone jack, because removing it would pave the way for more advancements in technology. With this in mind, it is no surprise that I was also among the first to order Apple’s new AirPods! I received them on Monday, December 19 – 2 days before the original estimate! I excitedly unboxed them, and paired them. Now that I have had some time to test functionality, here is my impressions and review.

What’s in the box?

  • The AirPods in their Charging Case
  • Documentation
  • Lightning Cable

Note: The box is shrink wrapped, unlike some newer products from Apple. Also, the box has a tactile image of the AirPods, which is something I always enjoy.

Setup

As many other reviews point out, pairing the AirPods with an iPhone or iPad is quick, painless, and somewhat magical. Simply open the lid of the case while it’s near your device, and an interface similar to Control Center will appear, asking you to connect. Once paired, you can see the battery level of the case and the AirPods themselves. Now, not only are your AirPods paired with the device you’re using, but they are also paired with all other devices connected to your iCloud account. The only omission, at least for now, is the Apple TV. The reasoning for this is that the Apple TV is generally a shared device, so the AirPods must be paired like traditional bluetooth devices. Hopefully this will change soon!

Pairing with traditional bluetooth devices is made possible with a pairing button located on the back of the AirPods case. This button also allows you to reset the AirPods, if you need to start the pairing process over like I did.

Wait, it wasn’t a seamless experience?

Well, it would have been, had I not been on a phone call at the time of initial pairing. Sound quality seemed strange to me, and I could not get the AirPods to show up on other devices. Initially, I went to Settings > Bluetooth, and forgot “Yessie’s AirPods,” but the next time I tried to pair them, the panel said, “Not your AirPods.” I could have connected anyway, but I wanted to have the experience Apple intended. So, I reset the AirPods.

To complete a reset, open the case (with the AirPods inside) and hold down the pairing button for 15 seconds. Then, the interface I mentioned above should appear. From there, it’s smooth sailing.

Look and Feel

Apple is going wireless, and the AirPods show it off beautifully. If you are used to traditional Apple headphones, these will be an easy adjustment for you, as the AirPods are simply a pair of EarPods with the cables cut off. They look and feel almost exactly the same. Even if the EarPods fall out of your ears, these may not. As it turns out, one major reason EarPods fall out of people’s ears is because of the cables. Who knew? Personally, I never had issues with EarPods staying in my ears, and this remains true for the AirPods. I did, however, have a scary moment where one fell out of my ear while doing house work. I would advise extra caution around trash receptacles or anything with a drain, especially for us low vision and blind folks.

Connectivity

The AirPods link together using Apple’s new W1 chip, and maintain two simultaneous bluetooth connections to your device. They remain perfectly in sync, which is really magical. The AirPods are said to have bluetooth 4 with some “special sauce,” but all that matters is that it seems to work really well. They have improved range compared to other bluetooth devices, and they have less audio imperfections. This is great, because for them to be worthwhile, these need to rival the usefulness of traditional or lightning headphones. In my testing, I would compare the range of the AirPods to that of my wireless, not bluetooth, headset with a USB receiver. I am very impressed, and I have not experienced any disconnections, like with traditional bluetooth audio devices.

Functionality

The AirPods can be charged from 0% to 100% in just 30 minutes, and each AirPod can last 5 hours on a single charge, or 2 hours of talk time. The case provides 24 hours of charge, which means these should easily get you through any long commute, or multiple short commutes with no need for lightning cables. When the case does need to be charged, you can easily do so with the included lightning cable, or one of the many others you undoubtedly have lying around. If you ever find yourself in a hurry, a quick 15-minute charge in the case provides the AirPods with 3 hours of listening time, or 1 hour of talk time. You can quickly check the charge of the AirPods, as well as the case with the same interface that pops up when you open the lid. When both AirPods are in the case, they’re listed as “AirPods: X%.” When one is removed, however, they show up as their separate left and right channels respectively. Additionally, you can check the level of your AirPods while you’re using them in the Batteries Widget on your iPhone. It will even tell you if you are using the left or right AirPod, which is a nice touch.

The AirPods can be used independently as a mono headphone, or together as a stereo pair. Switching between mono and stereo audio works really well in my testing. Just take one out of the case, and put it in your ear. You’ll hear it connect, and you can immediately start playing audio. As soon as you remove the second AirPod from the case, it will begin playing audio and you can put it in your ear for a great stereo sound. Removing either one will pause the audio, and you can press play again to continue playing in mono, or put the other headphone in your ear to continue listening in stereo. I love this feature, as it makes it very easy to quickly hold a conversation with someone without the distraction of audio playing in your headphones. Note: You can change any of these behaviors in Bluetooth settings, and even rename the AirPods.

Seamless Switching

On a recent podcast, I mentioned how I love my Plantronics Voyager Edge for its ability to maintain a simultaneous connection to both my iPhone and Apple Watch, and to switch between them as needed. The AirPods are advertised to do the same, without the need to manually pair to each device. However, in my testing, this has been far from consistent.

The AirPods refused to appear as an audio option on my Apple Watch until I restarted. Once I did, the watch connected to them and VoiceOver’s audio came through the AirPods instead of the watch. However, once I switched back to my phone, and tried switching back to the watch, I was unable to get audio to go through the AirPods again. Attempts to connect through Control Center on the watch often failed, which is a huge disappointment.

Additionally, I noticed that with only VoiceOver running, the AirPods would lose connection to my phone when I set it down. I would have to go to Control Center and remind them that they were supposed to be connected. This is also disappointing.

Music Playback

Music playback with the iPhone works really well. It sounds great – slightly better than the EarPods. I can definitely see myself using these quite a bit for listening to music on the go. My only problem? Siri is not a good replacement for actual buttons. I would like volume controls, and a way to skip tracks. Right now, you can only play/pause, and activate Siri by tapping the AirPods. What’s worse is that you have to tap really hard for Siri to activate, and it’s hard to know exactly where to tap. I’m hoping this will get easier with time, but it would be nice if Apple would give us some additional controls for music playback.

VoiceOver Latency?

Admittedly, I am not the best judge of latency, seeing as how I don’t continuously use VoiceOver. However, I will say that when paired with an iPhone, the AirPods are very responsive. I don’t notice much lag at all when typing long messages, or using VoiceOver. Is it as good as wired headphones? I don’t think so, but each person will form their individual opinion about latency. I’ve heard everything from, there’s no latency, to VoiceOver is very sluggish. There are also many factors to keep in mind when testing latency – the device used for testing and the particular use case are two examples of this.

I would also like to point out that MacBooks before 2015 are not setup to support newer standards of bluetooth, so latency is much worse on those machines. Additionally, they do not support wide-band audio, so any calls will have very poor audio quality. This is not the fault of the AirPods.

Conclusion

Apple’s long-awaited AirPods are finally here, bringing with them the wireless future Apple promised! At $159, the price is cheaper than most comparable wireless earbuds, and the functionality is much improved. Of course, this is more true for those of us in the Apple ecosystem, and who interact with Apple devices on a daily basis. If you are an Android user, for example, there are probably better options available for purchase. If you don’t plan to use these with an iPhone, iPod, iPad, or Apple Watch, I would recommend looking elsewhere. I have had a few issues with AirPods when it comes to switching between devices and with losing connection when no audio is being streamed, which is disappointing. However, I feel most of this is caused by long-standing bugs with Bluetooth in iOS, which will hopefully receive more attention now and actually get fixed. As for the AirPods themselves, future updates may include additional functionality – I am hoping for more music controls. With all this said, I believe the AirPods are a great first-generation product. There is room for improvement, but software updates should do the trick! I recommend these to any iOS user who is searching for well-integrated truly wireless earbuds. Embrace the wireless future with me, won’t you?

The Future in Microsoft Accessibility

A picture of the Windows Logo

A day ahead of the International Day of Persons with Disabilities, Microsoft highlights improvements planned for it’s products and services for 2017, and the changes seem really exciting.

Windows 10 and Narrator

The Windows 10 Creators Update will include improvements to Narrator. Some of these new changes are already available on Insider builds. Other changes will be available in early 2017. They include:

  • Braille: Microsoft says that the Creators Update will include beta support for braille input and output. There will be support for braille displays from more than 35 manufacturers, and support for over 40 languages. Narrator will support multiple braille variants, including grade 2 contracted braille.
  • Unassisted installation: You will be able to install the Windows 10 Creators Update with Narrator, regardless of weather you are setting up a full installation of Windows, or a portable one.
  • New launching method for Narrator: Microsoft has changed the quick keys used to launch Narrator. Due to feedback from users, you will now launch Narrator by pressing CTRL + Windows + Enter. Narrator can still be launched from Cortana or the Settings Window.
  • New Voices and capabilities: Narrator will gain 10 new voices, and multilingual reading, allowing for seamless switching of languages, as long as you have the corresponding voices installed.
  • Improved audio experiences: Microsoft has implemented something they call “Dynamic ducking,” meaning that Narrator will only reduce the volume of other applications when it is speaking. Microsoft has improved handshaking between Narrator and Cortana. Now, Cortana won’t transcribe what Narrator (or other screen readers) are reading.
  • More general reliability and usability improvements: Microsoft added what it says are “features to make it easier to understand the context of a control with which you are interacting and to make it possible to discover information about objects like the background color of a table cell.” Narrator will maintain your navigation mode across applications. Microsoft has also made some cursor positioning improvements to Narrator. They include “stopping and starting where you expect when reading in scan mode and when reading by line, paragraph and in continuous reading.”
  • Easier web browsing with Edge: The responsiveness of Narrator has been improved. Microsoft has added several new features, including the ability to navigate by forms such as check boxes, text fields or buttons. Heading level navigation is also possible.
  • Improvements across devices: It will be possible to use a controller to “drive Narrator interactions on Xbox.” You will be able to adjust the pitch and speed of the Narrator voice on The Xbox.

Support For Third-party Assistive Technology

Microsoft has said that they are “working closely with partners to ensure that they have what they need to deliver great user experiences with Edge, Office and other Windows apps. And, we continue to offer the Window Eyes screen reader free of charge for customers using Office 365.”

And There’s More

For more information on Microsoft’s other exciting accessibility efforts, check out the Microsoft Accessibility blog at  Making Microsoft Products More Accessible, What to expect in 2017 I might be a Mac guy, but I think what Microsoft is doing with accessibility is amazing, and I’d love to play with it. Maybe one day I might be saying Windows Hello to a Surface. While I can’t see that happening right now, who knows what the future will bring, aside from Narrator? Follow us around the web and let us know what you think. Will you upgrade if you already use Windows? Do Microsoft’s accessibility improvements excite you enough to switch from macOS?

#iACast 26 – Dial It Up

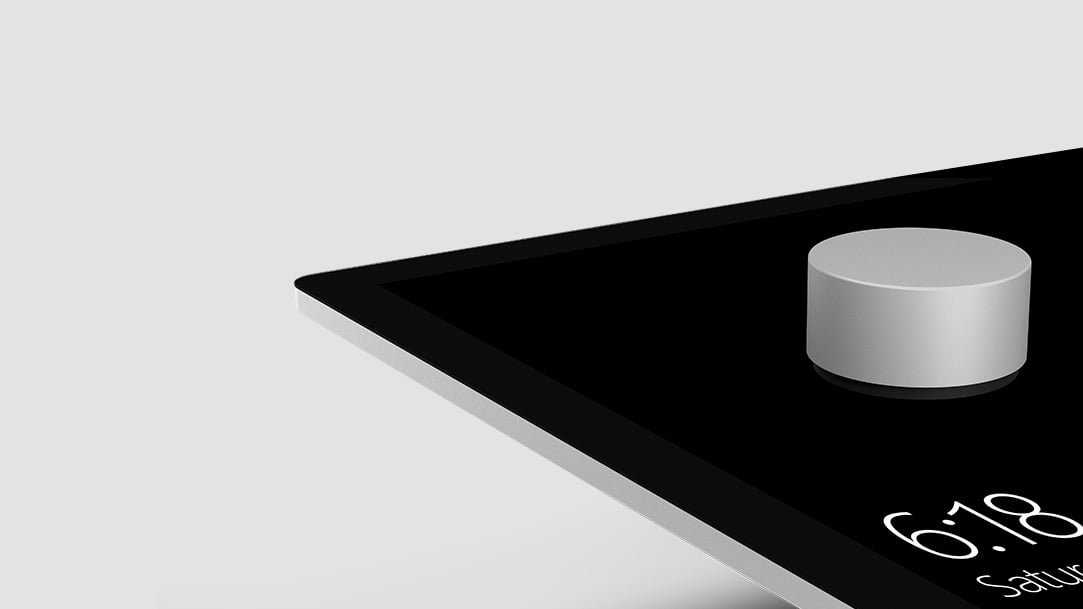
Image of Surface Dial on top of a touch screen displaying the time.

Welcome to episode 26 of the #IACast! This episode was recorded on November 9, 2016. Listen to this podcast to hear Michael, Jessica, Daniel, and Jason discuss the following topics:

  • Accessible VotingAre you over 18 and a United States citizen? If so, we hope you voted in this year’s election. If you did not, because you were afraid of accessibility issues, we have great news for you! Several of us voted, and we have a lot of information for you about what you can expect when voting.
  • Microsoft Surface Studio and 2016 Apple MacBook Pro First ImpressionsMichael recently made his way to the Microsoft store and the Apple Store – check out what he thought of the Surface Studio, Surface Dial, and the MacBook Pro.
  • Google Home Now AvailableThose of us on the podcast this week have not yet seen the recently released Google Home, but someone on the iAccessibility team has! We cannot wait to bring you more information about the Google Home, but here’s what we’ve heard about the device so far.
  • Slack AccessibilitySlack is a service used to communicate with groups of people, in what are called teams. You may need to use this app if you join an organization, beta test, or even work for some companies. Recently, the iOS app was updated to work much better with VoiceOver. We are really happy about this!

As always, if you enjoyed this podcast, please share it with friends! Also, you can reach us on social media, or email us with feedback! Thank you for listening!

Zooming in on the Touch Bar

image of MacBook Pro 2016 from iMore.com

We’ve already talked about how VoiceOver works with the Touch Bar on the new MacBooks, but what about low vision users? How could Apple possibly make items on such a tiny screen usable by the visually impaired? It’s called Touch Bar Zoom, and we’re going to tell you all about it.

What’s Touch Bar Zoom?

Much like Zoom on the Mac, Apple TV, iPad, iPhone, and Apple Watch, Touch Bar Zoom magnifies elements, making them easily accessible to everyone. Since the Touch Bar is small, Apple opted to show a zoomed version on screen whenever it’s needed. Once the user has selected an option, the icons disappear from screen.

How to Enable or Disable Touch Bar Zoom

  1. Click the Apple logo in the menu bar.
  2. Click “System Preferences.”
  3. Click “Accessibility.”
  4. Click “Zoom.”
  5. Click the checkbox next to “Enable Touch Bar Zoom.”

To disable Touch Bar Zoom, follow the steps listed above, and deselect the checkbox.

Note: Touch Bar Zoom is not available while VoiceOver is running, due to conflicting gestures.

How to Use Touch Bar Zoom

To show the Touch Bar on screen, hold one finger on the Touch Bar. Note: Simply tapping it will not work.

If the version of the Touch Bar shown on screen is either too small or too large, you can adjust the zoom level. This is done by holding down the command key, and performing the pinch to zoom gesture on the Touch Bar. Just as it does on iOS, bringing the two fingers closer together (pinching) will zoom out, and spreading the fingers apart will zoom in.

How to Select Items

Holding one finger on the Touch Bar will show it on screen. Then, slide your finger to the item you wish to select. The circle surrounding it on screen will change color, and then you can lift your finger. Alternatively, you may split-tap items to select them. To do this, touch and hold an icon you wish to select, then tap the Touch Bar once with another finger.

Conclusion

When the new Macs were just rumors, we were concerned that low vision users would be left out in the cold. However, we really should have known better. Regardless of what accessibility features a user needs, the Touch Bar is completely accessible. We wish Touch Bar Zoom would work with VoiceOver, but we believe this is a great start. We cannot wait to get our hands on the new MacBooks!

Featured image from iMore

Some of My Favorite #macOS Sierra Features

Image of the macOS Sierra App Store Icon, which is mountains and sky inside of a circle with a border.

Sierra has been out for awhile now, and while I haven’t had the chance to play with it as much as I would like, I have found some interesting new features and changes. If you’ve been following macOS Sierra news, or if you are using the new OS yourself, you’ll probably know about most of these. However, there’s a chance you might find a few mew gems.

Siri

First and foremost, let’s get the big one out of the way! Yes, we now have Siri, Apple’s digital assistant, in macOS Sierra. The functionality is more limited than I would like, and there are a few accessibility issues with it, but it is a great start! I can’t wait to see future improvements made to Siri on the Mac.

For more coverage on Siri in macOS, check out these articles:

Unlock Your Mac with Apple Watch

Another feature we also have covered on iAccessibility is the ability to unlock your Mac with your Apple Watch. This is a huge step for convenience and security, and those who have tried this feature absolutely love it!

However, there are some limitations, such as:

  • You must have a 2013 Mac or newer.
  • You must have two-factor authentication enabled for your Apple ID.
  • You must have watchOS 3 on your Apple Watch.

Some of these limitations may be show stoppers for some users, such as myself. Unfortunately, I own a 2012 MacBook Pro, so I am unable to use this feature.

Picture-in-Picture

One of the great features from the iPad is now available on the Mac! If supported in the app, or if you are watching video in Safari, you will be able to continue watching video while working in other apps. The video will take up a corner of your screen, and you can continue working. Even if you have little or no vision, this is a great feature, because it means your audio will continue as well! Nice!

Tapbacks

Wait, what backs? LOL! Basically, reactions to iMessages is available in macOS. Want to know more about iMessage in iOS 10, check out this article.

In macOS, simply right click on a bubble, choose, tap backs, and then the reaction you want.

This feature is great if you need to reply to a message, but do not want to lose your train of thought and want to return to working quickly.

Rearranging Menu Extras

Yes! Finally! In macOS Sierra, you can now rearrange menu extras. Simply hold down the command key while dragging icons to rearrange them. Note: This feature does not seem to be VoiceOver accessible at this time.

New Notification Shortcut

Now VoiceOver users can quickly access any notifications they have waiting in an easy-to-use VoiceOver menu.

That’s right. Simply press VO+N to access new notifications. Enjoy!

One Row Added?

This is most likely every VoiceOver user’s favorite new feature, especially if they frequent Twitter. One Row Added, One Row Added, One Row Added got annoying very quickly.

Now we have more control over what happens when the number of rows changes under the VoiceOver cursor, and it is awesome! Most users will most likely choose nothing, but you can also have a sound played or have spoken feedback as before. This is great, because there are instances in which you would want to know a row has been added, such as when adding a marker to an audio file.

Related Article: There’s an Activity for That

Simplified Preferences

Take a trip through system preferences and VoiceOver Utility, and you’ll notice that some options appear to be missing, have new locations, or are worded differently. Although it is a subtle change, it is a welcome one. It helps to simplify changing preferences, and remove redundant options.

…and that’s it, at least for me! What do you think? Are there any new features I should have added? Do you think tabbed interfaces for all apps should have made it onto this list? Feel free to share your favorite features in the comments, and thanks for reading!

Review: Google Allo Accessibility

Image showing the Google Allo icon

Clearly in competition with Apple’s iMessage, and other messaging services, Google recently released Allo – a messaging app for Android and iOS. Most of its features are very similar to iMessage, with a few exceptions.

First of all, as stated above, unlike iMessage, Allo is cross-platform. That means, regardless of whether you’re rocking an iPhone 7 or a samsung Galaxy S7, you will be able to use this app.

Additionally, Google’s assistant is baked right into the app. You can chat with it, play games with it, and more.

Lastly, Google will read messages sent with the service, unlike Apple’s iMessage. Note: There is a way around this, but it involves giving up most of the app’s unique features. Is that a deal-breaker? Well, that would depend on who you ask.

We have already talked about iMessage on iAccessibility, so we know it is accessible. So, how does Google Allo stack up? Is it worth using to communicate with friends? Let’s see.

The setup process is fairly straight forward. Like WhatsApp, Google Allo uses your phone number to create an account. This means you will have difficulty if you wish to message using tablets or other phones. After verifying your phone number, you are prompted to give the app access to your contacts and to send you notifications. Then you take a selfie, and add your name. And that’s it! You are all set up!

Once you’ve completed the setup process, you’ll notice there’s already a thread with Google Assistant. In this thread, there are unread messages. This is where I first began to encounter accessibility concerns on iOS, but not on Android.

The first thing Google assistant wants you to do is allow access to your location. This makes sense given the fact that the assistant can help plan a night out, among other things.

The reading of messages in this thread by VoiceOver is quite erratic. Some messages are read at least twice and out of order. I quickly learned that it is better to flick rather than to explore the screen by touch.

The smart replies are completely accessible, and I had no problems with those.

However, in some replies from the assistant, VoiceOver will get stuck in a continuous loop. For example, when asking what can you do.

Talkback, on the other hand, has none of these issues as far as I could tell. I was even able to successfully play Tic-Tac-Toe with Talkback running on Android. That was a lot of fun, and it was accessible, too!

I did appreciate the attempt by Google to make the conversation with Google Assistant more like chatting with a friend, but it was a little creepy at times. For example, it wants to know where you are and more about you. For me, it felt a little like talking to a stalker.

So how about chatting with a friend?

Well I tried that too. The same messaging issues that plague the Google Assistant message thread also affect any other threads you have. The most annoying thing for me is constantly hearing VoiceOver say, “double tap and hold to open message edit menu.” I do not know what that means. With all the double tapping and holding I did, I could not make any “message edit menu” appear.

One neat thing that Google Allo has over iMessage for me is that the quality of audio messages is so much better! I get why Apple uses low-quality recording, but it is such a disappointment. similar to Apple’s iMessage, you double tap and hold on the “record an audio message” button and swipe up to send or left to cancel.

If text effects are your thing, you can easily do this with VoiceOver running. Simply enter text, and then double tap and hold on the send button. Without releasing the button, swipe up to make text larger and swipe down to make text smaller. Note: there is no feedback to inform you of just how large or small your text is, regardless of whether you’re sending or receiving.

You can also send your location, stickers, take a photo or video (and draw on it), or attach a photo or video from your camera roll. I was extremely disappointed to discover that taking a photo or video in the app, and sending stickers are both completely inaccessible on iOS. VoiceOver sees no elements on the screen. Android, once again, has no such issues.

There are also a few inconsistencies as far as the interface is concerned. One example is to delete a conversation on iOS, you need to double tap on the menu at the top right of the screen while you’re in the conversation. On Android, on the other hand, you long press on the conversation thread and then double tap delete.

Another inconsistency is that Android users can access quick replies in notifications, whereas that does not appear to be an option on iOS. Neither version of the app allows you to quickly write out your own response, which is disappointing.

I also tried out encrypted one-on-one chats with myself, and that worked just like any other chats. The interface is dark instead of light, which I honestly preferred, and messages can be set to expire. Also, notifications are very vague, only telling you that you have a message.

Overall, I like the app. I think it’s great if you can convince enough people to download it. You can send text messages with it, but you can’t use any of the app’s main features unless the recipient of your messages is also using Google Allo. Also, there are legitimate privacy concerns. If you’re OK with Google reading every single message you send, unless you remember to start an incognito chat, then go for it! Lastly, accessibility has room to improve, especially on iOS, but it is a very new app.

What do you think of Google Allo? Have you tried it yet? Do you plan to download it? Why or why not? Let us know!

Echo Accessibility

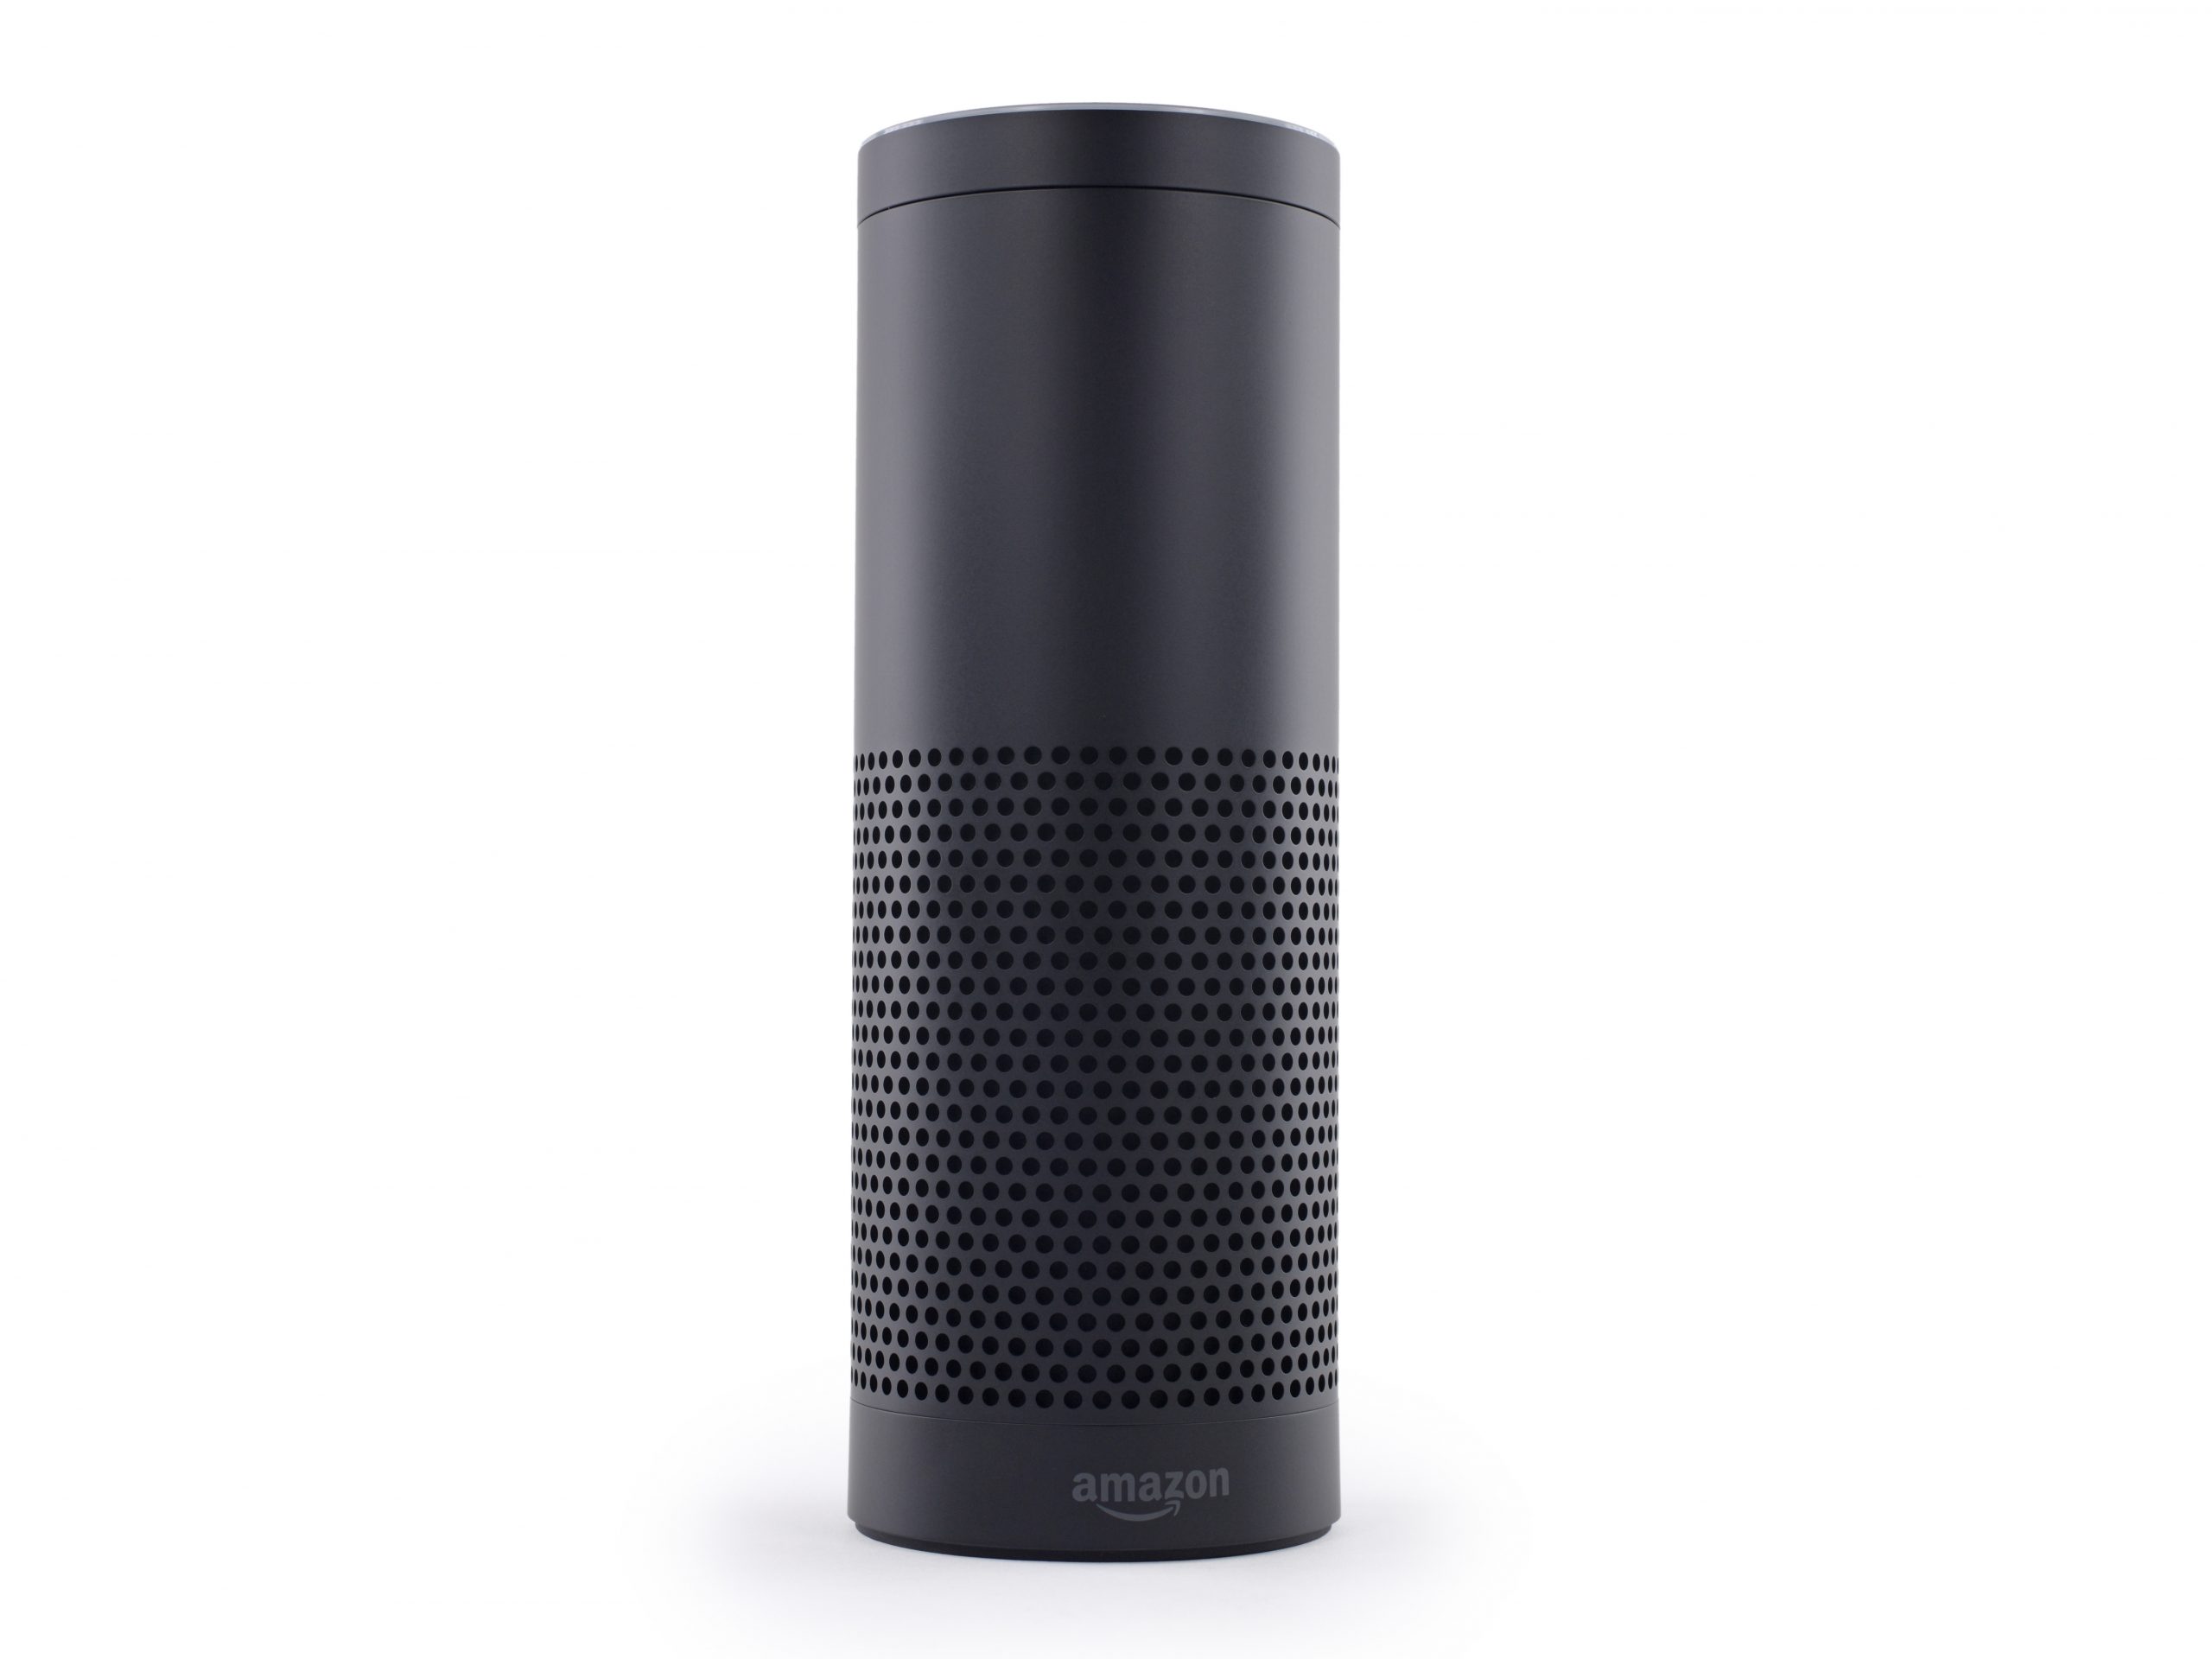
Image of Amazon Echo

In 2014, Amazon released the beta version of its Echo device that lets users speak and get answers to questions. The Echo seems to be Amazon’s version of Siri, but with a few features Siri does not have.

I just purchased an Echo, and have loved my experience with this device. The Echo will always listen to what’s going on, and it will listen to the code word that is set. I kept mine set to Alexa. I can say things like, “Alexa, what is the weather today?” or, “Alexa, continue reading my book.” which would then have Alexa continue reading my Kindle book. This is one of my favorite features, because I like getting books for my Kindle Voyage, but I sometimes would just like to listen to the book, and Alexa makes this possible. It does get a bit annoying as they promote Audible each time you start reading a Kindle book, but it doesn’t take long before Alexa starts reading again.

The one thing that Amazon could do better with this device is to create a better Echo app. You have to do all setup in the Echo app, but the app layout could be made better especially in the skills section.

Conclusion

While there are many personal assistants out there, the Amazon Echo stands above the rest with its features and personality. They also have a great speech synthesizer built in that provides more inflection to words that make the device have some of the best human sounding speech that is out on the market right now.

#iACast 2 – Accessibility Update

iAccessibility Logo

Episode Notes

Apple News

  1. Apple is holding an event next week to announce its new Phones. It is expected that the new iPhone will be announced.
  2. WatchOS 2.0 should come out next week along with iOS 9

Apple Watch Accessibility

  1. Apple Watch apps still could be more accessible.
  2. Watch apps will be more accessible after WatchOS 2.0 is released and developers have time to work with the code.

Windows 10 Accessibility

  1. Windows 10 is ready for screen readers, but is not fully supported by any screen reader.
  2. Narrator works with Windows 10, but is not for everyone.
  3. Cortona is a great tool for Windows 10 users, and will be more useful when screen readers work better with the OS.
  4. Edge browser not accessible with screen readers at this point.

Accessibility in Gaming

  1. Games have come a long way in recent years to support accessibility
  2. Destiny has color blind mode, and constant sounds to help low vision players find items to pick up or activate.
  3. Mortal Kombat X and Injustice made more accessible with audible cues thanks to blind gamer.
  4. Mobile game accessibility becoming more popular with the Blindfold games and games like Trivia Crack and Dice World.
  5. Trivia Crack needs to fix several buttons as they are no longer labeled.

Other Resources

Check out these resources online to further your technology knowledge.

  1. BlindBargains http://www.blindbargains.com
  2. Lynda.com http://www.lynda.com
  3. TWiT http://www.twit.tv
  4. iMore http://www.imore.com
Back to Top